By now we have ensured all of our emails are encrypted via TLS using Let’s Encrypt verified certificates, and we’ve also set up DKIM so that the email recipients can authenticate the messages easily and at a much better rate.
But what about SPAM? What about incoming unsolicited bulk mail spam going from server to server? You sure would not want your server and your clients to be a victim of it, right?
Well, this tutorial is for you! This article will explain how to install and configure SpamAssassin on a server with CyberPanel installed so that your email services are spam proof. Please note that CyberPanel has built-in support for DKIM creation and TLS encryption in email. SpamAssassin will also be integrated into CyberPanel very soon by our developers, but until then, this is a manual method of doing so.
What is SpamAssassin?
Apache SpamAssassin is a project of the Apache Foundation. It is a content filter and gives email a score based on its “spaminess” (that is, the likelihood that the email’s content is spam), the higher the score, the higher the possibility that the email is spam. They use a variety of spam-detection techniques which include but are not limited to matching blacklists, online databases, DNS-based scoring, checksum-based spam detection and much more!
It filters the inbound messages and keeps your users protected from the spam!
An incoming filter is very necessary because ultimately CyberPanel is a web-hosting control panel, and it will be available to end user clients as well. We really need to be double sure about spam because Unsolicited Bulk Spam can crowd up your clients’ mailboxes. People who are using daily email for genuine purposes may get adversely affected by too much spam.
Step 1 : Installing SpamAssassin
It is presumed that you have installed CyberPanel’s latest release (1.6.4 Stable as of now), have created your website with it, and have made your email account. If you have not done these things, or do not know how to do them, then please follow our documentation or previous articles that describe the process very well.
After that, you will need to install SpamAssassin and its dependencies through the command line with the following command:
sudo yum install spamassassin -y
Step 2 : Editing SpamAssassin’s Configuration
Now, edit SpamAssassin’s config file with your preferred text editor, append the following line, and save it:
nano /etc/mail/spamassassin/local.cf
required_score 5
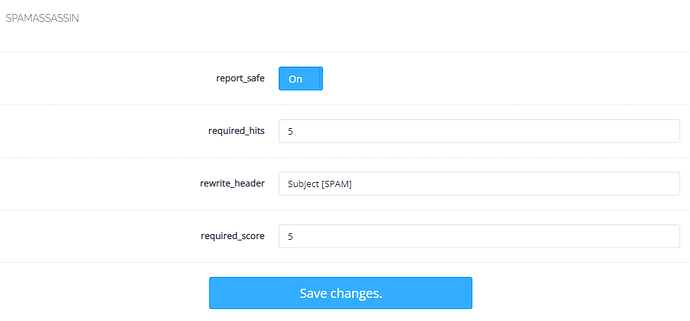
It should finally look like this:
required_hits 5.0
report_safe 0
rewrite_header Subject [***SPAM***]
required_score 5

SpamAssassin Config File
Please note that if report_safe is set to 0 (which is recommended), then the email’s Subject header is modifed to what the rewrite_header specifies. If report_safe is set to 1, then all of the emails which are detected by spam-assassin get deleted straight away! You can set rewrite_header to either ‘[SPAM]’, or simply ‘[SPAM]’. It just specifies how your client will notice that the email received is spam.
Step 3 : Adding a User and Group for SpamAssassin
We will add a user and a group in which the daemon will run. THen we’ll change its home directory to where the SA logs are stored. Finally, we will start the SpamAssassin and enable it on boot:
groupadd spamd
useradd -g spamd -s /bin/false -d /var/log/spamassassin spamd
chown spamd:spamd /var/log/spamassassin
systemctl enable spamassassin
systemctl start spamassassin
Update the Spam Rules with the following command:
sa-update
Step 4 : Configuring Postfix to use SpamAssassin
We will edit the postfix’s master.cf file by any text editor:
nano /etc/postfix/master.cf
On the top, edit and replace the line containing the following:
smtp inet n - n - - smtpd
With this:
smtp inet n - n - - smtpd -o content_filter=spamassassin
Append this at the end of the file:
spamassassin unix - n n - - pipe flags=R user=spamd argv=/usr/bin/spamc -e /usr/sbin/sendmail -oi -f ${sender} ${recipient}
Finally, restart Postfix:
systemctl restart postfix
Step 5 : Testing SpamAssassin!
To test SpamAssassin is working, just send the following email with any subject from your email client (like Gmail or Hotmail) to your e-mail address hosted on this CyberPanel installation. Give it any Subject, and use this for the content:
XJS*C4JDBQADN1.NSBN3*2IDNEN*GTUBE-STANDARD-ANTI-UBE-TEST-EMAIL*C.34X
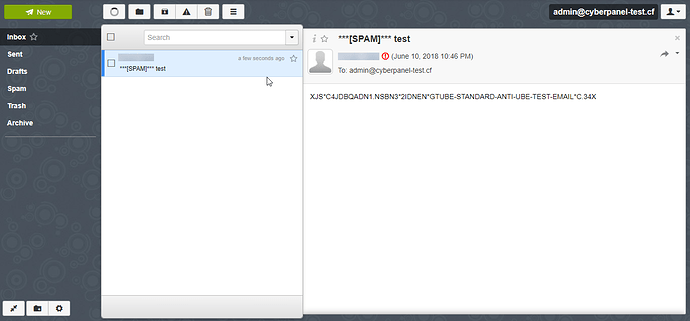
Now, check your Inbox and you’ll see that its subject will be prefixed with the rewrite_header we specified before!
Email marked as Spam in our Inbox!
Checking Email Logs
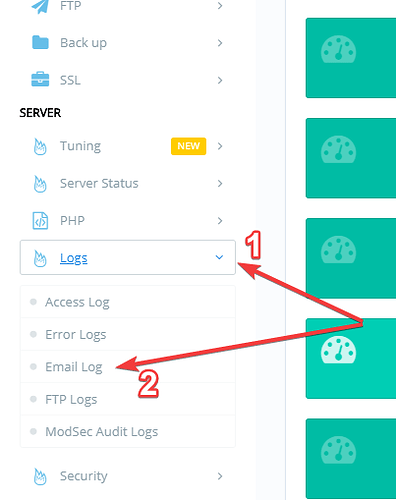
You can also check the email logs in CyberPanel by clicking Logs → Email Log in the sidebar.
Navigating to the Email Logs in CyberPanel
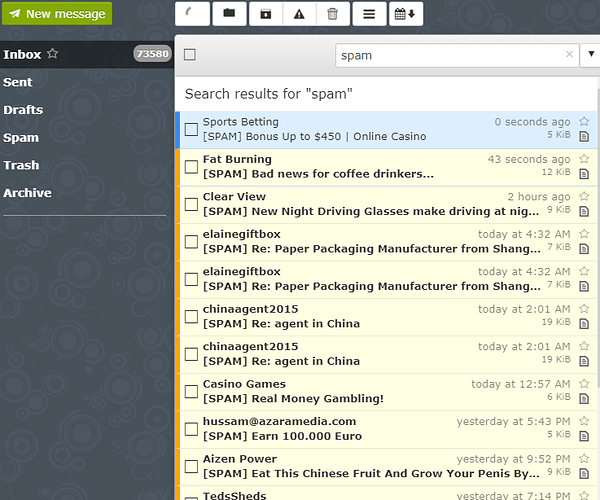
You will see in the following log lines, that the incoming mail was first scanned and detected as spam due to a high score, then delivered to the Inbox later on.
Working of SpamAssassin as seen in the Mail Logs
Step 6 : Making a Cron Job to Automate Spam Definition Updates
Now that we have SpamAssassin working, we will want to be getting its definition updates daily, just like you would update your Antivirus’ Database on your PC.
The command to update that is “sa-update” in the terminal, and we will make a cron job for it to run daily at 2:00 in the morning.
To edit the crontab we will edit the file:
nano /etc/crontab
And append the following line at the bottom:
00 02 * * * root /bin/sa-update && /sbin/service spamassassin restart
Finally, reset the crond service to apply the changes!
sudo systemctl restart crond.service
Congratulations, we have successfully made our CyberPanel installation and its hosted clients safe from spam! If you have any queries regarding this article or any of the steps didn’t work for you, feel free to comment below or post on the CyberPanel Forums.
You can also join our Discord server for more info.


