Backups are the primary concern of any website owner because they carry all of the information and the hard work of the many years you have put into your website. You can lose your website’s data in a moment due to uncertainty on the web. Nowadays, Cyber attacks are widespread, and hackers find loopholes to access your personal and professional information and benefit from it. It is essential to have a reliable backup system that secures your website’s data as a priority.
After reading this guide, you will understand the difference between a conventional Backup System and an Incremental Backup System in CyberPanel, and how feasible it is for you to use incremental backups rather than a conventional backup.
At the end of the article, you will know the steps necessary to create local incremental backups in CyberPanel.
What is CyberPanel?
CyberPanel is a web hosting control panel that runs on OpenLiteSpeed or LiteSpeed Enterprise and allows you to install WordPress, Joomla, PrestaShop, and Magento with one-click. It is the best hosting control panel that you can install with one command on your CentOS or Ubuntu server. Many professionals use CyberPanel to manage their sites by themselves, and in the same way, you can manage your sites from its simple GUI (Graphical User Interface).
If you have the technical knowledge, then you must understand the complexity of hosting a website by yourself without a web hosting control panel. It requires expertise on the Linux command line terminal to install the necessary prerequisites for running your WordPress website. Further, managing your site is also a proper job. Luckily, if you don’t have the technical knowledge, then you don’t need to learn it because CyberPanel provides pre-installed applications to install on your private or shared server with one-click. In the same way, you can create a local incremental backup in CyberPanel with one click.
What is the difference between a conventional backup system and an incremental backup system in CyberPanel?
There are two backup systems in CyberPanel that provide backups of your data, databases, passwords configurations and emails. Both backup systems allow you to take the backup of your website manually, or you can configure backups to run automatically on a daily or weekly basis.
The Conventional Backup System in CyberPanel
The conventional backup system takes a backup of your websites without knowing the repetition of your data. For example, if you have set a conventional backup system to take backup daily it will take a backup disregarding any duplication even if your data is changed by a mere 1%, and it takes the full backup of your website again that already exists. Ultimately, a backup will consume more disk space and bandwidth (if you are storing them remotely, more bandwidth will be used to transfer them),
The Incremental Backup System in CyberPanel
To resolve the problem of consuming more disk space by the conventional backup system, CyberPanel has recently launched an incremental backup system that takes a backup of only new data, databases, and emails. For example, if you have set an incremental backup system daily, it will take a backup of only new data, databases, and emails that were added in the last 24 hours. Ultimately, the backup of your website consumes less disk space and bandwidth than a conventional backup system and it will be easier and faster to create backups and restore them.
Steps to create an incremental backup and restore your site in CyberPanel
CyberPanel allows you to create an incremental backup of your website with few clicks. Let’s discuss the following in detail:
- How to create a website
- How to access the file manager of your site
- How to create a new file/folder in the file manager
- How to create an Incremental Backup
- How to restore your website through Incremental backup in CyberPanel
How to create a website in CyberPanel
If you don’t have a website set up and you want to try out the incremental backup, use the following steps to create a new website in CyberPanel. If you already have a website you can skip this step.
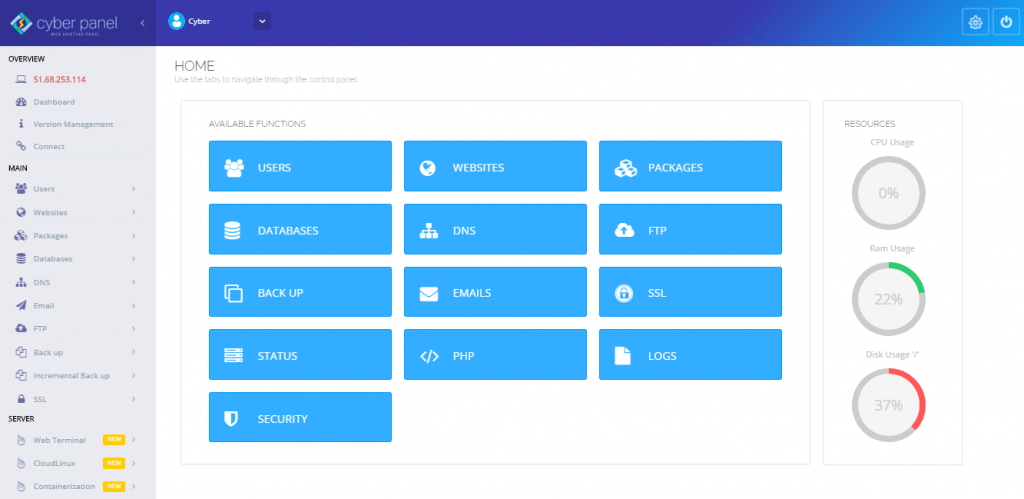
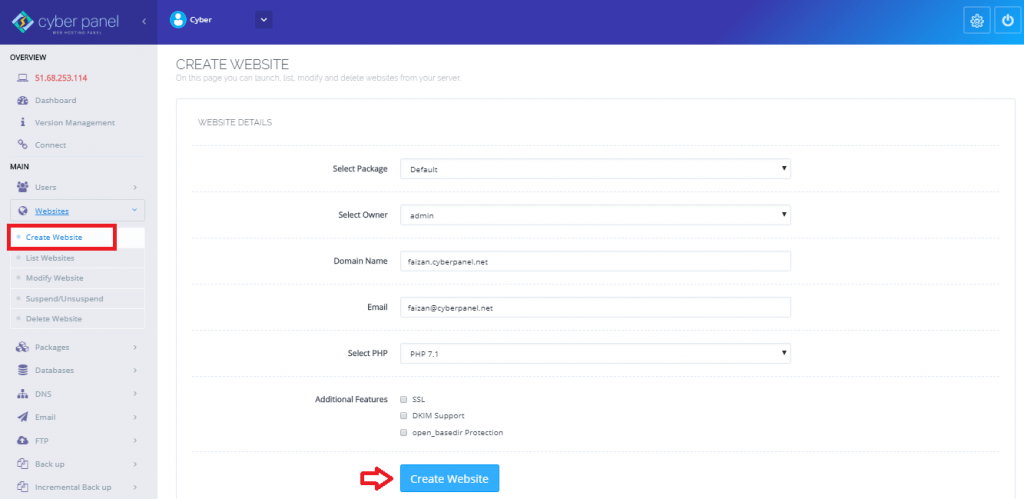
From the main dashboard of CyberPanel, you can create a website with one click. Navigate to Website > Create Website from the left menu bar and fill out the following information:
- Set the default package of your website from the scroll down menu.
- Set the owner of your website to the admin from the scroll down menu.
- Enter the domain name of your website.
- Enter the email address of your website. Later on, you can make a new email in CyberPanel for official use.
- Select the PHP version of your website from 5.6 to 7.3.
- You can choose any additional features that are available for your sites such as SSL (Secure Socket Layer), DKIM Support, and Open_basedir Protection.
- Click the Create Website button for the instant creation of your site.
Access Your Site’s File Manager in CyberPanel
Your site is successfully created. Now we need to make some changes, let’s say create a new file in the existing site to use the functionality.
Next, we are going to access the file manager of your site, in which we make a new file in the public_html folder, and test the incremental backup of this site. For that, you need to go to Websites > List Websites > Manage:
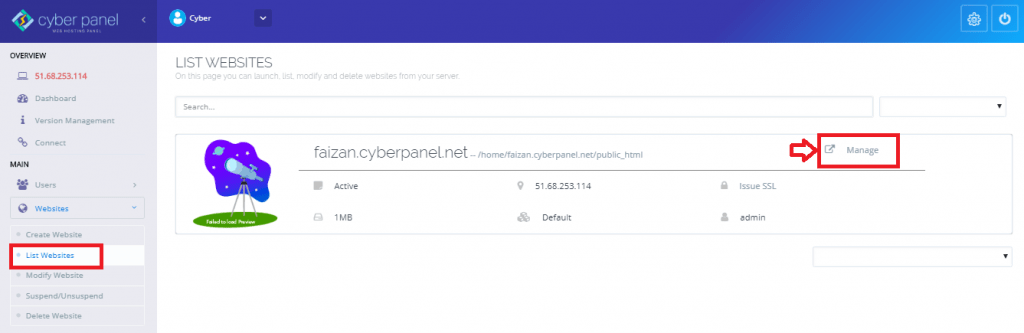
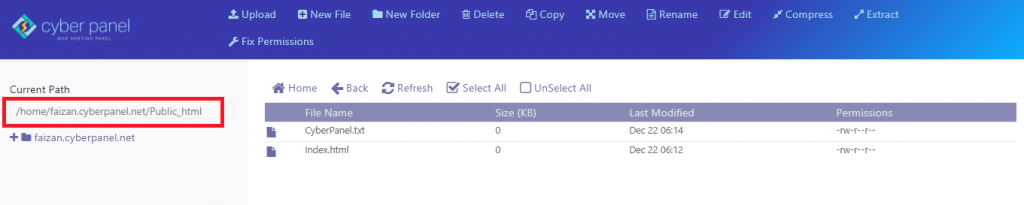
Scroll down the newly opened window and click File Manager to access the public_html folder or index.html file of your site

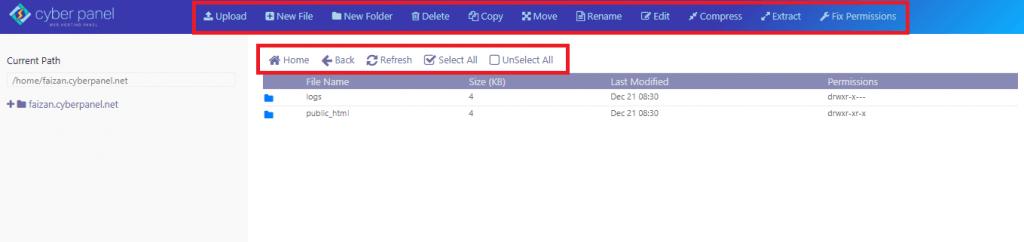
Also, you can create a new folder or file in the public_html folder to make changes to your site from the graphical user interface with one-click. The File Manager is straightforward and carries prominent settings to make changes such as Delete, Add a new folder or file, and much more.
How to Create a New File/Folder in File Manager
- Navigate to the
public_htmlfolder of your site in File Manager. - To create a file, click New File from the main menu bar on the top of the screen.
- Enter the file name. In this guide, we are going to create a file with the name of
CyberPanel.txt. Once you enter the file name and click Create File, the file will be displayed instantly in your File Manager. - Select the file and click Edit from the menu bar on the top of the screen. Add content to the file, just like in Microsoft Word, and click Save Changes.
How to Create an Incremental Backup
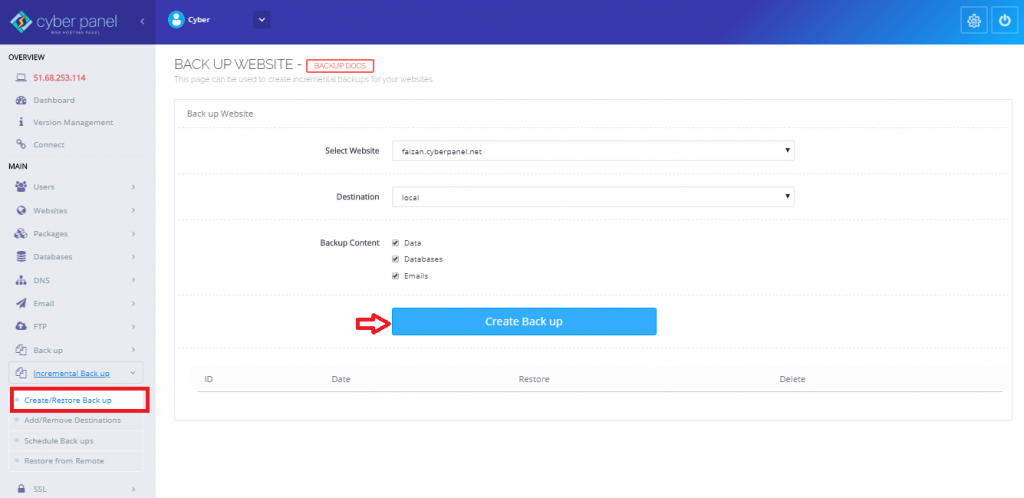
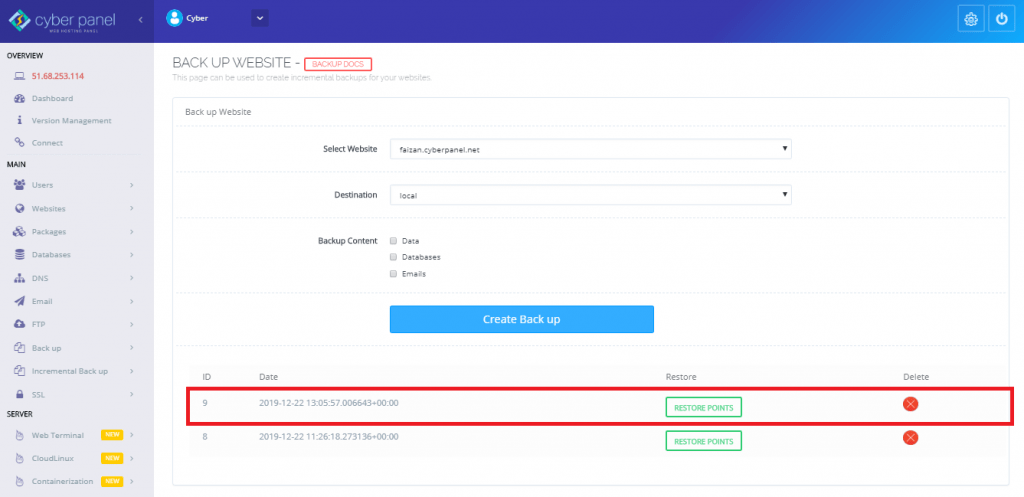
- Navigate to the main dashboard of CyberPanel, and click Incremental Backup > Create/Restore Backup from the left menu bar.
- Select your website from the scroll down menu bar.
- Select
localin the Destination section. - CyberPanel offers you the ability to take a backup of your site’s data, databases, and emails. You can select all of them at once, or you can select any of these three while taking an incremental backup of your site based on your requirements. But, the CyberPanel team recommends taking a full backup of your site, i.e. (Data, Databases, and Email), to avoid any problem in case of an emergency.
- Click Create Backup.
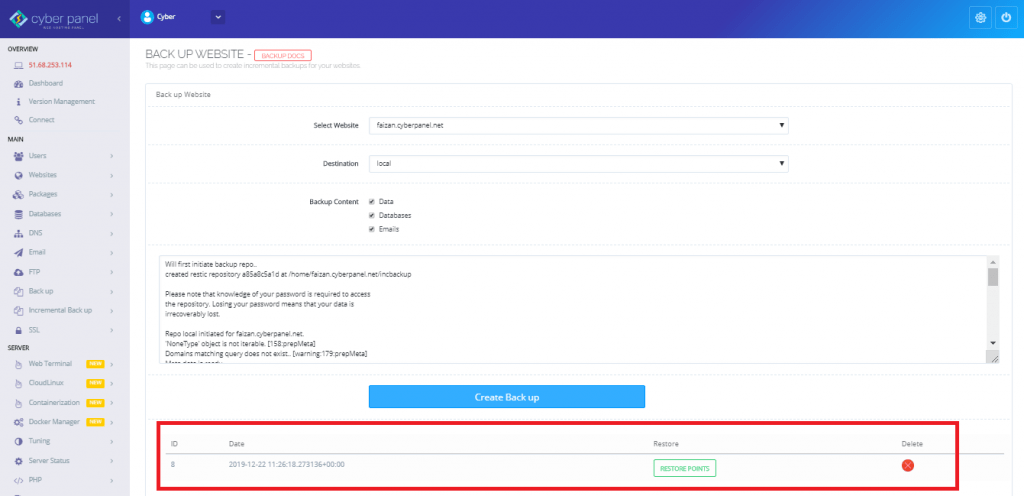
The incremental backup of your site based on Data, Databases, and Emails is stored, and the result looks like this:
How to restore your website through Incremental backup in CyberPanel
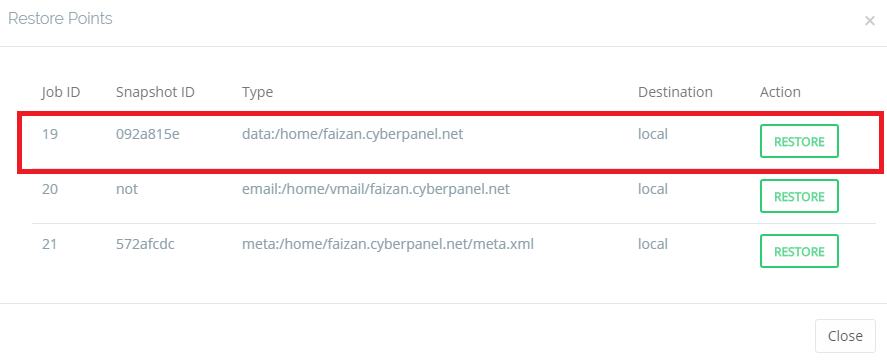
Click Restore Point in the Output section to restore your site. When you click it, the results look like this:
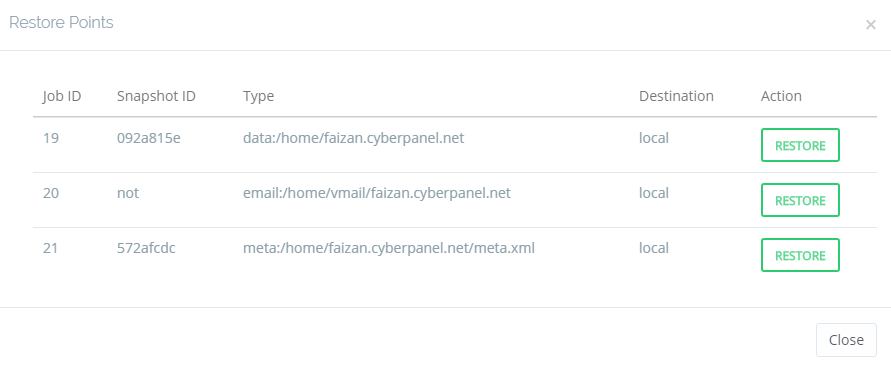
You can restore your website instantly with one click, or according to your requirements. For example, you can restore data that is on Job ID 19, emails that are on Job ID 20, and databases that are showing on Job ID 21.
Example: Delete and restore a file with incremental backup
Let’s take a look at how a Restore of your website works if we delete a bunch of files, including CyberPanel.txt, from the file manager. We can restore them from the incremental backup that we just created.
Navigate to the public_html folder in the File Manager of your website, select all the files and delete them.

All the files of your website are now deleted from the public_html folder in the file manager.

Navigate to Incremental Backup > Create/Restore backup, and select the website. The last backup that has been taken either manually or automatically per your settings is going to be aligned at the top. Click Restore and restore your site’s data as seen in the following screenshot:
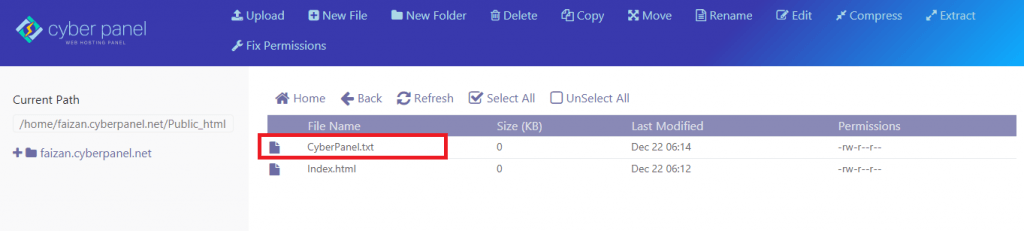
Visit File Manager for your site, and you will see the restored files:

Similarly, you can visit the public_html folder to check your deleted files, including CyberPanel.txt, which is back again through incremental backup in CyberPanel.
Example: Restore your WordPress site from an incremental backup
Let’s discuss the real example of taking an incremental backup of your WordPress site and how it works. First, you need to set up WordPress on your site in CyberPanel. Navigate to Websites > List Websites > Manage > Application Installer > WordPress + LSCache and install it with one click. You can get help from the article Set up Self-Hosted WordPress Site for Free in 10 Minutes, if necessary.
After the successful installation of WordPress, navigate to http://domain name/wp-login.php/ and provide your username and password to log into the main dashboard of your WordPress site.
Now, we are going to apply the theme on our WordPress and take an incremental backup. Afterward, we are going to delete WordPress from CyberPanel and restore it to demonstrate the functionality of incremental backup. You will understand that if a hacker tries to make changes to your site, that an incremental backup is available to restore your site with one click. It gives a clear process to use incremental backup as the most reliable backup system for your websites.
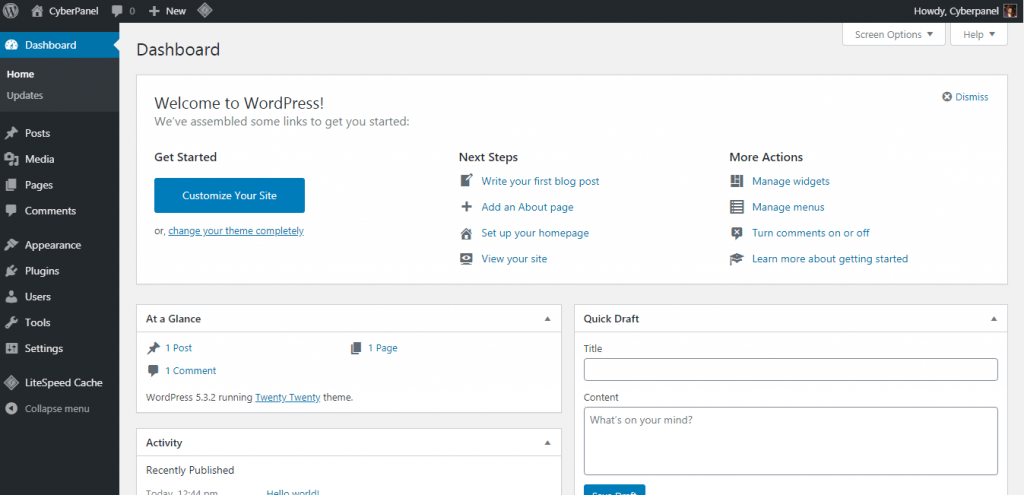
Navigate to Appearance > Themes from the main dashboard of your WordPress site, and apply any theme. Afterward, the site looks something like this:

Take an incremental backup of the WordPress site in CyberPanel to save the changes to the theme. You can see in the following screenshot that the backup is stored:
Like in the previous example, go to your site’s File Manager and into the public_html folder that carries all of the files of your WordPress as seen in the following screenshot, and delete all of them:
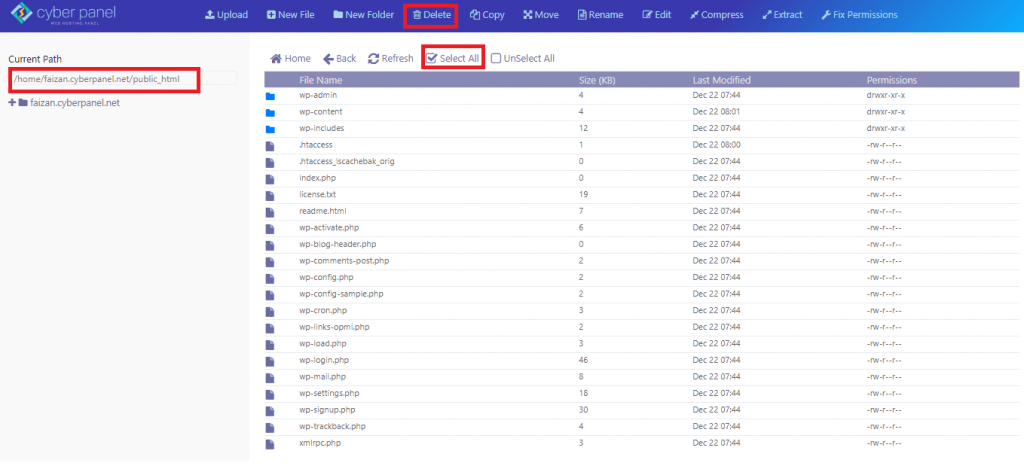
All the files in the WordPress site’s public_html are deleted.
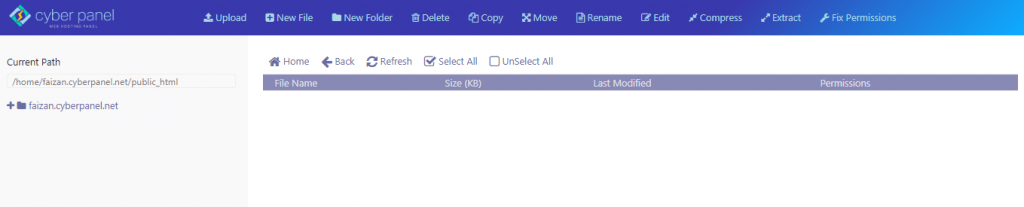
Refresh the WordPress site, and it gives a 404 Error, as we have deleted all the files from the public_html folder.

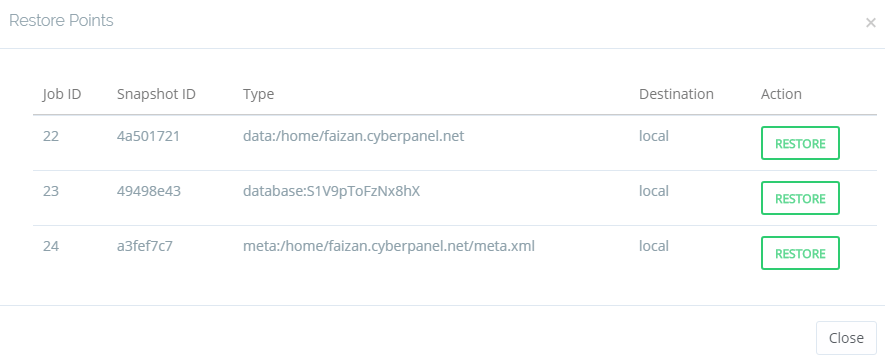
Navigate to Incremental Backup in CyberPanel and restore Job ID 22, 23, 24 of your site’s data and databases in the same way as before. You can see in the following screenshot that shows the restoration:
Refresh the File Manager and visit the public_html folder of your WordPress site. All the files are stored again with one click.
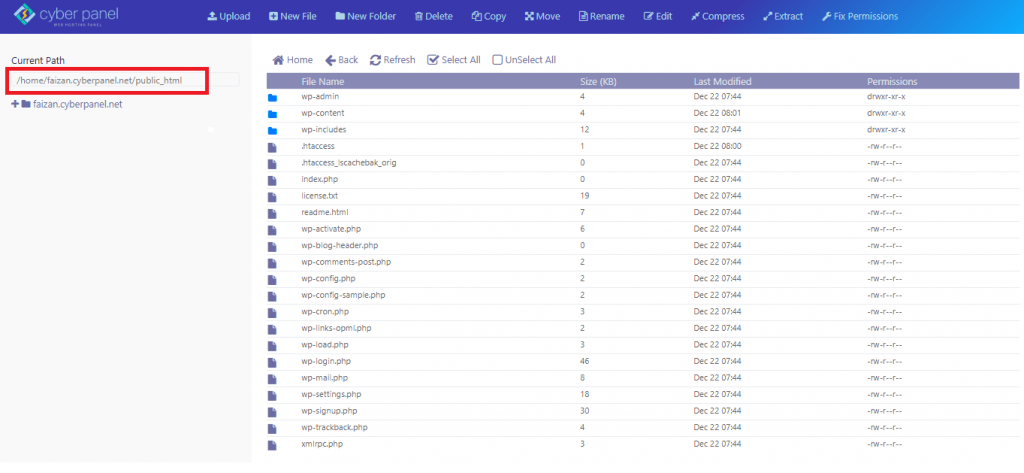
Also, the WordPress site is live again after restoration from incremental backup in CyberPanel:

Conclusion
In this guide, we have successfully demonstrated the functionality and difference between conventional and incremental backup systems in CyberPanel. You must have learned the simple functionality of our backup system that is available to use with a few clicks. Most of the professionals in the world use CyberPanel to secure their websites with an incremental backup system that consumes less storage and bandwidth of your server. We have covered two examples that practically showed you the results by deleting all the files in the public_html folder in File Manager. Similarly, you can restore your site data, databases, and emails with one click from our latest feature of Incremental backup.
Moreover, you can easily install CyberPanel with one command with the help of our guide to Install CyberPanel.