We showed you how to set up custom SSL for your domain in CyberPanel. If you missed it, then follow that guide:
How to setup Custom SSL with CyberPanel!
Today, we will explain how you can generate a wildcard SSL for your domain and add it to CyberPanel. We will use Let’s Encrypt Wildcard SSL for this guide.
What is Wildcard SSL?
Wildcard SSL Certificates secure all the sub-domains of the particular domain. This reduces your work and saves you the trouble of issuing sub-domain-specific SSL for all of your sub-domains. Wildcard SSL will save both your time and money in securing your websites running on subdomains. Remember one thing: Wildcard SSL will work for only sub-domains and not for the main/root domain. We will explain using an example of the domain ‘cyberpanel.net‘. Here a Wildcard SSL will be generated for this domain which will be used for all the subdomains hosted on that particular server, or multiple servers if your certificate issuer allows usage on multiple servers. So, practically every subdomain of ‘cyberpanel.net‘ will work on HTTPS with a single certificate called the Wildcard certificate. Some examples of subdomains are ‘www.cyberpanel.net‘, ‘forums.cyberpanel.net‘, ‘docs.cyberpanel.net‘. Here ‘www.‘, ‘forums.‘,’docs.‘ are subdomains for ‘cyberpanel.net‘.
One thing that should be remembered while generating Wildcard SSL for the domain is that we will have to use ‘*’ (asterisk). For example, in this guide, we will generate Wildcard SSL for domain ‘cyberpanelssl.ga‘ and we will use *.cyberpanelssl.ga for generating the SSL. Here, ‘*‘ means that all the subdomain are included with this domain under a single certificate and the generated SSL will be Wildcard SSL.
Let’s proceed with the important part of the guide.
Requirements
- Domain.
- CyberPanel Installed on CentOS 7.
- CyberPanel User Login Credentials for your Domain.
- Domain Registrar Login Credentials.
Get Wildcard SSL and Private Keys
Step 1: Get Free Let’s Encrypt Wildcard SSL
Currently, the only service that provides free Wildcard SSL is ‘Let’s Encrypt’ and there is a free service that makes the process simple and faster. The ‘sslforfree.com‘ service verifies the domain using various methods, and after verification, the SSL certificates are generated securely and made available on their webpage in both text and zip files.
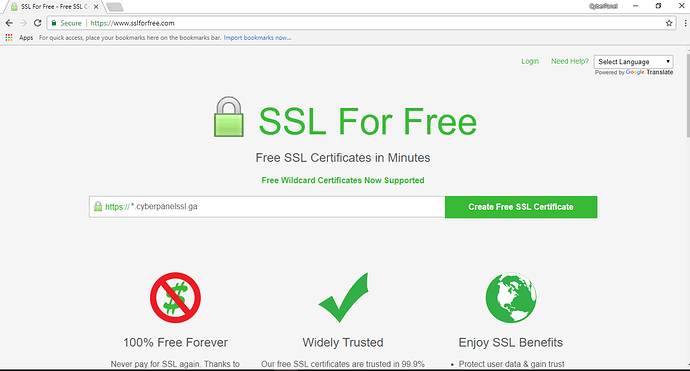
Head over to the SSL for Free Website. You can also do this via command line, but this website will ease the process for you.
It will show a webpage asking for the domain name with a text box as shown. In the text box, we will type ‘*.cyberpanelssl.ga‘ as we are generating Wildcard SSL for this particular domain. You can type ‘*.yourdomain.tld‘.
After entering domain with ‘*’ (asterisk), press the ‘Create Free SSL Certificate‘ button.
Note – Please don’t forget the asterisk mark or the SSL Certificate will be generated for root domain.
If you want an SSL certificate for the root domain along with the wildcard SSL then you can type ‘cyberpanelssl.ga *.cyberpanelssl.ga‘.
Note – Domains should be separated using a space.
Step 2: Verify the domain
Under the Wildcard SSL generation process, only one option is available for the verification of the domain, i.e ‘Manual verification using DNS records’.
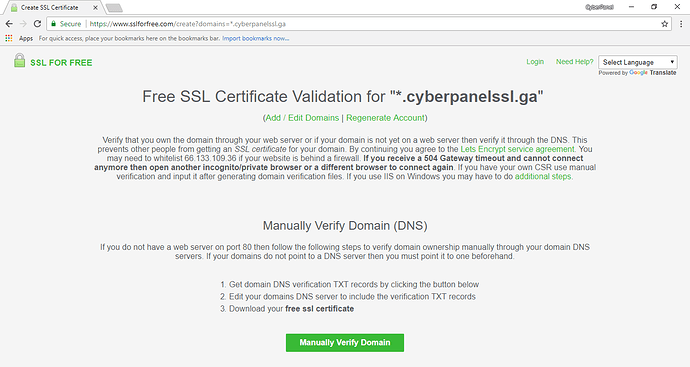
After pressing the ‘Create Free SSL Certificate’ button a new page opens which shows that verification of domain is necessary for SSL Certificate generation.
Tap on the green button with the text ‘Manually Verify Domain’. It will show you some steps explaining how to add displayed DNS records to your domain registrar DNS management section for your domain.
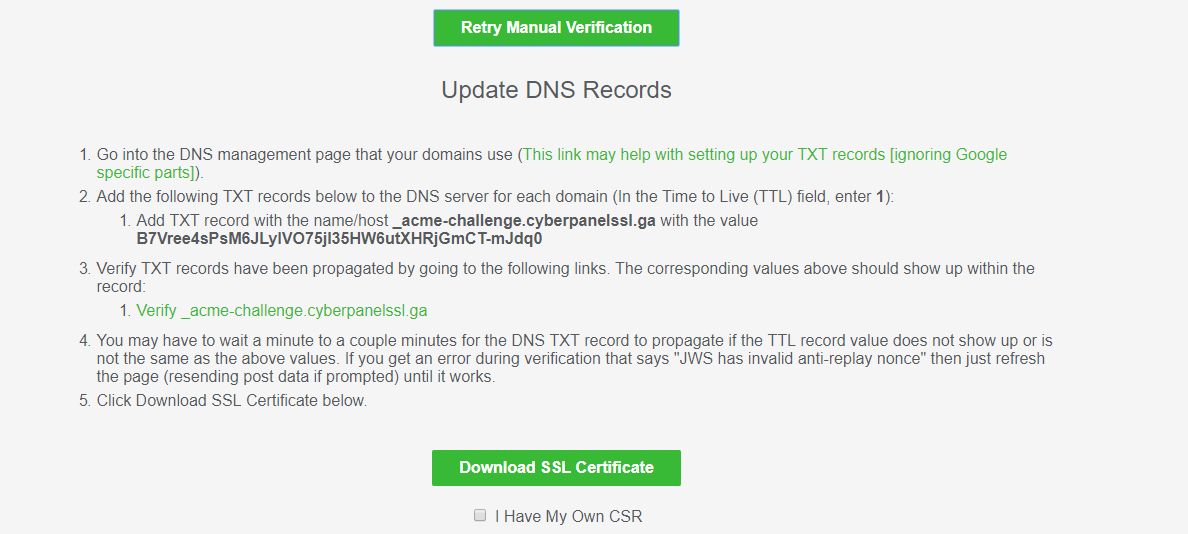
Log into your domain registrar, head over to the DNS Management section, and create a ‘TXT’ record with name/host and value displayed on the SSL for Free website with TTL value ‘1’.
If you cannot enter 1 second as TTL then use the minimum TTL value allowed by your domain registrar.
After entering the DNS TXT Record information you can save it and proceed to the Verification link given in the next step on the website. Tap on it and it will check if TXT Records added are visible or not. This process might take a while because of DNS propagation. After DNS Propagation the link given will show a message ‘TXT Record(s) Found’, which means SSL for Free can see and verify the TXT Record.
If your TTL is higher than 1, you need to refresh and check if TTL is decreasing. If it’s decreasing then everything is fine. Proceed to the next step of the guide.
With this domain, verification has been finished.
Step 3: Generate and Download Wildcard SSL Certificates
After successful verification of the domain tap on the green button that says ‘Download SSL Certificate‘.
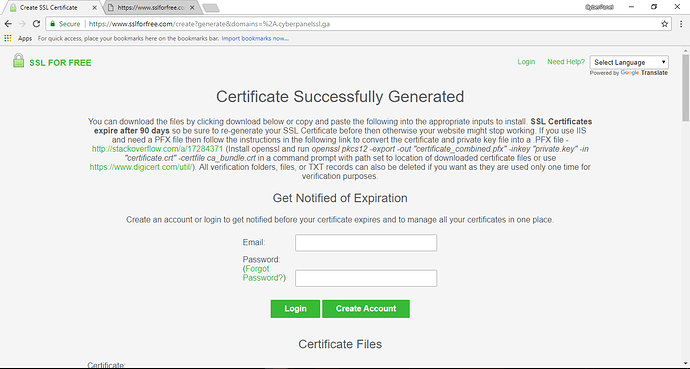
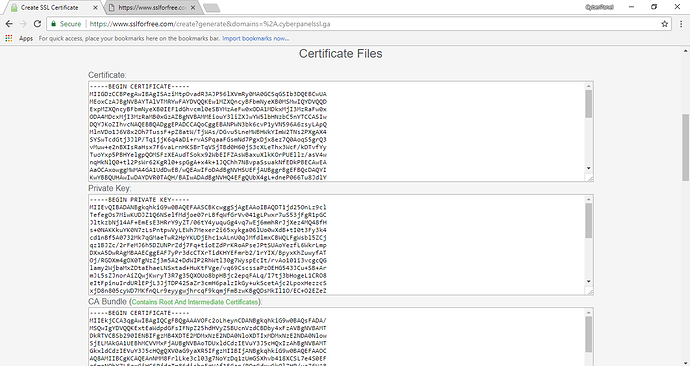
The process of generation might take some time to complete. After SSL certificates are generated it will show a page with a successful message, and certificates and private keys will be listed individually along with the zip file to download.
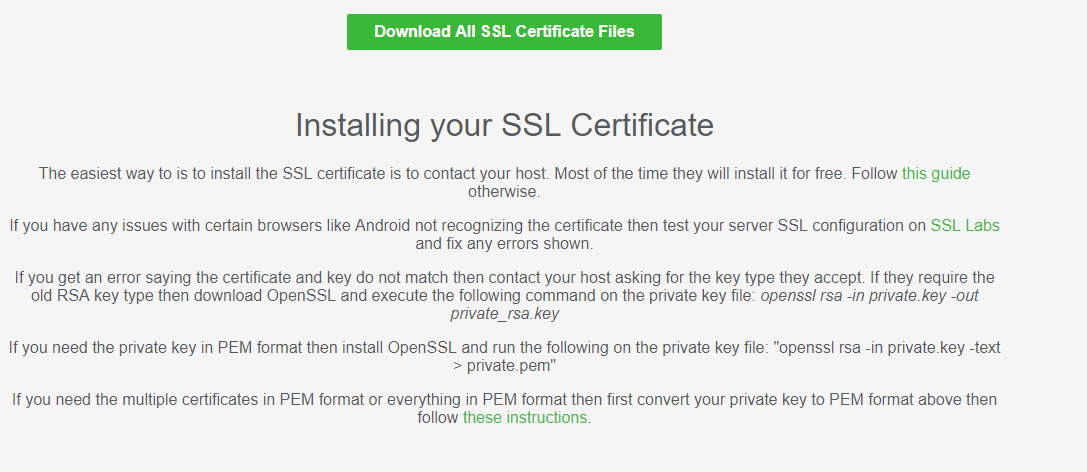
Tap on the button ‘Download all Certificate Files’ to download the zip file. The download button can be found by scrolling down the webpage.
ADD SSL to Domain in CyberPanel
Step 1: Open CyberPanel Web Panel
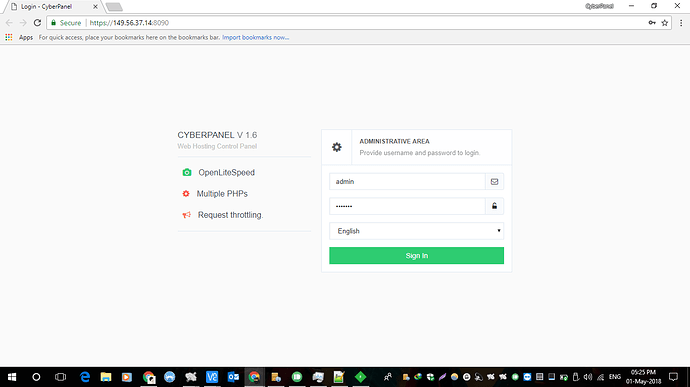
First, open CyberPanel Web Panel using https://hostname:8090 (‘hostname’ here is your ‘Server Hostname’ or server IP Address).
You might get an SSL Warning on accessing the CyberPanel Web Panel. Select ‘Proceed anyway’ or ‘Proceed with caution’. The text of the warning message depends on the web browser.
Step 2: Log into CyberPanel Account
Enter username and password for the account where the domain is hosted, select language and log in. If you have created multiple user accounts then you need to be careful to log in to the correct account.
Step 3: Select Website
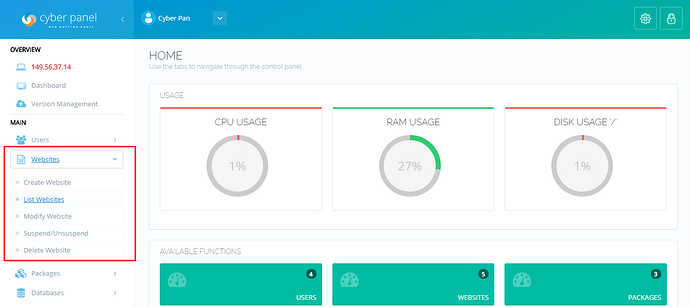
Look out for ‘Website’ on left sidebar and select it.
Note – If your website is already added to CyberPanel then skip Step 4
Step 4: Create Website
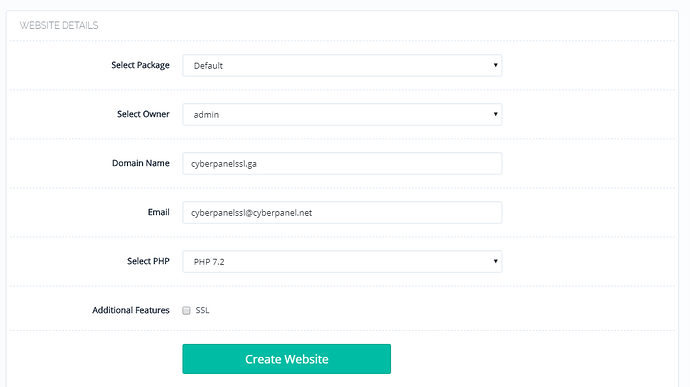
No worries if you have not already added the website in CyberPanel. Tap on ‘Create Website’ and fill out the details of your website in the form that appears on the screen.
Note – Please do not tick SSL under Additional Features.
Press the ‘Create Website’ button and wait for the process to finish.
Step 5: List Websites Available
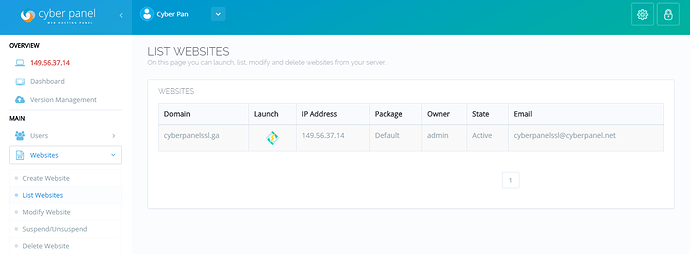
Select Website again on the left sidebar and select ‘List Websites’.
Step 6: Select Website
Lookout for the website in which you want to add SSL and tap the icon under the ‘Launch’ tab.
This will open the various tools and configurations for the particular website.
Step 7: Add SSL Option
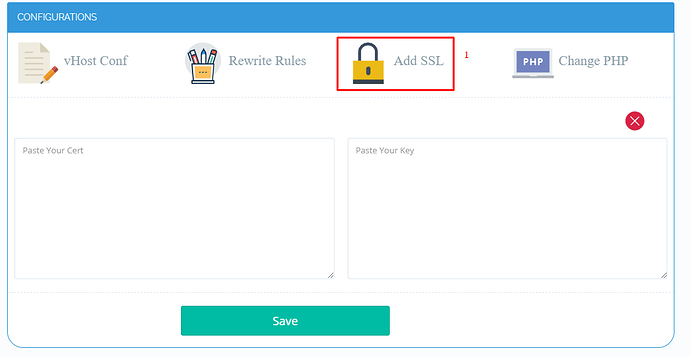
Scroll down a little and look out for the ‘Add SSL’ option.
Select ‘Add SSL’.
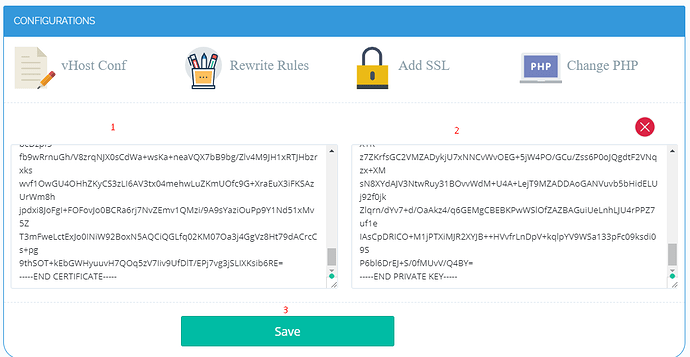
This will show two text boxes: the first for Certificate and second for Private Keys.
Step 8: Add SSL Certificate and Private Keys
Fill both the text boxes, press the Add SSL button, and wait for success.
In the first text box, paste the contents of your certificate file.
The certs look like this:
-----BEGIN CERTIFICATE----- end certificate -----END CERTIFICATE-----
The end cert will be followed by intermediate cert and CA cert in the same text box.
Addition of intermediate cert and CA cert is important or else SSL Testers and some browsers will give warnings that the chain is broken.
In the second text box, paste the Private Keys.
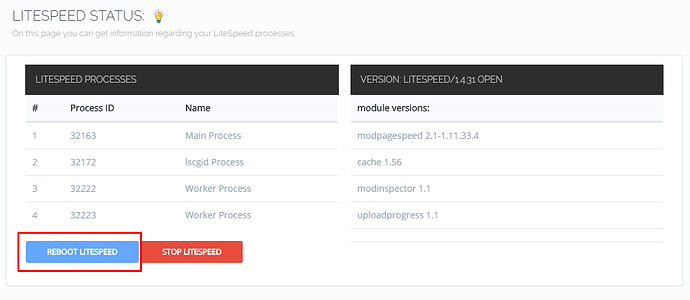
Step 9: Restart OpenLiteSpeed
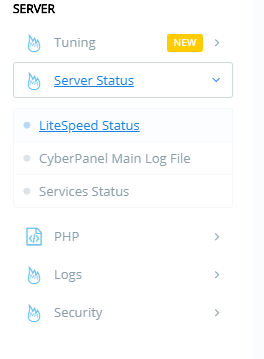
Move to the left sidebar, look out for ‘Server Status’ and select it.
Step 10: Check SSL
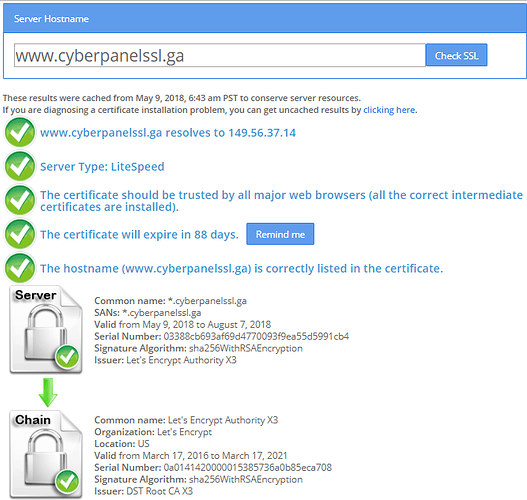
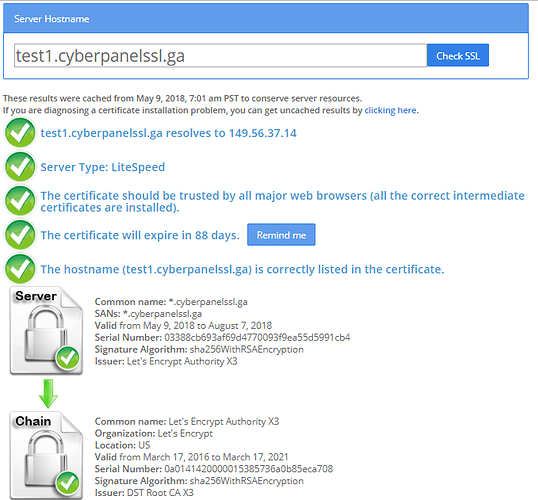
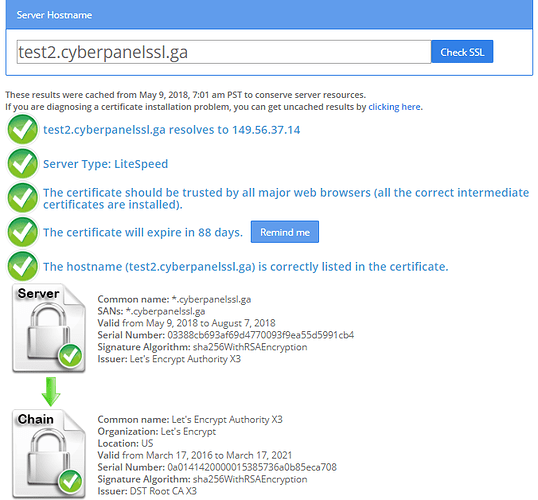
Now we can check SSL using the Online SSL Checker. Use this website to check.
Enter your domain name and press the ‘Check’ button. Your results should show.
We have created 3 subdomains using DNS A Records pointing to the same server and they are:
- www.cyberpanelssl.ga
- test1.cyberpanelssl.ga
- test2.cyberpanelssl.ga
We hope this guide was easy to follow and helps you in every step while generating Wildcard SSL and adding it in CyberPanel.
If you face any kind of problem in above process kindly contact us or head over to our CyberPanel forums.
