Before reading this document, make sure to install CyberPanel and create your first website. The first step towards Email Marketing is an email list. CyberPanel can accept email lists in 2 formats.
- .csv (comma delimited)
- .txt (each row containing on email)
In this article, we will see how we can create, update, verify and maintain a healthy email list.
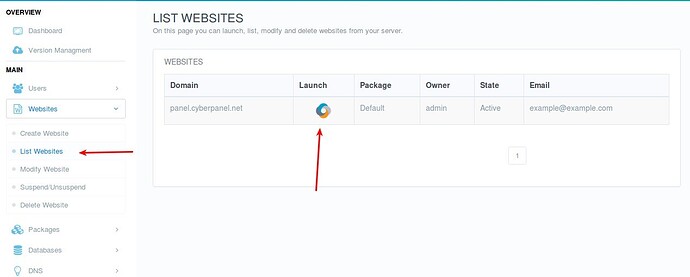
Step 1: Open Website Launcher
Main > Websites > List Websites » Launch
Once launched, scroll down to Email Marketing
click Create Lists.
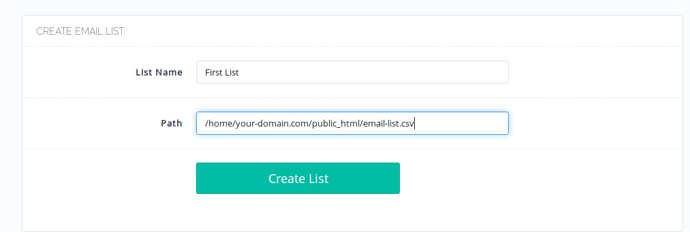
Step 2: Load Email Addresses
First, you need to upload your email list (.csv or .txt file) using file manger, so if you have uploaded your email list file in the document root of your site, its path will look like /home/your-domain.com/public_html/email-list.csv
This will load all emails from the file.
Step 3: Manage/Verify your Email Lists
You can verify or add more emails to your existing lists.
Note: If you load a new .csv or .txt files to your existing email list, only new addresses will be added. Duplicates will be automatically handled by CyberPanel.
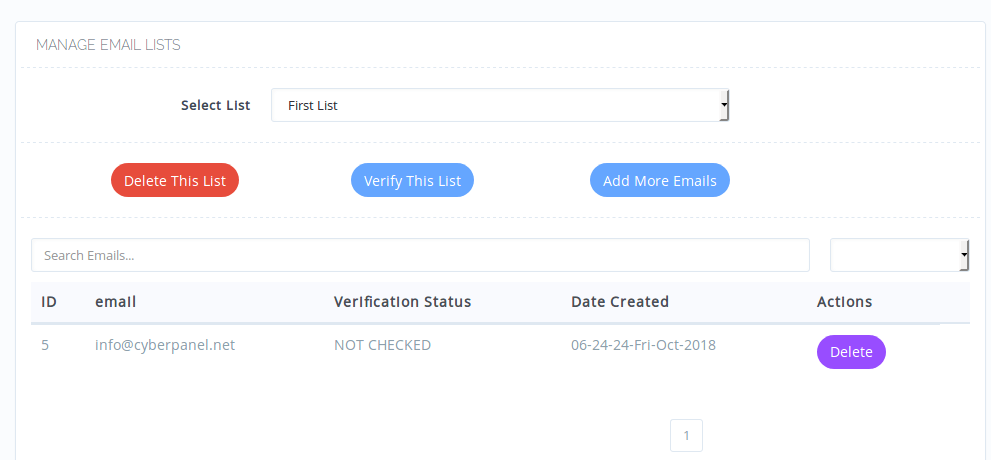
After clicking Manage Lists. You will see:
1. Delete This List
Will delete the currently selected email list.
2. Verify This List
Verifying emails is the process of knowing if emails in your lists actually exist or not. If your Email Lists are small (2-5K) emails, then you may not get into trouble. Because some provider consider email verification process as potential spam and you can get your IP blacklisted.
Just click Verify This List, and the verification process will start. For verified emails, Verification Status will change to Verified, and Verification Failed for emails that fail to verify (means they don’t exist or their email server does not allow verification transaction).
3. Add More Emails
Clicking Add More Emails, will allow you to load more email addresses to your currently selected email list.


