Easiest Way to Set Up and Use the User Interface
1. DNS Configuration
Choose a domain or subdomain and create an ‘A’ type record pointing to the ‘main server IP’, without DNS proxy.
- Example: We will use
mypanel.interpryce.com - DNS Configuration: Type A → Name:
mypanel→ Value:"your-ip"→ TTL: Auto - Outcome: Subdomain as hostname →
mypanel.interpryce.com
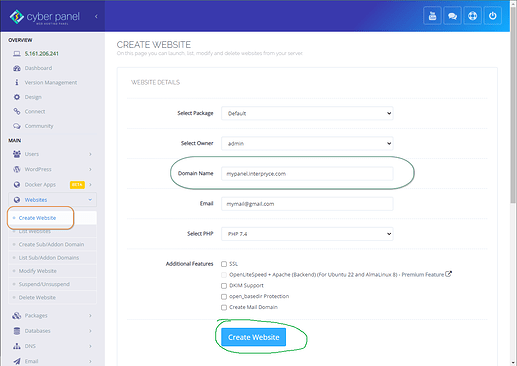
2. Hostname Configuration in CyberPanel
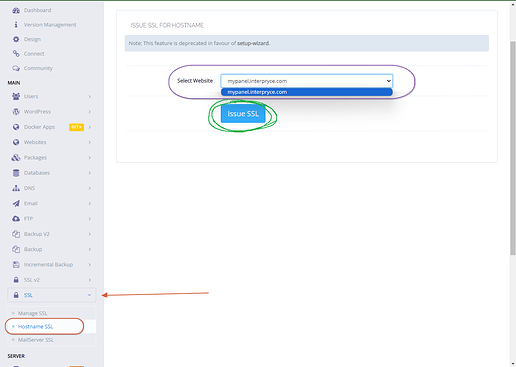
Set up CyberPanel to be accessed via the chosen hostname.
- Example: Add
mypanel.interpryce.comas a new site in CyberPanel and set it as the hostname.
Note: If you already have a hostname configured, skip to step 3.
Proxy Creation
3. OLS Panel Access Credentials
If necessary, set your Username and Password to access the OLS Panel.
- In the server’s SSH terminal, execute:
cd /usr/local/lsws/admin/misc && ./admpass.sh - Follow the instructions to keep “admin” or set a new username and password.
3.1 Accessing the OLS Panel
- Access
your-ip:7080
4. Virtual Host Configuration
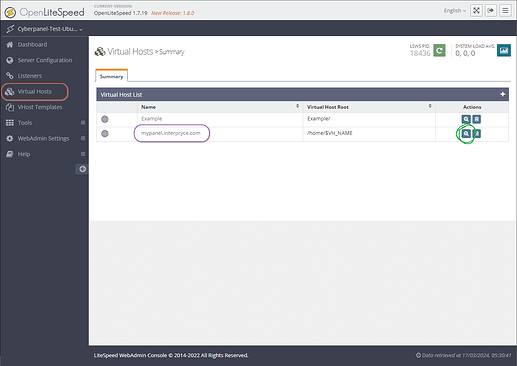
Go to ‘Virtual Hosts > Summary’ and open the settings for your configured hostname.
5. External Application Configuration
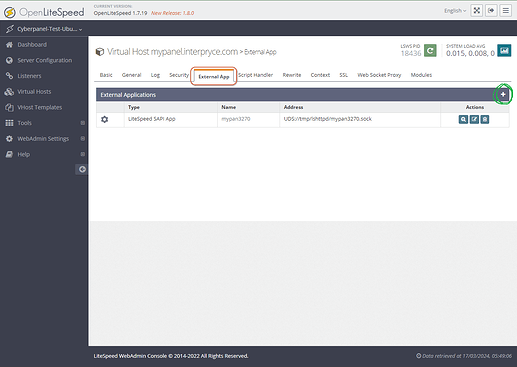
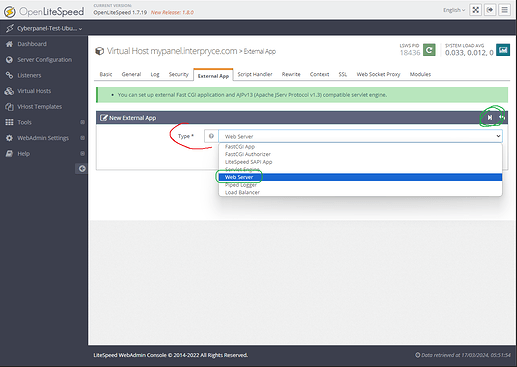
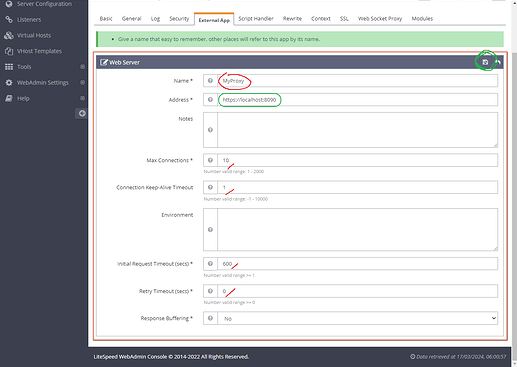
In ‘External App’, add a new entry and set up your Proxy.
- Type: Web Server → Define Localhost
- Name: In this example “
MyProxy” (a unique key without spaces) - Address:
https://localhost:8090
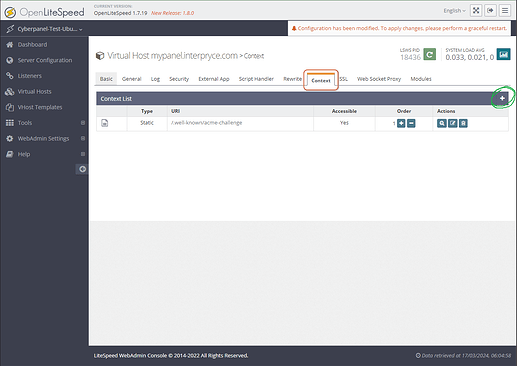
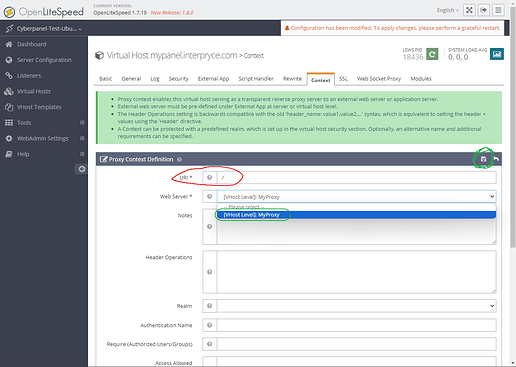
6. Context Configuration
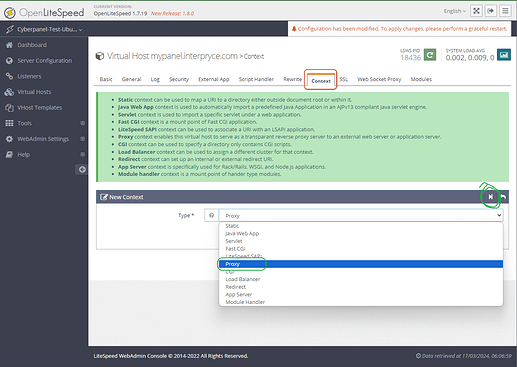
In ‘Context’, add a new context and link it to the Proxy you just created.
- Proxy: “MyProxy”
7. Restarting OLS
After configuring, restart OLS to apply the changes.
NOTE:
I’ve noticed several posts here with different ways to accomplish this task. However, I believe that my method is the most efficient and simple, and can be executed mostly through the user interface.
I have been using this method for years and have never encountered any issues, unlike other techniques that I see around here. That’s why I decided to share it. I hope it proves useful to many.

