[TUTORIAL] HOW TO MASK YOUR SERVER’S IP AND SHIELD AGAINST DIRECT IP ATTACKS | ALSO BLOCK DIRECT ACCESS VIA PORT 8090 (Part 2)

Introduction This tutorial is divided into two parts. In the first part, we apply a method that I’ve previously taught (link to tutorial 1).

In the second part, I’ll teach you how to block direct access to your server via port 8090 or any other port you define, and how to completely hide your server’s main IP on the internet. No one will be able to discover your server’s main IP.

Part 1 Apply the method I taught in the link to tutorial 1.

Part 2 Now, let’s learn how to shield your server from common attacks and hide your public access IP. If you don’t apply security practices and mask your IP, it will be public for anyone who performs a reverse search on the domain/hostname using various free tools on the internet, such as:

Before applying my method, if you search your hostname in the tool above, you’ll notice that anyone has access to your server’s “main” IP. But don’t worry, now you’ll learn how to protect yourself from this using CloudFlare to shield your server and prevent exposure or possible common attacks.

  1. Apply the settings from ‘Part 1’ linked above.
  2. Now, just go to your CloudFlare and activate the DNS Proxy:

With this, we have all the protection that CloudFlare can offer. And the best part, this doesn’t prevent you from accessing your server or using any tool or option of CyberPanel with your hostname protected with CloudFlare’s DNS Proxy.

Now you have two layers of Proxy protection; Part 1 ==> Back-end – Part 2 ==> Front-end.

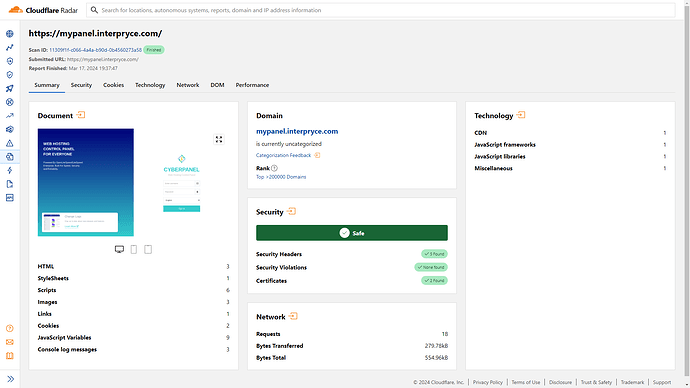
https://radar.cloudflare.com/scan/11309f1f-c066-4a4a-b90d-0b4560273a58

In addition to all this, now the direct access to your server with hostname:8090 or any other port is blocked.

Enjoy more security. :slight_smile:

6 Likes

If you’re interested in further enhancing your server’s security, please leave a comment below. I could provide a tutorial on how to deny direct access via IP.

By doing so, your server would have three additional layers of security. It could only be accessed or receive requests through the hostname, never through the IP. This ensures an extra level of protection.

Please express your interest here, and I will consider creating this tutorial as Part 3… it will require a significant amount of work. Stay safe! :slight_smile:

2 Likes

Thank you so much for sharing this.
I look further to other tutorials from you.

1 Like

Thanks for taking time to write great content! Very useful information.

I have few questions, How this setup would affect email service,

Assuming we have setup hostname SSL for panel address at hostname.example.com and enabled cloudflare proxy.

  1. Should we set another subdomain for mail service with DNS only mode in cloudflare ??

For example: mailserver.hostname.example.com and setup rDNS (reverse DNS, PTR record) against server’s public IP address ,then issue mail server SSL to mailserver.hostname.example.com ??

  1. Can we use some other port number with cloudflare proxy?

  2. Will cloudflare’s country blocking security rules prevent cyber panel updates?

Thanks in advance!

2 Likes

Maybe you have a tutorial or a way to protect the mail subdomain, like @dkmedia mentioned.
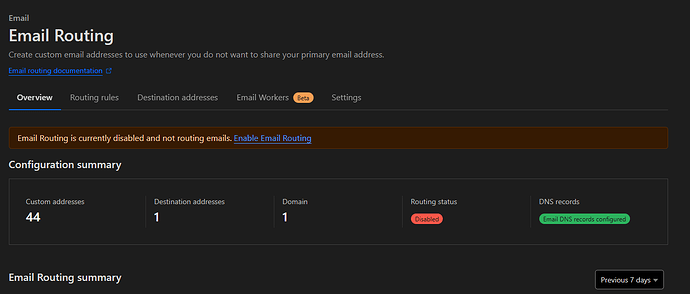
I am a frequent user of Cloudflare, and Cloudflare has a built-in email routing protection setup, but i do not know if it works with CyberPanel’s internal email system.

Hello, I hope this message finds you well. These are great questions, so I will clarify them to be documented and help others in the future:

  1. You cannot, and it is not possible to use a proxy for email domain names, such as “mail.mydomain.com”. This is a global security practice to prevent spammers or any other type of email abuse and masking. If your email domain is configured with a proxy, your email server will not function because the service requires a direct connection to the server.

1.1 The PTR record (rDNS) operates at the domain and IP (host) level. Therefore, if you want to use a local email service, such as on a VPS or a dedicated server, you must configure the PTR record for it to function correctly (required by Google and Yahoo). Similar to the previous practice, this is a global security measure against spammers and other abuses, mainly to prevent malicious individuals from sending emails masquerading as a legitimate company. It serves to ensure the ownership and authenticity of a real email server that aims to follow best practices and comply with global security rules. It works in conjunction with SPF and DKIM.

1.2 Honestly, I do not recommend any friend, acquaintance, or client to use this type of local email service. Each day it becomes more difficult to have a self-hosted email server that functions without problems and with proper ownership and authenticity (without ending up in the spam folder). I suggest using dedicated email and SMTP services that offer high reliability. There are services that cost the equivalent of a cup of coffee per month and allow you to use as many email accounts as you need, according to your storage space. I do not see the need for the headache or time lost configuring a local email server. Although it works most of the time if well configured, email delivery is rarely 100% (in most cases, it does not even reach 60%). I do not think it is worth the time, effort, and risk unless you provide large-scale hosting services as a professional business. In this case, the configuration would be much more robust and complex, done directly at the level of your clusters and your range of dedicated IPs as an authentic provider… ISP → BGP → CIDR.

  1. Yes, you can do this, as it is not limited to just one reverse proxy. You can replicate the mentioned tutorial for any local service on your server configured as a reverse proxy, and for any port, as long as it is properly configured in the application and the server.

  2. No, this should not happen in any way. The updates will be done in the server administration console, and this configuration mentioned is only at the layer of your domain and host (your websites - hostnames). Although you access the panel through the configured hostname (web panel access), when managing your server, you should make the standard SSH connection “ssh root@YourServerIP”. The server will establish a direct connection with the CyberPanel update repository via curl, and there should not be a proxy in this process; I believe it is not even possible to do this at the management layer.

Final details and conclusions:

This type of configuration, which I taught in this tutorial, is for those who, like me, like to keep a server 100% secure and shielded against any type of “direct attack,” keeping your main IP completely hidden from the entire internet, using exclusively communication via services like CloudFlare or others for security, load balancing, CDN, caching, etc.

To be more specific, if in your DNS manager there is any configuration that points directly to your main server’s IP without a proxy configured, this tutorial would be useless and would not serve its purpose. CloudFlare itself, when detecting a direct IP pointing, notifies and clarifies this with a small alert above the pointing. Thus, any DNS analysis service can easily expose your IP.


A good practice to circumvent these issues would be to configure a dedicated IP exclusively for server management, with effective protection configured directly on the local network, using advanced protection services against the most common types of attacks, and limiting access exclusively to specific ports such as SSH, SFTP, FTP, etc.

Additionally, it is advisable to configure exclusive IPs for each of your applications and/or set of websites if the goal is complete and professional security. However, this is very advanced and would require a separate, extensive tutorial. This way, you would have full control over access and dedicated configurations for each one without exposing IPs to vulnerabilities. :slight_smile:

In fact, this service is just an email router/forwarder, which should ensure proper reception and provide a lot of protection to your main email inboxes, keeping them safe from exposure to spammer lists on the internet. However, the issues mentioned earlier are specifically about delivery, that is, sending emails, and in this case, the mentioned service would not make sense.

It would be better to use a professional email service with greater authority. :slight_smile:

My VPS provider provides me with a PTR, i currently use a local cyberpanel e-mail setup.
But I do wish to use Cloudflare for it.

That is why I asked if it was possible to use it :slight_smile:

My host makes sure that my IP is clean from spammers, if my IP gets blocked, I get switched to a new IP, while the original IP gets cleaned up.

Yes, I understand your idea. You want to set up a proxy connection to the email server (e.g., mail.mydomain.com), but unfortunately, this is not possible because the operation requires a connection to your IP, either directly or indirectly through the email domain, where your self-hosted email server is configured. If you use CloudFlare’s proxy, the service (client) would try to access CloudFlare’s public IP, which would not have an email server running.

In fact, the vulnerability here is that people who know your email address could try to discover your final IP based on A records, or the SPF itself, such as mail.yourdomain.com, webmail.yourdomain.com, server.yourdomain.com, panel.yourdomain.com, etc. Believe me, there are services (bots) that attempt various possibilities to access your final IP to find flaws or vulnerabilities in your server, or even to look for other applications and services running on the same server, or to perform DoS or DDoS attacks. You are limited to this due to the PTR requirement.

One alternative would be to do exactly as I suggested at the end of my explanation…

You can configure an IP exclusively for your VPS/MAIL server and open only specific ports, such as SMTP, IMAP, POP etc., for this IP.

The PTR would return for this exclusive IP of your VPS (mail.mydomain.com) to meet the requirements of Google, Yahoo, or any other service that requires PTR.

By limiting this IP to exclusive email services, you would ensure protection against the most common direct attacks on your server, allowing you to expose this dedicated IP for the email service without issues.

And another exclusive IP for your websites and more fragile applications, which would not be exposed at all, using services like CloudFlare.

Another detail that many people don’t understand is that you don’t necessarily have to follow a pattern, like most who use mail.mydomain.com, for example. The trick here is that you can literally use whatever you want as the email server domain + PTR, such as “eyiwoeirut.mydomain.com”. After all, the email server is yours, it’s self-hosted, and you can configure it however you like, as long as you follow the standards and requirements.

Of course, this wouldn’t make sense for VPSs that use only a single IP for everything.

I’m not sure if what I explained is clear, but this would certainly work and ensure the security of the public IP and the protection of the server since only specific ports could function on this public IP, as well as the complete hiding of the main IP for applications or websites. :slight_smile:

Hi, I followed your 2 parts of the tutorial and I wanted to thank you for your work, it’s quick to set up and functional! Could you make a part 3 to hide CyberPanel access via the IP address?

Hello, I haven’t had the free time to do part 3 the way I would like. :slight_smile:

However, if you have correctly completed steps 1 and 2, a simple and easy way to prohibit access to your CyberPanel via IP, is by simply removing port 8090 on your firewall.

This way your panel will be inaccessible by IP+PORT, for example:

http://108.107.106.105:8090

And it will be accessible only by the proxy you configured locally, which responds to the hostname you pointed out:

https://your-host.com

Make sure your hostname responds correctly to the proxy, and then do so. :slight_smile:

That’s part 1 of 7 of step 3 that I’ll be posting one day. But you can start there. =)

1 Like

To be safe, take a snapshot of your server beforehand to avoid headaches.

Although if you have done steps 1 and 2 correctly, you should have no problems.

But the guarantee of restoration in case of a problem is always welcome. For example, as much as I’m sure of what I’m doing, I ALWAYS TAKE A FULL SNAPSHOT before performing any task. :slight_smile:

Thanks you very much, it worked!
Do you know how I can block the port for a Docker container to which I have made a reverse proxy on a subdomain?

After making the changes, I get an error.

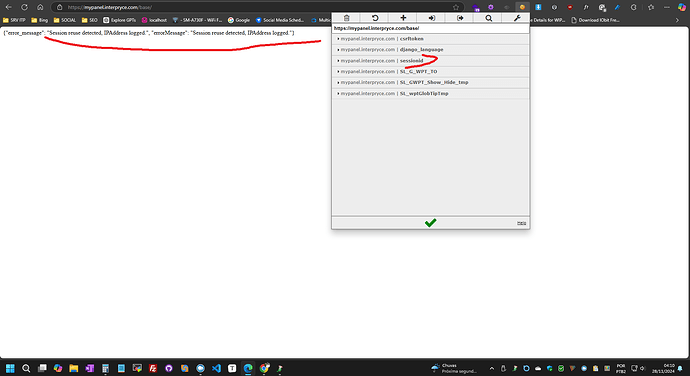
Error code: use cloudflare login show this message:{“errorMessage”: “Session reuse detected, IPAddress logged.”, “error_message”: “Session reuse detected, IPAddress logged.”}

Current Version: 2.3

Build: 9

Current Commit: 6f28d39a591b5e08aac6adfcc59b642a58622ea2

1 Like

so do I. It is kind of weird. I use version 2.3.9. I try all this tutorial from part 1 to part 2. and getting
Error code:
{“errorMessage”: “Session reuse detected, IPAddress logged.”, “error_message”: “Session reuse detected, IPAddress logged.”}

1 Like

Hello, this is new to me.

I tested all the possibilities before providing this tutorial, and everything worked perfectly fine for me and for others who did.

Going through the logical paths, this error should not be occurring with the activation of the proxy.

There will probably be some change in how CloudFlare works, I will test this soon and come back here with an updated solution. :slight_smile:

I started a new instance with a clean and updated installation of CyberPanel to test the mentioned error. The new instance is available at the following link:

https://mypanel.interpryce.com

| USER: testuser | PASS: TEST123456

(I will leave it available for a limited time for testing purposes.)

The error does exist:

{"error_message": "Session reuse detected, IPAddress logged.", "errorMessage": "Session reuse detected, IPAddress logged."}

when trying to log in to CyberPanel through the proxy.


From the quick tests I did, the local proxy configuration is working as it should and meets the configured hostname. However, when activating the Cloudflare proxy service, this session error is displayed, and the login attempt is blocked.

The error occurs because a session ID or token is being saved that recognizes the IP configured in the hostname. If the IP is from the server, the login passes, but if it is the proxied IP from Cloudflare, it is refused as an unauthorized access attempt.

This was definitely some security implementation that Usman inserted.

I will tag him here to see what he has to say and if he can help us with this. :slight_smile:

@usmannasir

1 Like

The session issue is not due to the tutorial after effects. Its a known issue with new cyberpanel update which uses cloudflare proxy.

1 Like