Hello all!
This article is about the GIT (version control system) and CyberPanel websites. People who use CyberPanel for development will be happy to know that they can attach Git repositories (GitHub and Gitlab) to CyberPanel websites, CyberPanel will use Git webhooks to deploy your apps directly from your repositories.
GIT Deployment
GIT is a modern version control system, we are not going to get into what GIT is and what it does, because if you are here I assume you are already using GIT in your development environments.
Today we will see how we can attach a remote GIT repo to your CyberPanel website.
Step 1: Create Github Repository!
With CyberPanel you can either attach repo from Github or Gitlab, but we are going to use GitHub in this article. If you already have a GitHub repo, you can skip this step.
Go to: Sign in to GitHub · GitHub
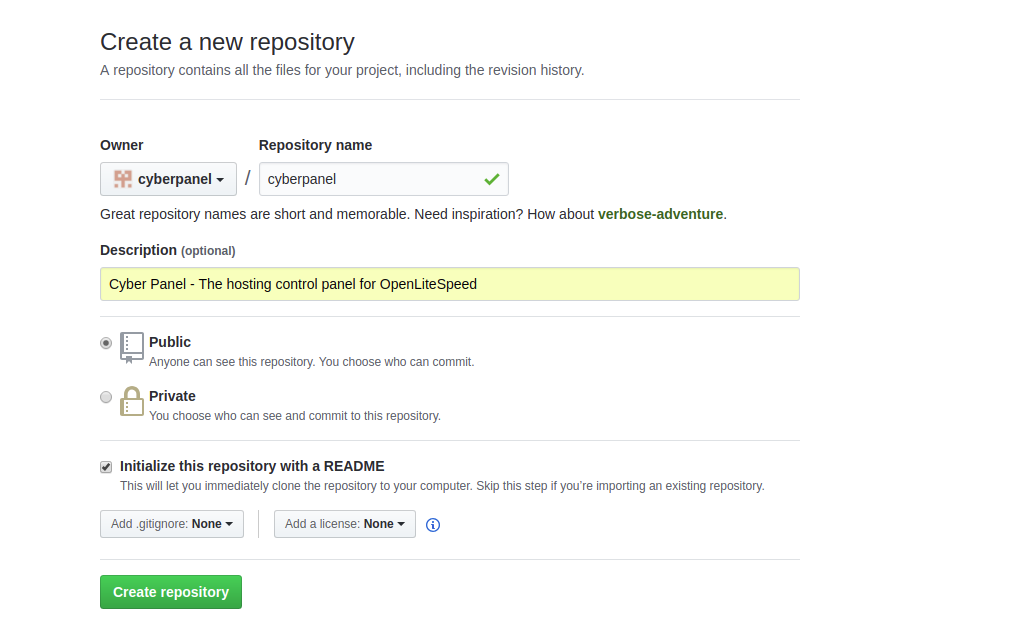
Simply fill in all the details and click Create Repository. This will create an empty repository and initialize it with README file.
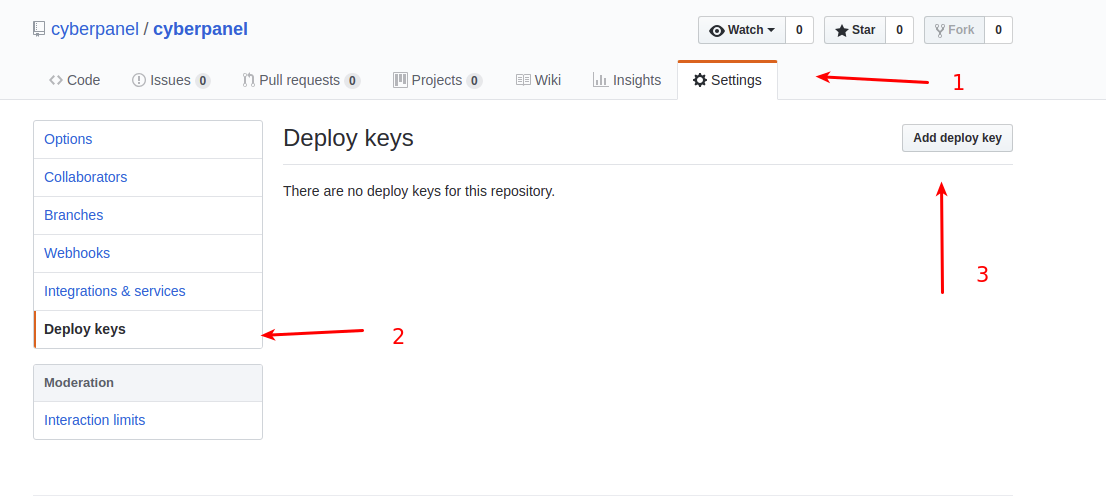
Step 2: Deploy keys to your Repo!
Before moving any further, you need to deploy your server keys to your GitHub repository (GitLab have account level keys, whereas in GitHub you can add keys at repo level).
I assume you have already installed CyberPanel and created your first website.
After doing that navigate to:
https://IP Address:8090/websites/domain.com/setupGit
Replace domain.com with your website you want to attach repo to.

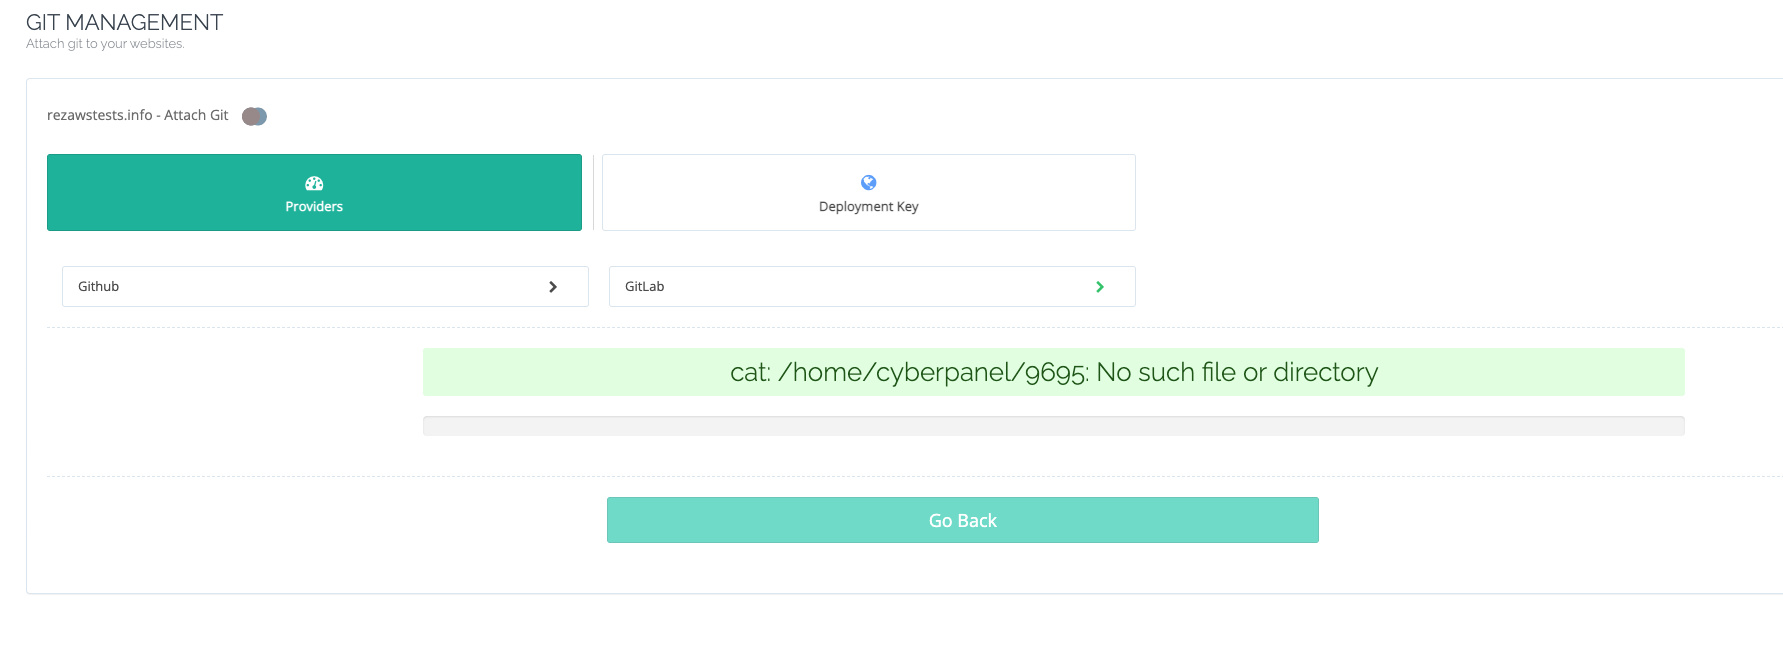
Click on Deployment Key and copy the key from the box. Now go to your repo to deploy this key.
Step 3: Attach repo to your CyberPanel website!
Once your keys are deployed, its time we attach the website to our repository. Again navigate to:
https://IP Address:8090/websites/domain.com/setupGit
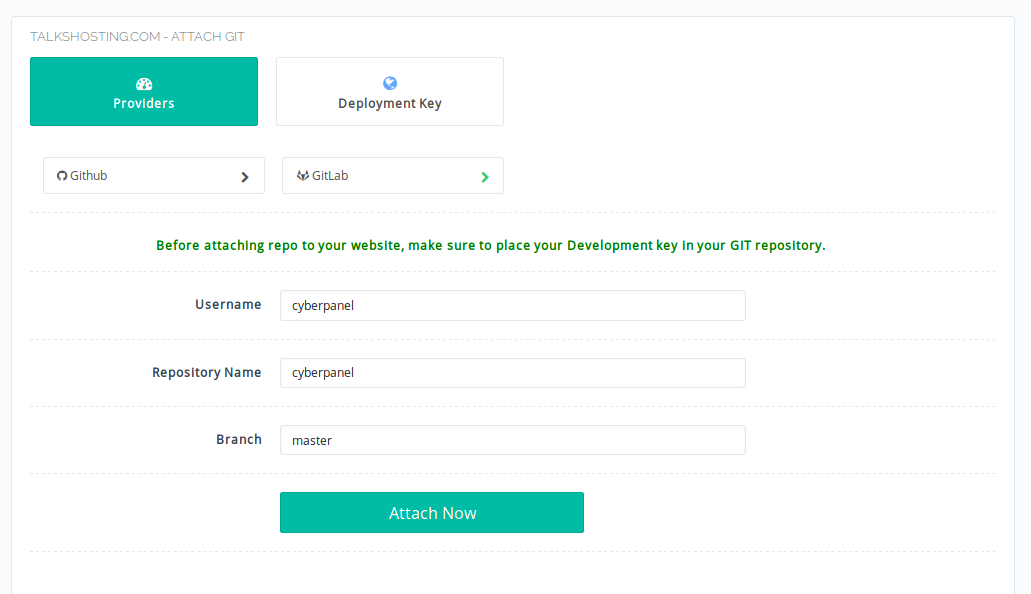
By default Github is selected, however, the procedure is almost similar for GitLab, on this page just click GitLab to attach repo from GitLab service.
Fill in your username followed by repository name and click Attach Now. If your repo URL looks like:
https://github.com/usmannasir/cyberpanel
Here username is usmannasr and repo name is cyberpanel, you can adjust accordingly.
This will take some time and after few seconds your CyberPanel website is now attached to GitHub repository, there is one last step to perform so that any commits to your repository should initiate a git pull in your server so that you are always in sync with the repo.
Step 4: Setup Git Webhook!
Once the website is successfully attached to a repo, the page will refresh and you will see:
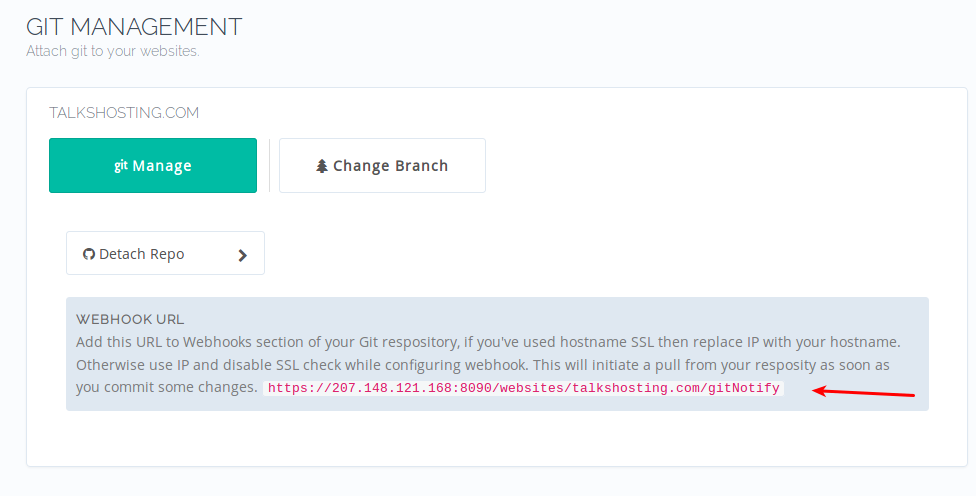
You can copy this URL (you will need to paste in Git webhooks section). Please note that you can replace IP in this URL with your hostname if you have used hostname SSL and have a valid Let’s Encrypt SSL. Otherwise, in Git webhook section, you will have to disable SSL check.
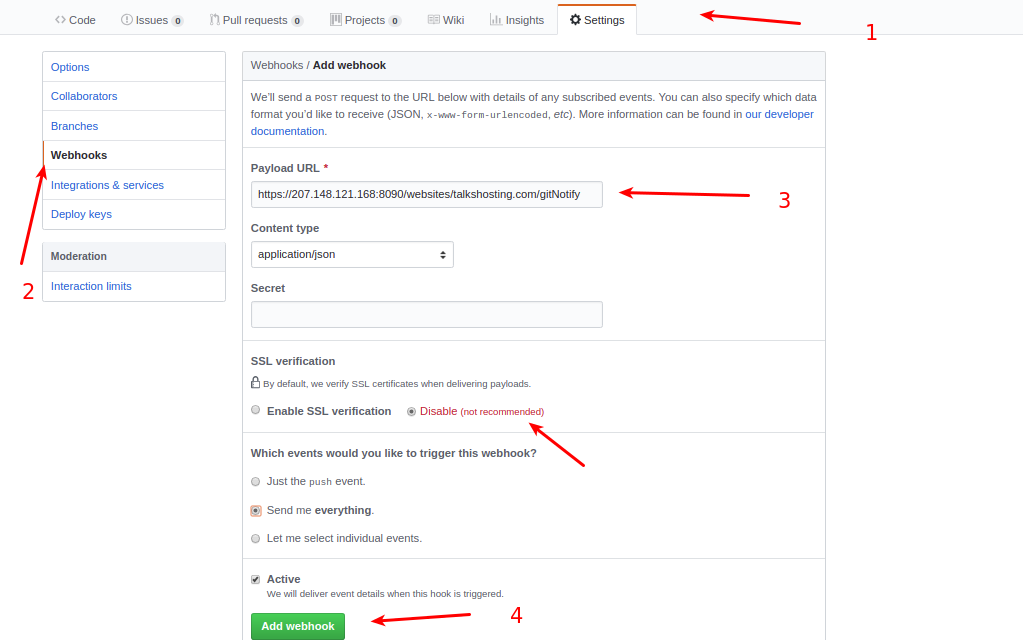
Please note here that I’ve disabled SSL check since by default CyberPanel uses self-signed SSL. Self-sign SSL will fail with SSL verification from GitHub, either disable SSL verification or setup CyberPanel on SSL and replace IP with that hostname (domain name).
This will make sure that whenever you push new code to your repo it is automatically pulled to your website.
If you have any questions, feel free to ask them below.
Installation
This branch is not pushed into production yet, so you can install via:
sh <(curl https://mirror.cyberpanel.net/install-test.sh || wget -O - https://mirror.cyberpanel.net/install-test.sh)