Tutorial: Setting Up Fail2Ban for Permanent Bans and Bulk IP Analysis
Fail2Ban is an essential tool to protect your server against brute-force attacks, especially for services like SSH and CyberPanel. This tutorial will guide you through installation, setting up permanent bans, and analyzing blocked IPs using free tools.
Step 1: Install Fail2Ban
To install Fail2Ban, run the following command:
sudo apt install fail2ban -y
Step 2: Enable Fail2Ban to Start on Boot
To ensure that Fail2Ban starts automatically after each server reboot, run:
sudo systemctl enable fail2ban
Step 3: Start Fail2Ban
Once installed, start Fail2Ban to begin protecting your server immediately:
sudo systemctl start fail2ban
Step 4: Configure Fail2Ban for Permanent Bans
Before modifying the configuration, it’s recommended to create a backup of the jail.conf file. This allows you to adjust settings in a dedicated file without altering the defaults.
Copy jail.conf and open it for editing:
sudo cp /etc/fail2ban/jail.conf /etc/fail2ban/jail.local
sudo nano /etc/fail2ban/jail.local
In this file, you can activate and configure Fail2Ban for SSH or other services like CyberPanel. Here’s a basic configuration for SSH with a permanent ban:
[sshd]
enabled = true
port    = ssh
filter  = sshd
logpath = %(sshd_log)s
backend = %(sshd_backend)s
maxretry = 3
findtime = 5m        # Time window for counting failed attempts
bantime  = -1        # Permanent ban for blocked IPs
This setup will permanently ban an IP after 3 failed attempts within a 5-minute period.
Step 5: Restart Fail2Ban to Apply Changes
After modifying and saving the configuration, restart Fail2Ban to apply the new rules:
sudo systemctl restart fail2ban
Step 6: Check Fail2Ban Status and Blocked IPs
To ensure that Fail2Ban is running and protecting your server, check its status with the following command:
sudo systemctl status fail2ban
To see the list of IPs currently blocked by Fail2Ban for SSH, use:
sudo fail2ban-client status sshd
Step 7: View Ban Logs
If you want to view detailed logs of bans in Fail2Ban, use the following command to display only ban entries:
cat /var/log/fail2ban.log | grep "Ban"
Step 8: Export and Analyze Blocked IPs in Bulk
Once you have accumulated a significant number of blocked IPs, you can export them for bulk analysis. Here are recommended free tools for analyzing multiple IPs at once:
-
InfoByIP - infobyip.com
InfoByIP allows bulk IP analysis for location, ISP, and reputation information. This tool is convenient for quickly retrieving details on multiple blocked IPs.
-
AbuseIPDB - abuseipdb.com
Allows you to check abuse reports for each IP. Useful for identifying IPs with known malicious activities. You can analyze IPs in bulk with a free account.
-
ipinfo - ipinfo.io
Provides details on IP location and ISP. Their API can process multiple IPs, but some advanced features may require a free account.
-
MaxMind GeoLite2 - maxmind.com
An open-source solution for IP geolocation. You can download their GeoLite2 database and perform local analyses.
Step 9: Visualize IPs on a Map with BatchGeo
To get a better understanding of the geographical locations of the blocked IPs, you can visualize the data on a map using BatchGeo. Go to BatchGeo, copy-paste your list of blocked IPs with their coordinates, and generate a map. This free tool is easy to use and provides a clear visual overview of the sources of connection attempts.
Step 10: Use the Results to Improve Security
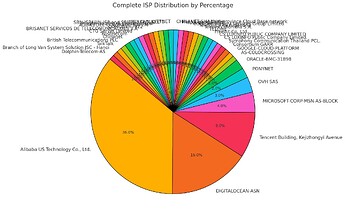
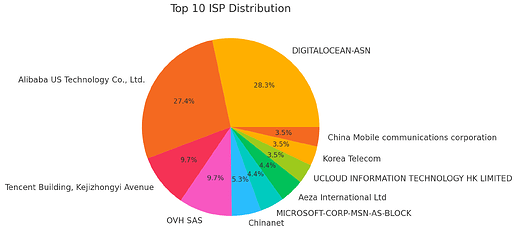
After analyzing and visualizing the IPs, you can better understand the geographical origins and ISPs associated with connection attempts. This allows you to adjust your configuration, for example, by blocking certain countries or monitoring specific providers more closely.

