Migrating a WordPress website from one hosting server to another is similar to the process of moving furniture from one house to another.
First you need to protect your furniture in a way that will keep it safe from losing tiny things like nails and screws. Then, you need to choose a mode of transportation that won’t scratch your furniture. Finally, you must load the furniture into the new house and arrange it in a pleasing way.
Similarly, for your WordPress website, you need to protect it with a thorough backup, safely copy it from one server to the other, and finally load it into the new control panel and configure it.
In this article we will demonstrate how to transfer the WordPress website (process for other database sites are also similar) from cPanel to CyberPanel. Regardless of the type of the control panel you start with (be it cPanel, DirectAdmin, VestCP, etc.), the concept is the same. As long as you can perform a backup from the original hosting using the panel’s backup tools, or via the file manager and phpMyAdmin directly, it will work.
Here we will explore a few different processes and you can choose the one that most closely matches your configuration.
Our destination server is running CyberPanel as a control panel, so that we can make use of OpenLiteSpeed technology.
Now let’s start.
Step 1: Back up the Source!
The source for WordPress website consists of two main things
- Files
- Database
Before we start we have to make sure that we disable any cache plugins that could impede the process like (W3C, Varnish , Breeze, etc). Disable all of them using Network Deactivate. (We will reactivate after migration)
NOTE: DON’T CHANGE DNS OR NAMESERVERS NOW.
Backing up the Files
Log in to your origin control panel and navigate to the file manager. In cPanel normally your data is located under public_html folder, if you have another site that you are interested to backup which is residing in some sub-folder you can choose that folder instead.
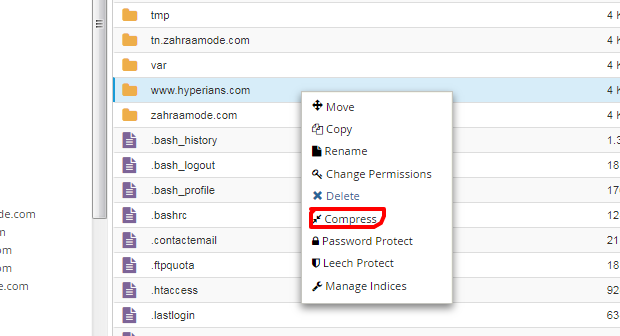
Right Click on the folder that contains the files then select Compress.
Now choose the compression type. I prefer using a tar archive as it’s easy to handle on a Linux-based server.
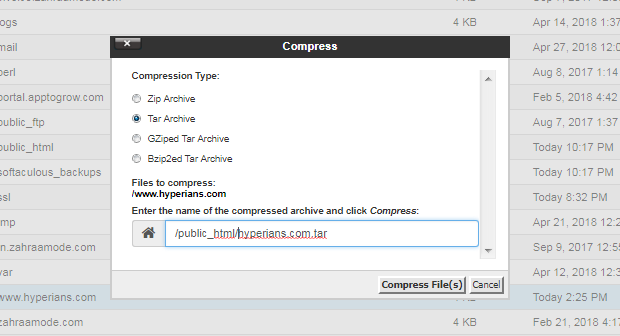
For the destination file, enter something like /public_html/name_your_file.tar.
Choosing the public_html folder to store your compressed file make it easier to transfer this file via wget.
If you don’t have SSH access to the destination, you can use FTP or SFTP to download the tar file to your computer and then upload it to your server. This can work with small file sizes, but for large websites it’s better to move the file directly via SSH.
Click the Compress Files button and wait until it’s finished. Be prepared for it to take a long time, if you have a large tar file. Once the file compression is done, you can find the file in your destination public_html folder with the name you choose earlier.
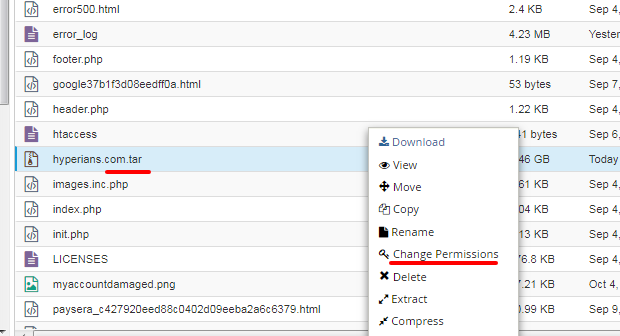
Change the file permissions to enable access via wget to this file. Right click on the tar file and then choose Change Permissions. Enter 755 as shown.
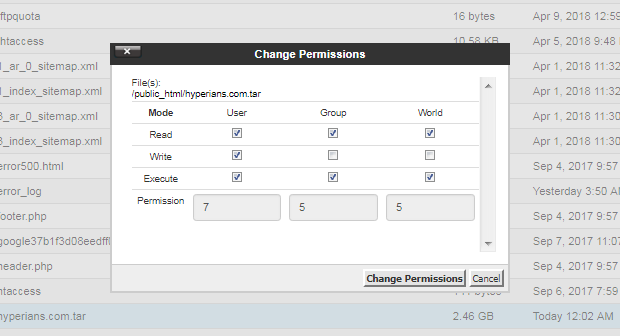
Now your tar file is backed up and ready to be transferred.
Backing up the Database
As mentioned earlier, there are many ways to back up the files and the database. You can use backup options provided by your host provider in the control panel i.e JetBackup or you can directly export the database from phpMyAdmin.
If you have more than one website hosted on your old server, you will need to know which database is related to the website you’re preparing to migrate.
Go to your site folder and right click wp-config.php. In the top 1/3rd of the page you’ll find the database name just after:
Define('DB_NAME',
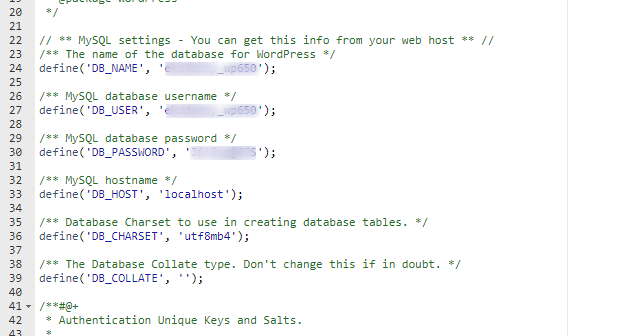
Now let’s log in to phpMyAdmin in order to export the database and make it ready for transfer.
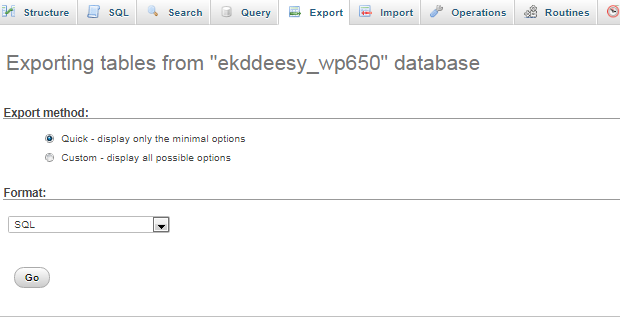
Log in to phpMyAdmin. On the left panel, click the database name you looked up in the previous step. Click the Export link at the top.
Choose “Quick,” then click Go to start exporting. Make sure you have allowed popups in your browser, as the database will be downloaded to your PC via popup dialog.
Step 2: Migrate to the Destination!
As we mentioned earlier, we need to choose the transportation mode that will take the furniture (Files and Database) from our old house (Server) to our new one.
File Transfer
There are a few ways that our data can travel:
- Using wget from SSH at the destination server.
- Using the SCP command from SSH at the sending server.
- Using FTP to download files to the PC then upload them to the destination server.
We will be using wget from SSH at the destination server to move the files!
Before we start migration we need to prepare our new house at the destination CyberPanel server.
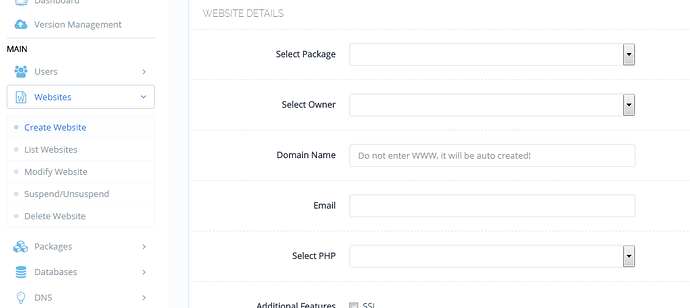
Create a New Website
Enter the Website Details: Select Package, Select Owner, enter Domain Name, enter Email, and Select PHP. DON’T click SSL at the moment as your DNS is not yet configured to your CyberPanel destination. We will do that later.
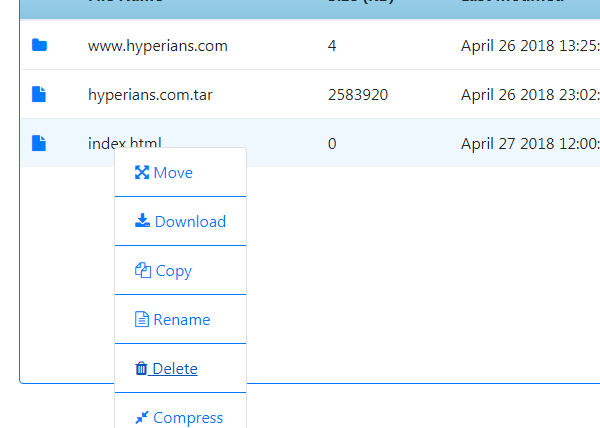
Now list and launch website, open the File manager, navigate to inside the public_html folder, and remove index.html.
Transfer the Files
On CyberPanel server, log in to SSH. Go to your newly created website path using cd:
cd /home/yourwebsitename/public_html
Enter the command:
wget http://www.yourdomain.com/yourtarfile.tar
Note: substitute your actual tar file name and domain for the example given.
The file will now be downloaded to your server. Once the transfer is finished, use the following command to extract the files into your destination directory (CyberPanel path to website accounts is /home/yourwebsite/public_html/.):
tar xvf your_tar_file.tar
The extraction process will start.
If you logged in to SSH as root or super user you will need to change file permissions. CyberPanel provides an easy way to do that via the file manager:
Open FileManager for the new CyberPanel site, navigate to public_html, and you will find the folder containing all of your exatracted files. Click on the folder. You will find it empty, as you did everything via command line (root user). Click on Fix permissions from top right corner on File manager, and the files will appear.

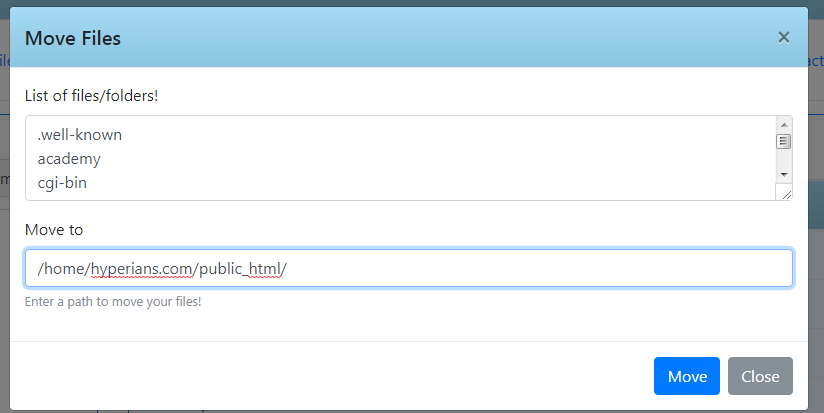
Click Select All, and move all of the files and folders to public_html directly, so they are accessible from root domain and not sub-folder.
Voila! Your files are now furnished and arranged in the new house. Let’s now complete the database migration.
Database Transfer:
There are a few options here, as well:
- Using Import function from phpMyAdmin to upload SQL file from PC (works for small size database)
- Using SSH to Import tables (for large SQL)
We will do the first option.
Create a new Database
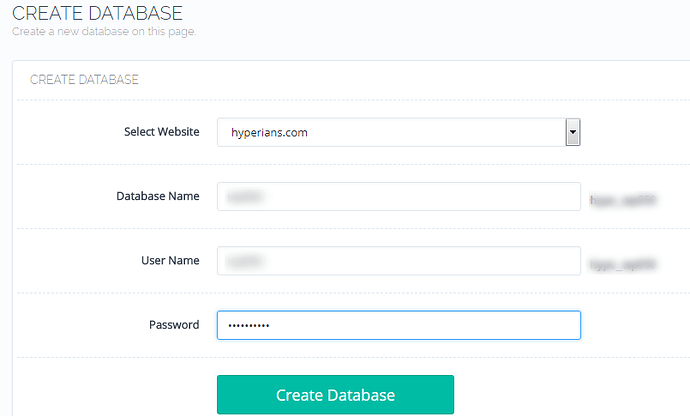
First we need to create a database in CyberPanel. To do this, click on Database on the left panel, then Create.
Select the website you just created, choose a Database Name, a User Name and a Password.
Note: Remember the full Database Name and User Name. You will need them later.
Click the Create Database button.
Import the Data
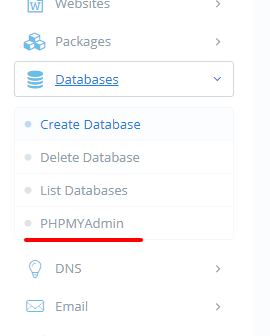
Now to import the database we extracted earlier, click again on Database in the left sidebar of CyberPanel, and select phpMyAdmin. This will take you to SQL phpMyAdmin, where you need to enter your Database username and password that you just created above. If you dont know them use “root” for the username and extract the password from SSH using the following command:
cat /etc/cyberpanel/mysqlPassword

Copy the password and use it to log in to phpMyAdmin. Then, select the database you created earlier and choose Import.
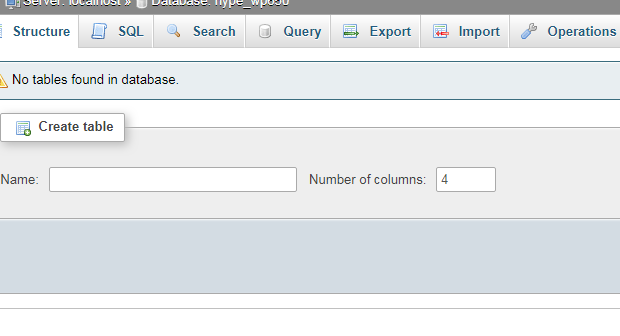
Import the database that you exported from the old server. Once importing has completed, you will see:

If you got any errors , then its probably due to a large file size. You may have to use import from SSH directly.
Now you have files and database migrated and everything seems ready.
The last step is to define the new database name and password into wp-config.php.
Go to file manager, public_html, right click on wp-config.php, edit, and type the new parameters in place:
DB_NAME, DB_USER, DB_PASSWORD

Save and you are almost done!
Step 3: Update Rewrite Rules!
Use rewrite rules guide to update rewrite rules.
RewriteRule ^/index\.php$ - [L]
RewriteCond %{REQUEST_FILENAME} !-f
RewriteCond %{REQUEST_FILENAME} !-d
RewriteRule . /index.php [L]
Step 4: Change the DNS Records!
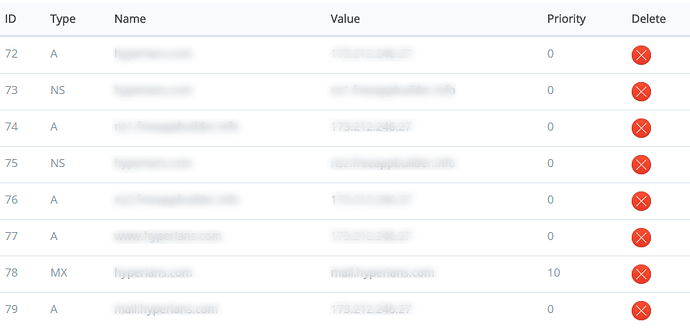
It is time you update your DNS records and point them to your new server.
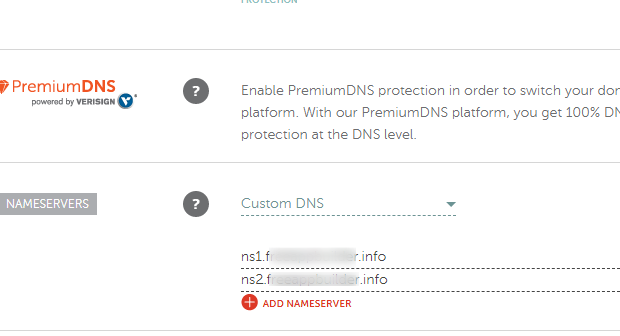
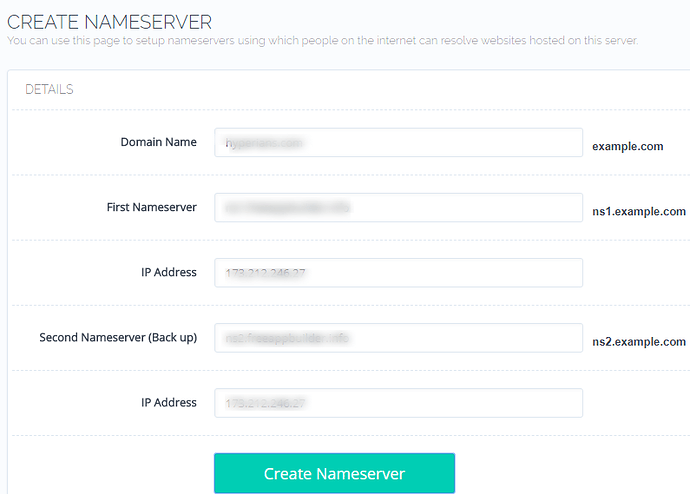
If you are using your own website as a name server then you have to create that name server, more detailed article about managing dns.
Add MX, www, and * as A records to your IP.
Finally, you can check your new DNS configuration at www.intodns.com or any other DNS checker tool.
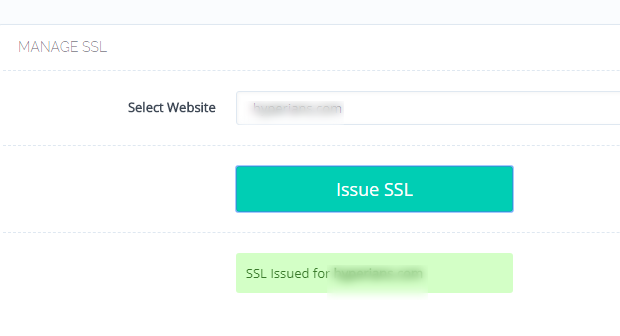
Issue an SSL certificate by clicking Manage SSL in CyberPanel’s left sidebar. Choose Manage SSL, select the new website we created, and issue SSL.
One last thing: You may wish to extend your SSL by following this tutorial:
Manually Extend SSL to WWW on CyberPanel
NOTE: You may need to wait up to 48 hours for your new DNS settings to take effect.
