Mailgun is an email automation service. It gives you a cloud-based email service for sending, receiving and tracking email sent through your websites and applications. Mailgun features are available through an intuitive RESTful API or with the traditional email protocols like SMTP. Mailgun email automation is trusted by over 10,000 Websites.
Mailgun Features Include:
- Send email from servers that don’t support SMTP or where SMTP is restricted.
- The Mailgun plugin uses HTTP API to send email by default. You just need a server, hosting control panel (including CyberPanel) and WordPress intalled on it.
- A Mailgun Free account lets you send 200 emails per day. All you need is to set up an account.
- Allows developers to spend more time on building websites and less time dealing with email issues.
- Very easy to understand and manage your emails.
- App API integration.

Steps to Configure Mailgun in WordPress
Configuring Mailgun in WordPress is very easy to do. It takes only a few minutes to set up. Just follow the following steps given below:
Step 1: Install WordPress on CyberPanel
Install and set up WP on CyberPanel using this guide: Learn why people are moving their WordPress setups to CyberPanel.
Step 2: Sign up at Mailgun for a free Account
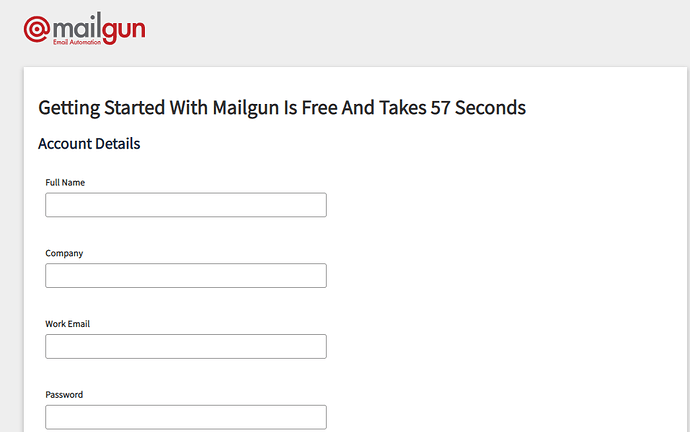
First you have to sign up for an account at the Mailgun website.
To complete the signup, you have to fill in the additional information.
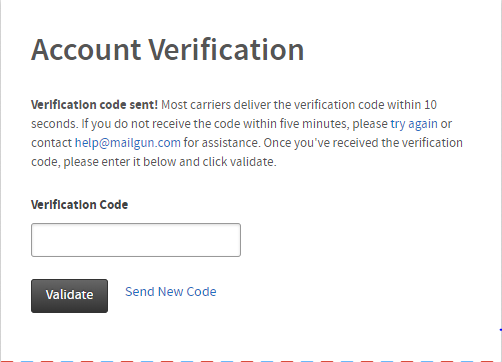
Multiple levels of verification is what allows Mailgun to better ensure email deliverability for all of their users.
You will receive an email to verify your account by clicking on the link. After that you have to enter the mobile number in text box to get the verification code on your mobile.
Once you’ve completed these steps, you’ll be taken to the login page. Go ahead and log into your new Mailgun account.
Step 3: Adding a new domain
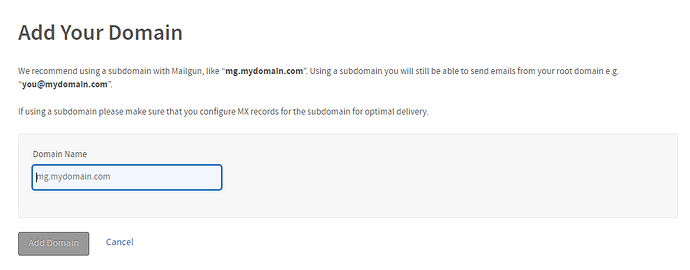
The next step is to add your domain. Click on the domain option on the left top corner and add new domain.
Step 4: Configuring domain
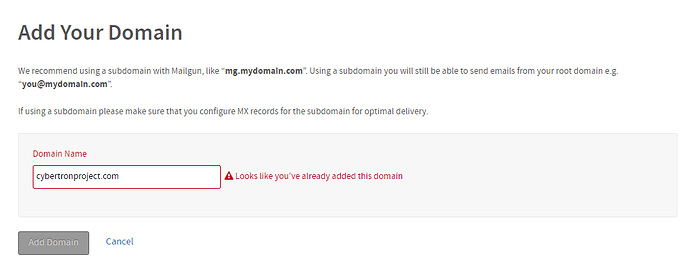
In this step you need to configure the domain for delivery. Mailgun recommends using a subdomain such as, mg.mydomain.com.
In this Example we will use our root domain.
Step 5: Mailgun DNS records
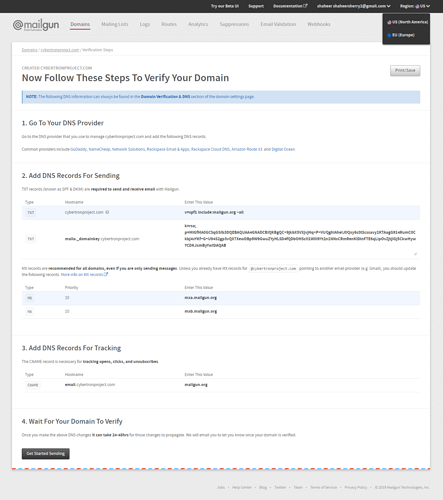
You will then need to add DNS records so that your email points to Mailgun. You can do this at your domain registrar or 3rd-party DNS provider. They require 2 TXT records, 2 MX records, and a CNAME be added.
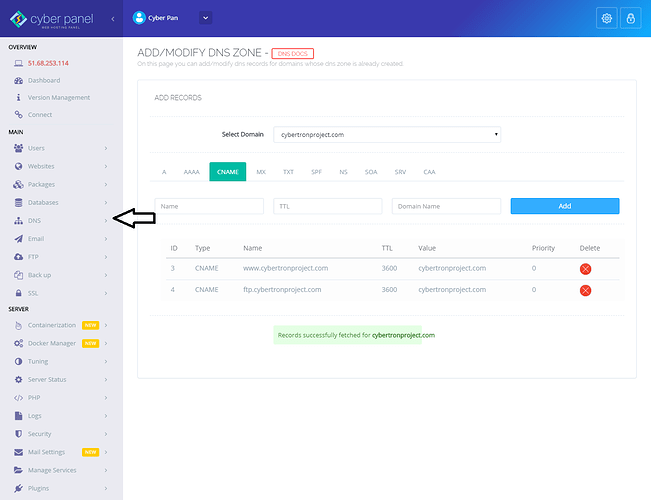
If you are a CyberPanel customer you can add DNS records by logging in to your CyberPanel. On the panel click DNS option then click Add/Delete Records, where you can easily update your DNS record. Here you have to update your TXT, MX and CNAME DNS records.
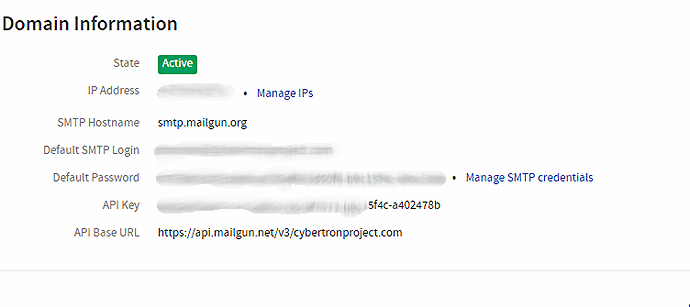
Once all the DNS records been added, the domain will show as “Active.”
Step 6: Install and Configure Mailgun plugin
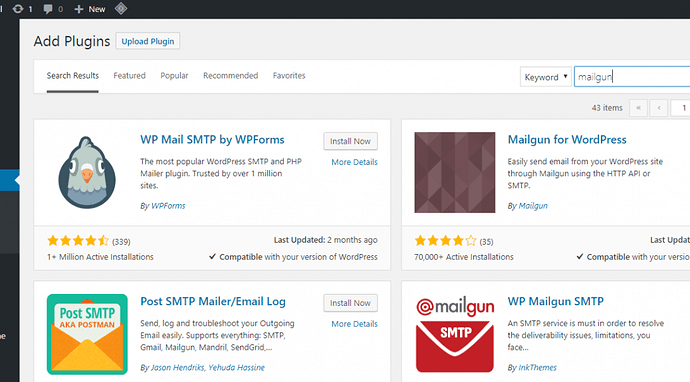
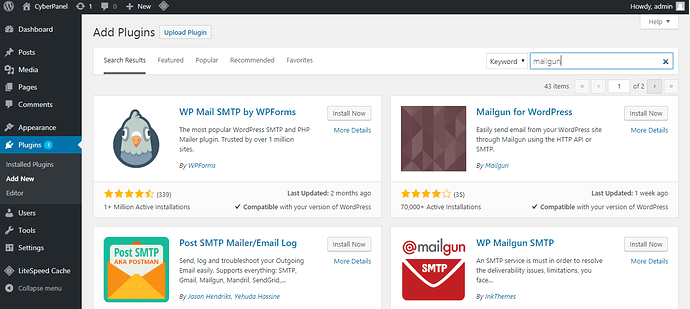
The next step is to configure your WordPress site to send emails with Mailgun. We suggest downloading and installing the free Mailgun plugin from the repository.
Go to your WordPress dashboard, click on plugins option, then add new plugin.
Step 7: Domain Activation and Mailgun plugin settings
The next step is to hook up the plugin. First, go to your domain in Mailgun and copy the API key to your clipboard.
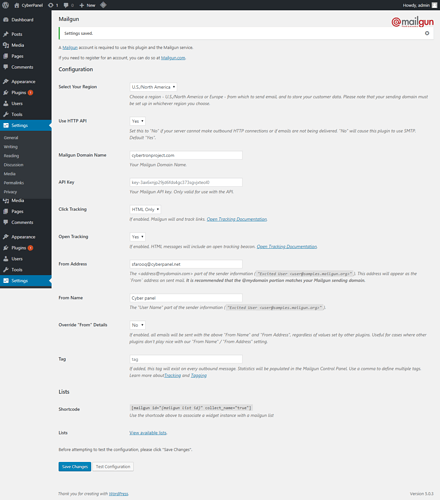
You will then need to go to the Mailgun plugin settings and configure the following:
- Choose HTTP API “Yes”.
- Add your Mailgun domain name: Example: cybertronproject.com.
- Paste your API key.
- Fill out the from address: Example: [email protected].
- Fill out the “From Name”
- Click Tracking “Html only”
Step 8: Email Testing
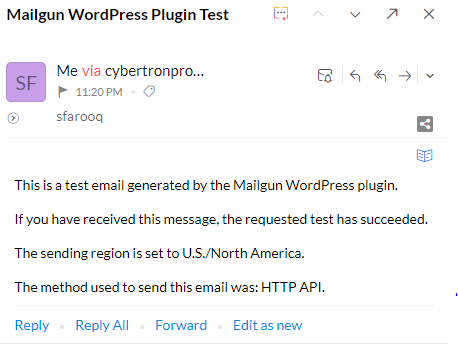
Once you have all the settings configured click on “Save Changes” button. Then click on “Test Configuration” button to get a test email and make sure everything is working fine. It will send it to the default WordPress email.

You’ll get an email like the one shown below.
And all done! All emails from your WordPress site will now send via Mailgun’s mail servers.
