Install Joomla! With the LSCache Plugin
What is Joomla?
Joomla! is another free and open source content-management system (CMS) based on the Model-View-Controller (MVC) design pattern for publishing web content. It is written in PHP, and uses Object-Oriented-Programming (OOP) techniques. It is responsive as well, as it can be used to write blogs or create websites according to the client’s needs. It is the second most used Content Management System on the internet after WordPress and comes with over 8,000 free or commercial plugins. Its features include but are not limited to page caching, RSS feeds, printable versions of pages, news flashes, blogs, search, and support for language internationalization.
LiteSpeed Technologies has recently developed a plugin which integrates Joomla! page caching into the OpenLiteSpeed web server! Meaning, while the stock page caching technique of Joomla! may provide a reverse proxy approach, OpenLiteSpeed’s cache plugin is exclusively created for OpenLiteSpeed web server and will provide performance enhancements and better resource utilization of your server.
In this article, we will be installing Joomla!’s latest version on our website hosted on CyberPanel and will set up the LSCache Plugin for Joomla!.
Step 1: Create Website
Before starting the tutorial, it is assumed that you have installed CyberPanel on your dedicated server or VPS. If not, please read the documentation on how to install it on CentOS 7. After installing CyberPanel, let’s create our website!
From the left panel, click on Websites then ‘Create Website’ and enter your domain name. After the website has been created, we are ready to install Joomla! on it.
Step 2: Install Joomla! on our Website
With CyberPanel, you can directly install Joomla! on your website, but before installing it, make sure you delete any content in the website or on the default ‘Website ready’ page before installing Joomla! from the CyberPanel or it will give errors.
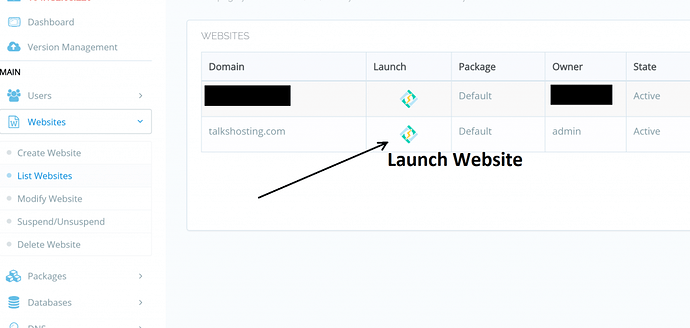
To delete content, launch your website’s Control panel and go to the Web File Manager.
Go in to Website’s Settings
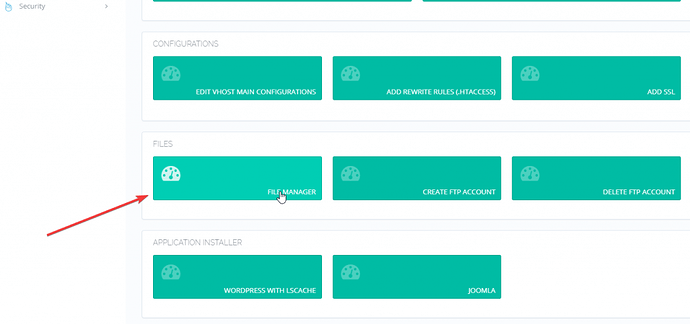
Opening File Manager of our Website!
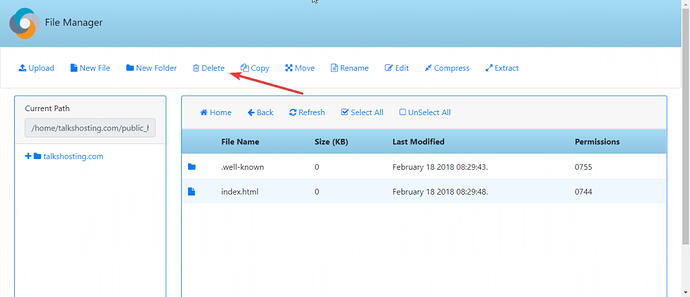
Inside the File Manager, go to the public_html folder and delete the index.html file.
Deleting index.html file
After deleting it, leave the .well-known folder as it is because it is needed for future renewal of the Let’s Encrypt Certificates. If you do not use Let’s Encrypt or you like to use Reverse Proxy (CDN) or have your own certificates, you may delete this folder.
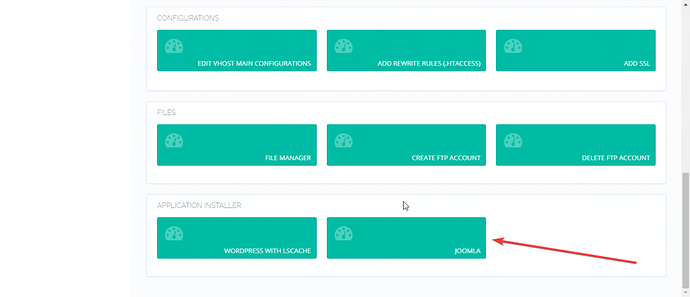
Now, to install Joomla!, close the File Manager and go back to our website’s settings. Under the File Manager section, you will see ‘Application Installer’ section. Head there and click on JOOMLA.
Click on JOOMLA to install Joomla! on your website!
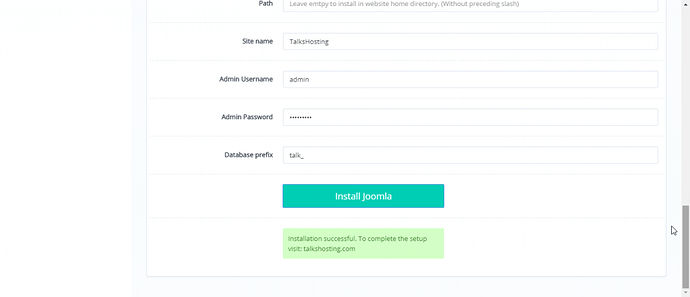
After clicking on that button, it will ask for some details. Fill it according to your needs and click on ‘Install Jooma’. It will automatically create a database and install Joomla! on your website straight away!
Joomla! Installed! YAY!
Now, if you head to yourdomain.com it will show you the basic Joomla! page. We will now go to the administration page to install the LiteSpeed Cache plugin.
Step 3: Install LiteSpeed Cache.
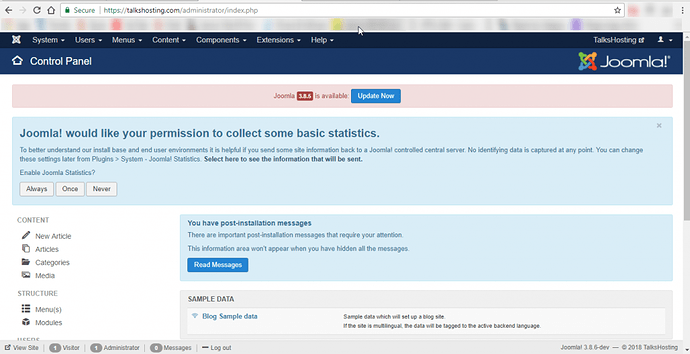
To go to the administration panel, go to yourdomain.com is available for purchase - Sedo.com and login with your username and password which you had created while installing Joomla! on your website.
Joomla!’s Administration Panel
You will need to download the lscache_plugin.zip and com_lscache.zip. These are the Cache Plugin files for Joomla!
After downloading the plugin files, go to Extensions → Install Extensions on the left Sidebar of your administration Panel. Upload the files that you just downloaded one by one, and Joomla! will automatically install them.
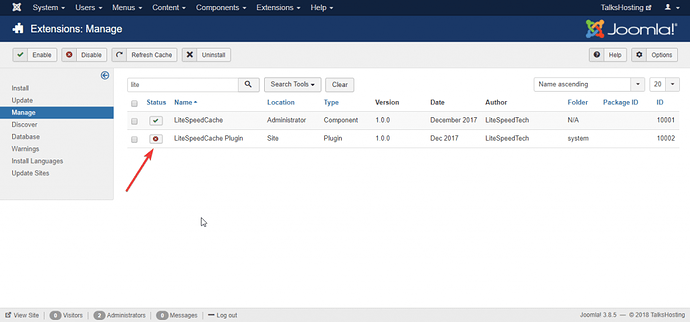
Next, go to Extensions → Manage → Manage and search for “lite” and there will appear LiteSpeed Cache Plugin. Enable that plugin by hitting the Enable icon as shown in the screenshot below.
Enabling LiteSpeed Cache plugin!
Step 4: Change Rewrite Rules (.htaccess)
After enabling the Cache plugin, we need to add some rewrite rules for the LiteSpeed Cache plugin to work.
To change rewrite rules, go to your Website’s settings in CyberPanel and click on ‘Add Rewrite Rules’ option.
Append the following lines at the bottom and Save:
CacheLookup onStep 5: Configure the LSCache Plugin
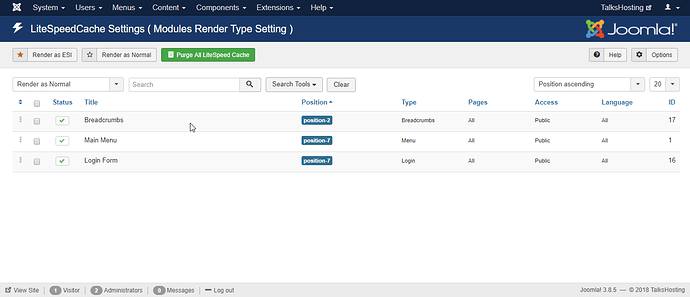
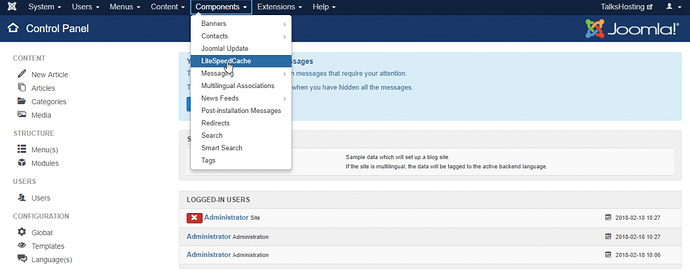
If you need to Purge cache in the future or fiddle with the Caching options, you can do it via the Joomla! panel itself. To do that, go to Joomla!’s admin panel, go to Components → LiteSpeed Cache, and it will open the Config options for you.
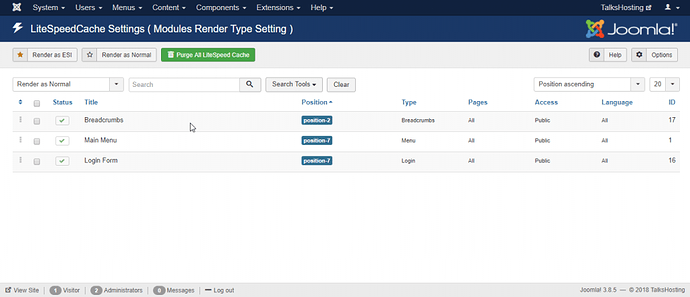
Joomla! will then open LSCache’s settings and you will be able to Purge ALL LiteSpeed Cache or make some other config changes according to your needs.
After this step, your Joomla! website will now start caching the pages for viewers from now on. To verify the caching, open your website in an Incognito Window and go to Inspect Element → Network Option and reload the page (F5).
Now, in your website’s headers, you will see the x-litespeed-cache: hit which will confirm that LiteSpeed Cache plugin is working for your site’s viewers!
Benchmarks!
With the above configuration, on a standard $5 DigitalOcean Droplet with CyberPanel installed, Joomla + LSCache configured, We tested with a number of 5000 requests with the concurrency level of 500 and were able to get these Benchmarks from an external Server with the tool “Apache Benchmark”.
Server Software:        LiteSpeed
Server Hostname:        talkshosting.com
Server Port:            443
SSL/TLS Protocol:       TLSv1.2,ECDHE-RSA-AES128-GCM-SHA256,2048,128

Document Path:          /
Document Length:        6401 bytes

Concurrency Level:      500
Time taken for tests:   14.616 seconds
Complete requests:      5000
Failed requests:        0
Total transferred:      34370000 bytes
HTML transferred:       32005000 bytes
Requests per second:    342.08 [#/sec] (mean)
Time per request:       1461.640 [ms] (mean)
Time per request:       2.923 [ms] (mean, across all concurrent requests)
Transfer rate:          2296.36 [Kbytes/sec] received

Connection Times (ms)
              min  mean[+/-sd] median   max
Connect:      757 1079 422.8    947    4056
Processing:   250  313  94.8    276     736
Waiting:      250  313  94.8    275     736
Total:       1009 1392 439.7   1258    4340

Percentage of the requests served within a certain time (ms)
  50%   1258
  66%   1312
  75%   1396
  80%   1469
  90%   1768
  95%   2201
  98%   2730
  99%   3002
 100%   4340 (longest request)
As you can see, we are able to serve almost 342 Requests with our current configuration with the above settings compared to the following bechmarks on an Apache + NGINX reverse proxy setup on a second server with 10 vCores and 12 GB RAM :
Server Software:        nginx
Server Hostname:        talkshosting.com
Server Port:            443
SSL/TLS Protocol:       TLSv1.2,ECDHE-RSA-AES256-GCM-SHA384,4096,256

Document Path:          /
Document Length:        22655 bytes

Concurrency Level:      500
Time taken for tests:   110.065 seconds
Complete requests:      5000
Failed requests:        202
   (Connect: 0, Receive: 0, Length: 202, Exceptions: 0)
Non-2xx responses:      202
Total transferred:      111034882 bytes
HTML transferred:       108951190 bytes
Requests per second:    45.43 [#/sec] (mean)
Time per request:       11006.542 [ms] (mean)
Time per request:       22.013 [ms] (mean, across all concurrent requests)
Transfer rate:          985.16 [Kbytes/sec] received

Connection Times (ms)
              min  mean[+/-sd] median   max
Connect:       11  572 1710.9     21    5979
Processing:   172 9012 17047.7   5435   90216
Waiting:      169 8963 17056.8   5379   90216
Total:        294 9583 18279.3   5508   96090

Percentage of the requests served within a certain time (ms)
  50%   5508
  66%   5889
  75%   6196
  80%   6450
  90%   8933
  95%  26279
  98%  96072
  99%  96080
 100%  96090 (longest request)
While Bench-marking, it was observed that in the Apache setup, all the Cores were being fried to 100% due to too high MySQL usage (see below). This can be explained with they theory that for each request, Apache queries the database for its information, while the OpenLiteSpeed webserver with LSCache serves the cached content to the user rather than hitting the database everytime saving the CPU usage.
Conclusion
As it is clearly seen on the benchmarks above, even the cheapest DigitalOcean droplet is able to hold almost 7.5 Times the requests with “OpenLiteSpeed + LSCache” than the standard “Apache+NGINX” webserver with Joomla! installed on our website.
After seeing the benchmarks above, you should be able to tell which one to choose for your next production content. As CyberPanel integrates OpenLiteSpeed webserver in it with other multiple packages for Website Hosting and Management, it makes it very efficient All-In-One free Control Panel for your website hosting needs.
Thanks for reading this Article, if you have any issues with any of the steps mentioned above, please ask in the comment section or hop on our Discord server for any support!
Discord server link : https://discord.gg/mcvXehH
