What is Drupal?
Drupal is a free and open source content-management system (CMS)/framework written in PHP. It’s content is all dynamic and responsive, meaning it works as well for big screen users as it does for mobile users without any issue. Drupal 6 and 7 were the earlier versions, but the latest version as of now is Drupal 8, which has better interaction and support for third party integrations as well. As it is portrayed on Drupal’s main website “Drupal 8’s core platform has more than 200 new features built in.”
In the competition of Content Management Systems, It comes 3rd in Popularity and number of downloads after Joomla in 2nd place and WordPress in 1st. CyberPanel has an integrated feature to install WordPress and Joomla with their respective LSCache plugins, directly using the Website Management Tools which facilitate your website hosted on CyberPanel and OpenLiteSpeed web server.
In this article, we will cover installing Drupal 8 on a website which is hosted on CyberPanel and further configuring the LiteSpeed Cache module for Drupal which is exclusively for OpenLiteSpeed installations. The LiteSpeed Cache module, with the help of advanced caching, serves the dynamic PHP pages as static HTML pages instead to reduce the server and database load in cases of high traffic. As a result, it tends to serve your content upto 4X Faster than normal! (See benchmarks at the end).
Step 1 : Create Website
Before starting the tutorial, It is assumed that you have installed CyberPanel on your dedicated server or VPS. If not, please read the documentation on how to install it on CentOS 7. After installing CyberPanel, let’s create our website!
From the left panel, click on Websites then ‘Create Website’ and enter your domain name. After the website has been created, we are ready to Upload Drupal on it.
Step 2 : Uploading Drupal on our Website.
For this article, we will be using the domain “talkshosting.com”, you will use your own domain at the time of setting up. Now that our website is created, we are ready to upload our contents on it!
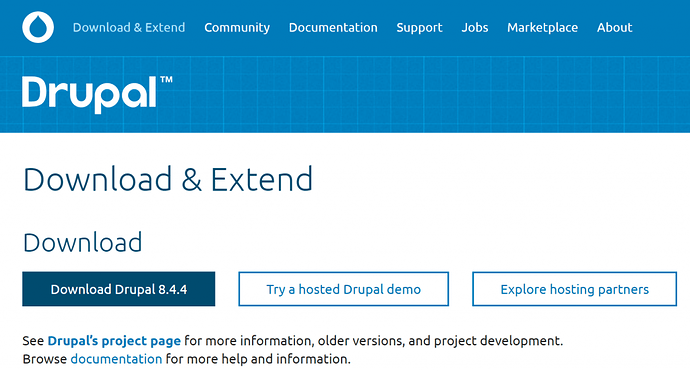
Go to Drupal’s Download page and download the latest release from there in .tar.gz format.
Downloading Drupal
After the drupal-8.x.x.tar.gz file has been downloaded, upload it to your website via either Web File Manager or FTP. For uploading it via Web File Manager, you will need to raise the PHP upload limit, for which a tutorial has been made here. After changing those limits, restart OpenLiteSpeed from the Server Status → Services status on the left sidebar.
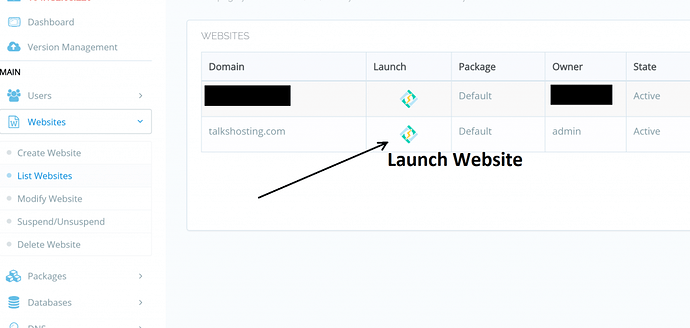
To go to web file manager, go to Websites → List Websites and Click the ‘Launch’ button next to your website.
Going to Website’s Settings
Inside the settings, scroll a bit down and click on ‘File Manager’, it will open your websites content with CyberPanel’s inbuilt file manager in a new tab. Now, click on the folder public_html and delete it. Now, upload the drupal-8.x.x.tar.gz which you had downloaded earlier through the file manager. After it has been uploaded, click on that file and Extract it by clicking Extract on top. The Drupal setup will be extracted in drupal-8.x.x folder. Rename that folder to ‘public_html’ so that the contents of our websites will be served from it. Drupal is now ready to configure. You can now also remove the drupal-8.x.x.tar.gz file!
Step 3 : Creating a Database for Drupal!
Now that Drupal’s files have been uploaded on our website, it is now ready to be configured before we shall use it. Before going to our website and configuring anything, Let’s create a database for Drupal to store its contents in!
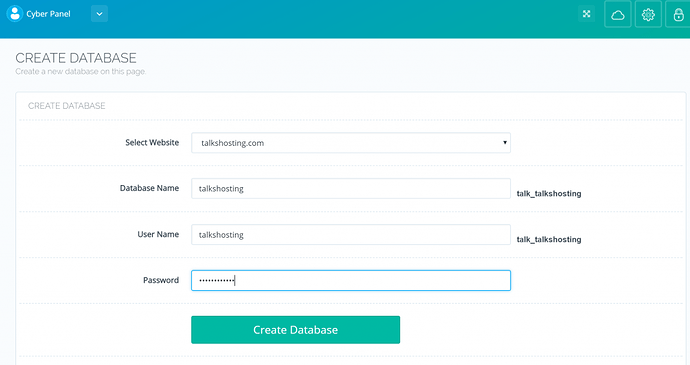
For Creating a Database, go to the left sidebar of your CyberPanel and Click on Databases → Create Database and enter your database name, the username to access it and its password. (Note : Please note the contents which are shown on the right hand side of the database name and user name fields somewhere else as well as we will need it for configuring Drupal further in the next step).
Creating a Database for Drupal!
Step 4 : Installing Drupal.
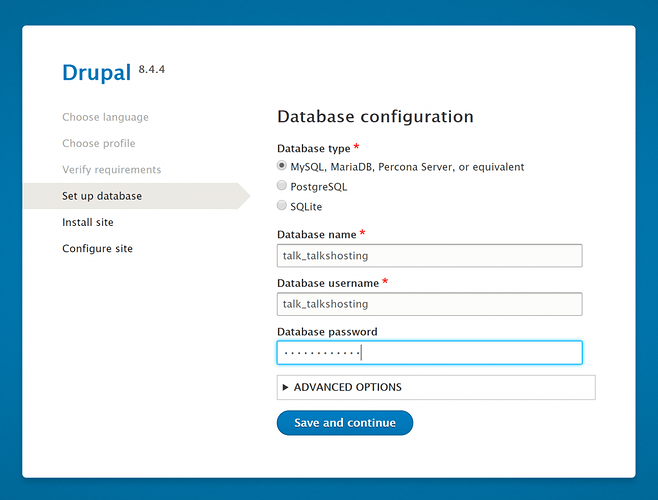
Go to your web domain now and Select your language. At the next step select Standard installation. After that, you’ll be asked for your database username, db name and password that you just created in the previous step. Enter it here.
Entering our Database information for Drupal to access
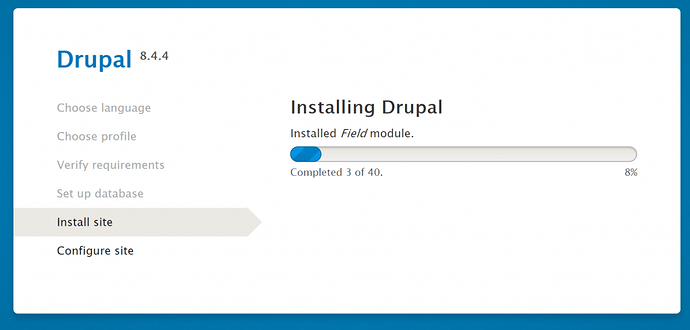
After that, click next and Drupal will install.
Drupal being Installed!
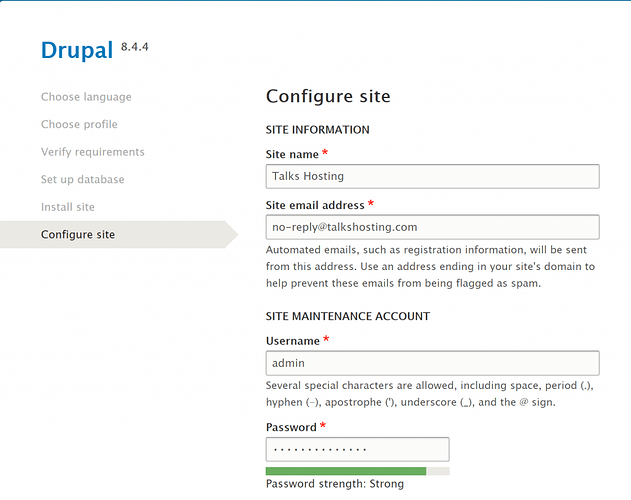
Now that Drupal is installed on your website, it will ask for Site name and other information. Enter it as you please. As we are using talkshosting.com for this process, we are entering the information that is needed for it.
Final Configuration
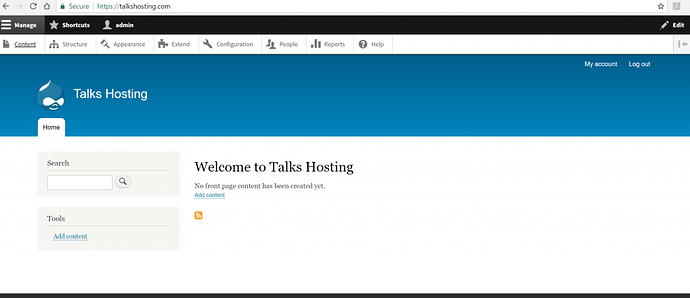
After you have completed this step, your site is now installed. Congrats!
Our site is now working, but you will notice that only the main page will work, if you try to browse anywhere else, you will be returned to a 404 page error. To fix this, we will now change the rewrite rules through CyberPanel itself.
Step 5 : Changing Rewrite Rules.
To change rewrite rules, let’s launch our Website again in CyberPanel like we did in Step 2.
Going to Website’s Settings
Scroll down to the Configurations section then click ‘Add Rewrite Rules (.HTACCESS)’. In that text area, delete everything stored previously, enter the following lines, and click Save Rewrite Rules.
ReWriteEngine On
RewriteCond %{REQUEST_FILENAME} !-f
RewriteCond %{REQUEST_FILENAME} !-d
RewriteCond %{REQUEST_URI} !=/favicon.ico
RewriteRule ^/ index.php [L]
<IfModule LiteSpeed>
CacheLookup on
</IfModule>
After you have done this, your site will now work perfectly!
Step 6 : Installing LSCache module for Drupal on OpenLiteSpeed
As CyberPanel uses OpenLiteSpeed webserver, it comes with a module for Drupal for inbuilt caching as discussed above. Therefore, lets install the Caching module on our Drupal Installation!
You need to download that module on your local computer via This Link.
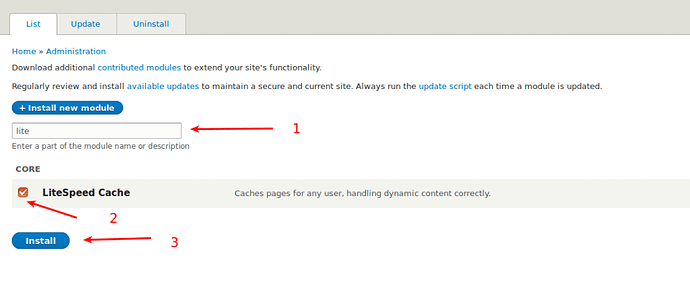
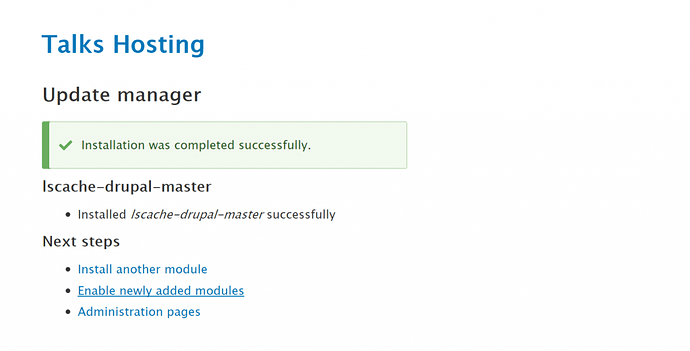
Now, go to your Drupal Installation, login to your admin account, go to Extend in the manage section. Click on Install Module at that page and upload the Drupal module which you just downloaded. The module will now get installed and you can enable it to have the effects of LiteSpeed Cache instantly!
Search for the plugins to install and Install LiteSpeed Cache!
Installing LiteSpeed Cache Module in Drupal 8
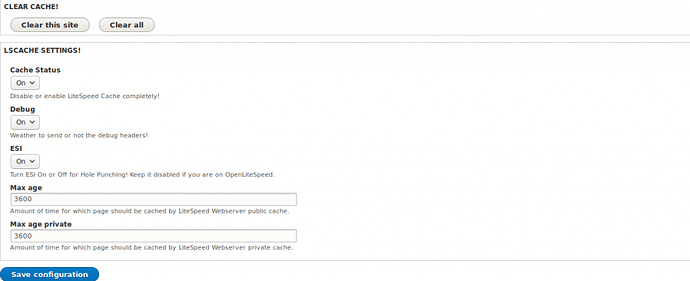
LiteSpeed Cache Plugin Configuration Options
After installing the LS Cache module, your site would be ready to serve the cached (static) content. However, inside the Module settings, there are a few options which can be configured according to your needs.
LS Cache Settings
From here, you can Clear Cache for your website. Note : the ‘Clear Cache’ option will clear the cache only for your Drupal installation but the ‘Clear All’ option will delete the cache for the entire domain which may consist of other applications running on the same domain such as WordPress/Joomla). Other options can be customized here like ‘Max age’ and ‘Max age private’ which defines for how long your website would be served as a Cached website ; after that age, the previous cache will be purged and the website will be cached once again.
If you are in a development environment, you can keep the Debug option on. Otherwise turn it off, if it is ready for production purposes, as it will stop emitting extra debugging headers for your Drupal website.
OpenLiteSpeed web server doesn’t supports ESI but LiteSpeed Technologies itself says that there’s no harm in keeping the ESI option turned on.
After configuring the above options, your website should be ready to serve cache content now. We will now do some benchmarking and the result can be found below!
Benchmarks!
Now that we have configured Drupal 8 on CyberPanel with LiteSpeed Caching enabled, lets see how it facilitates our website with the way we did it in this article, as compared to a standard Apache web server or an OpenLiteSpeed web server without LSCache module enabled.
Benchmarking Drupal 8 on Apache+NGINX Webserver
We generated traffic on our website with localhost via tool Apache Benchmark (AB) and the test was done for Apache web server with NGINX reverse proxy configured on the same server. (This configuration gives better results than standard Apache because NGINX serves static content and Apache serves dynamic content making it a bit faster than normal Apache in advanced uses).
Host node (KVM VPS) Specifications on which this benchmark was done :-
----------------------------------------------------------------------
CPU model            : Intel(R) Xeon(R) CPU E5-2670 0 @ 2.60GHz
Number of cores      : 10
CPU frequency        : 2599.996 MHz
Total size of Disk   : 84.9 GB
Total amount of Mem  : 12014 MB
Total amount of Swap : 8191 MB
System uptime        : 4 days, 5 hour 15 min
Load average         : 0.41, 0.30, 0.27
OS                   : Ubuntu 16.04.3 LTS
Arch                 : x86_64 (64 Bit)
Kernel               : 4.4.0-112-generic
----------------------------------------------------------------------
I/O speed(1st run)   : 184 MB/s
I/O speed(2nd run)   : 210 MB/s
I/O speed(3rd run)   : 336 MB/s
Average I/O speed    : 243.3 MB/s
When we generated 5000 requests on our website with a concurrency rate of 500 users, the result was :-
Server Software:        nginx
Server Hostname:        talkshosting.com
Server Port:            443
SSL/TLS Protocol:       TLSv1.2,ECDHE-RSA-AES256-GCM-SHA384,4096,256

Document Path:          /
Document Length:        8618 bytes

Concurrency Level:      500
Time taken for tests:   45.048 seconds
Complete requests:      5000
Failed requests:        0
Total transferred:      45305013 bytes
HTML transferred:       43090000 bytes
Requests per second:    110.99 [#/sec] (mean)
Time per request:       4504.822 [ms] (mean)
Time per request:       9.010 [ms] (mean, across all concurrent requests)
Transfer rate:          982.13 [Kbytes/sec] received

Connection Times (ms)
              min  mean[+/-sd] median   max
Connect:       12  267 736.6     39    3217
Processing:   541 2663 6379.3   1017   41832
Waiting:      541 2662 6379.4   1016   41832
Total:        575 2930 6998.7   1090   45038

Percentage of the requests served within a certain time (ms)
  50%   1090
  66%   1316
  75%   1598
  80%   1784
  90%   2748
  95%  19308
  98%  29271
  99%  44965
 100%  45038 (longest request)
As you can see, it is able to serve 110 Requests per second on this configuration.
Benchmarking Drupal 8 on OpenLiteSpeed webserver without LSCache
For this benchmark, we again generated traffic on our website with localhost and this time the test was done to examine the capability of OpenLiteSpeed webserver without LSCache enabled. This test was done on a standard 1 GB RAM 1vCore VPS whose specifications were :-
----------------------------------------------------------------------
CPU model            : Intel(R) Xeon(R) CPU E5-2630L v2 @ 2.40GHz
Number of cores      : 1
CPU frequency        : 2399.998 MHz
Total size of Disk   : 25.0 GB (1.2 GB Used)
Total amount of Mem  : 992 MB (66 MB Used)
Total amount of Swap : 0 MB (0 MB Used)
System uptime        : 0 days, 0 hour 6 min
Load average         : 0.08, 0.07, 0.05
OS                   : CentOS 7.4.1708
Arch                 : x86_64 (64 Bit)
Kernel               : 3.10.0-693.17.1.el7.x86_64
----------------------------------------------------------------------
I/O speed(1st run)   : 115 MB/s
I/O speed(2nd run)   : 98.7 MB/s
I/O speed(3rd run)   : 108.5 MB/s
Average I/O speed    : 107.4 MB/s
----------------------------------------------------------------------

When we generated 5000 requests on our website with a concurrency rate of 500 users, the result was :-

Server Software:        LiteSpeed
Server Hostname:        talkshosting.com
Server Port:            443
SSL/TLS Protocol:       TLSv1.2,ECDHE-RSA-AES128-GCM-SHA256,2048,128

Document Path:          /
Document Length:        8534 bytes

Concurrency Level:      500
Time taken for tests:   43.426 seconds
Complete requests:      5000
Failed requests:        0
Total transferred:      45034856 bytes
HTML transferred:       42670000 bytes
Requests per second:    115.14 [#/sec] (mean)
Time per request:       4342.641 [ms] (mean)
Time per request:       8.685 [ms] (mean, across all concurrent requests)
Transfer rate:          1012.73 [Kbytes/sec] received

Connection Times (ms)
              min  mean[+/-sd] median   max
Connect:      508  828 881.5    597    4314
Processing:  1599 3337 350.8   3354    4898
Waiting:     1598 3334 350.3   3350    4892
Total:       3397 4165 749.6   3972    7931

Percentage of the requests served within a certain time (ms)
  50%   3972
  66%   4033
  75%   4076
  80%   4121
  90%   4429
  95%   6124
  98%   7260
  99%   7582
 100%   7931 (longest request)
In this VPS with the CyberPanel (OpenLiteSpeed webserver) installed, it is able to handle 115 Requests / second despite it being a comparatively slower Box than the one we previously used.
Benchmarking Drupal 8 on OpenLiteSpeed webserver with LSCache enabled.
For this benchmark, we again used the 1 GB Digital Ocean Droplet with CyberPanel and LSCache enabled (basically, what we did in the article). Upon generating 5000 requests on our website with a concurrency rate of 500 users, the result this time was :-
Server Software:        LiteSpeed
Server Hostname:        talkshosting.com
Server Port:            443
SSL/TLS Protocol:       TLSv1.2,ECDHE-RSA-AES128-GCM-SHA256,2048,128

Document Path:          /
Document Length:        8633 bytes

Concurrency Level:      500
Time taken for tests:   12.031 seconds
Complete requests:      5000
Failed requests:        0
Total transferred:      46185000 bytes
HTML transferred:       43165000 bytes
Requests per second:    415.60 [#/sec] (mean)
Time per request:       1203.091 [ms] (mean)
Time per request:       2.406 [ms] (mean, across all concurrent requests)
Transfer rate:          3748.89 [Kbytes/sec] received

Connection Times (ms)
              min  mean[+/-sd] median   max
Connect:      517  857 305.0    759    3570
Processing:   169  286 116.8    232     695
Waiting:      169  285 116.8    231     695
Total:        722 1143 312.7   1071    4078

Percentage of the requests served within a certain time (ms)
  50%   1071
  66%   1155
  75%   1272
  80%   1326
  90%   1525
  95%   1721
  98%   2015
  99%   2095
 100%   4078 (longest request)
This time it was able to serve 415 requests/Second on this Box with the help of OpenLiteSpeed with caching enabled!
Conclusion
While it is surprising to say that the domain hosted on CyberPanel (or, OLS web server) with LiteSpeed Caching enabled on a LowEnd VPS is able to perform almost 4 times better vs. what a High-End VPS with Apache would perform, it is also shocking to know that Apache is still the most popular and most-used web server, when it isn’t as efficient! The traffic gets generated, and your server may even tend to crash but with OpenLiteSpeed web server, it is guaranteed that your server will be able to last much longer (wink, wink).
We hope you like the Benchmarks and will be able to set up Drupal 8 with LS Caching without any issues. If you did encounter any errors, feel free to ask on CyberPanel’s forums or the Discord server for any support related queries.
