DJANGO is a web application framework built with Python. DJANGO seen a tremendous growth recently, and a lot of developers are moving towards this framework. DJANGO official slogan says “the web framework for perfectionists with deadlines”. CyberPanel is also built on top of DJANGO framework, apart from that Instagram also uses DJANGO framework.
OpenLiteSpeed recently added support to run DJANGO applications at VHOST level. Now there is no need to reverse proxy your DJANGO application to gunicorn server. This also leads to increased performance.
In this tutorial we will see how we can setup a DJANGO application. (OpenLiteSpeed version 1.4.42+ is required)
Step 1: Install CyberPanel and Create Website
Before moving forward you need to install CyberPanel and Create Website. If CyberPanel is already installed, make sure to upgrade OpenLiteSpeed.
Upgrade OpenLiteSpeed on CentOS
yum update
yum upgrade openlitespeed
Upgrade OpenLiteSpeed on Ubuntu
apt-get update
apt-get upgrade openlitespeed
Install python 3.6 on CentOS
yum install python36-devel
yum install python36-pip
Install python 3.6 on Ubuntu
apt install build-essential
apt-get install python3-dev
Step 2: Install LiteSpeed Implementation of WSGI
curl -O http://www.litespeedtech.com/packages/lsapi/wsgi-lsapi-1.7.tgz
tar xf wsgi-lsapi-1.7.tgz
cd wsgi-lsapi-1.7
python3 ./configure.py
make
cp lswsgi /usr/local/lsws/fcgi-bin/
Step 3: Setup virtualevn for DJANGO Application
Note: In this tutorials we are going to use django.cyberpanel.net as example domain and cyberpanel as project name.
We will setup virtualevn in the document root of the application:
virtualenv --system-site-packages /home/django.cyberpanel.net/public_html
source /home/django.cyberpanel.net/public_html/bin/activate
pip3 install django
Step 4: Setup or Upload DJANGO Application
If you already have DJANGO application you can upload it to document root, we will create a brand new DJANGO project.
cd /home/django.cyberpanel.net/public_html
django-admin startproject cyberpanel
Open your project settings and make sure allowed hosts looks like
ALLOWED_HOSTS = ['*']
settings.py for this project will be located at /home/django.cyberpanel.net/public_html/cyberpanel/cyberpanel/settings.py
To set path for static files please add following at the end of settings.py
STATIC_URL = '/static/'
STATIC_ROOT = '/home/django.cyberpanel.net/public_html/static'
And create folder to start to collect your static files using
cd /home/django.cyberpanel.net/public_html/cyberpanel
python manage.py collectstatic
Create admin super user
python manage.py migrate
python manage.py createsuperuser
Note: Always replace django.cyberpanel.net with your domain name.
Since you are modifying/creating files via command line, you can go to File manager and click Fix Permissions so that correct permissions settings are in place.
Step 5: Setup DJANGO Application Context
Go to website launcher at https://:8090/websites/django.cyberpanel.net so that you can edit vhost Conf (Replace django.cyberpanel.net with your domain).
Scroll down and click vhost Conf and paste following at the end of the box:
context / {
  type                    appserver
  location                /home/django.cyberpanel.net/public_html/cyberpanel
  binPath                 /usr/local/lsws/fcgi-bin/lswsgi
  appType                 wsgi
  startupFile             cyberpanel/wsgi.py
  envType                 1
  env                     LS_PYTHONBIN=/home/django.cyberpanel.net/public_html/bin/python
  env                     PYTHONHOME=/home/django.cyberpanel.net/public_html/
}
env LS_PYTHONBIN=/home/django.cyberpanel.net/public_html/bin/pyhton is the location of python inside your virtualenv. Make sure you replace domain and project name in above settings accordingly.
Once done click Save and you can visit your DJANGO application at yourdomain.com, in this case, its django.cyberpanel.net. It should look like:
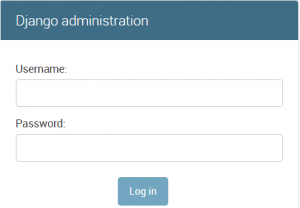
You can also check admin panel at django.cyberpanel.net/admin


