As we’ve already discussed that many people are now using CyberPanel for development/testing, and CakePHP is another popular and stable PHP frameworks that people love to develop their applications in. Earlier we saw how we can setup CodeIgniter, Laravel and Symfony application on CyberPanel. In this article we will see on how to setup CakePHP environment for either development or production use. With CodeIgniter we didn’t have to use Composer, but unfortunately we will have to use Composer to create CakePHP project.
Step 1: Install CyberPanel!
Earlier you needed to enter four commands to install CyberPanel, thanks to a small shell script which made this task easier. You just need to use one single command to start installation of CyberPanel.
sh <(curl https://cyberpanel.net/install.sh || wget -O - https://cyberpanel.net/install.sh)
After running this command it may take 20-30 minutes to complete installation. Once installation is completed you can access CyberPanel at: https://:8090 It is highly recommended to put CyberPanel on SSL.
Step 2: Create your first Website!
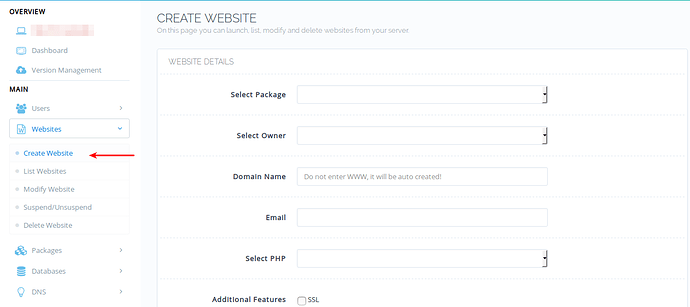
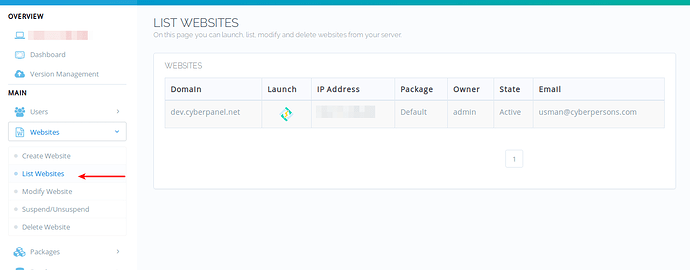
From left side bar click ‘Create Website’ under Websites. Fill in all the boxes on right, for your convenience a Default package is already created on plain install of CyberPanel so you don’t need to create one, however if needed you can create your own package too. CakePHP documentation recommends PHP version 5.6 or above so be careful on your selection of PHP on this page. After website is created make sure it appears on list websites.Step 3: Create FTP Account!
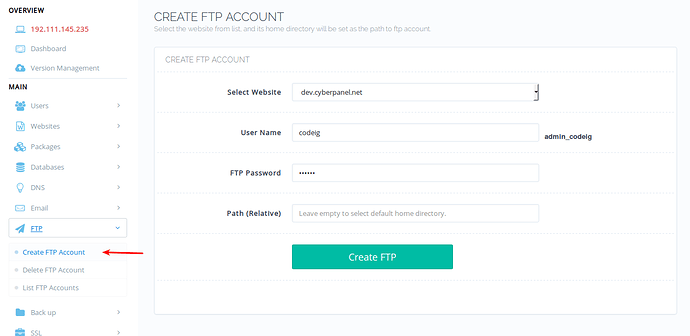
Mostly I recommend using File manager for uploading files, however, in this tutorial we are going to use FTP account, it will ease the uploading process incase we change our files, which we do very often while developing a new application.
Fill in the required details to create FTP account, leave the Path empty, so that default path is set which is /home/domain.com If you enter a custom path it will be relative to /home/domain.com/public_html, enterting custom path of cakephp will result in final path to /home/domain.com/public_html/cakephp. However leave empty in this case, since we are going to use default path.Step 4: Setup CakePHP Application using Composer!
To setup CakePHP application we need Composer, use following commands to install Composer:
cp /usr/local/lsws/lsphp71/bin/php /usr/bin/
php -r "copy('https://getcomposer.org/installer', 'composer-setup.php');"
php -r "if (hash_file('SHA384', 'composer-setup.php') === '544e09ee996cdf60ece3804abc52599c22b1f40f4323403c44d44fdfdd586475ca9813a858088ffbc1f233e9b180f061') { echo 'Installer verified'; } else { echo 'Installer corrupt'; unlink('composer-setup.php'); } echo PHP_EOL;"
php composer-setup.php
php -r "unlink('composer-setup.php');"
cp composer.phar /usr/bin/composer
This will install composer, once composer is installed we can setup CakePHP application. Setup CakePHP
cd /home/example.com/public_html
composer self-update && composer create-project --prefer-dist cakephp/app cyberpanel
mv cyberpanel/* .
cyberpanel here is the app name, you can use any name because we are eventually going to move application code to document root. Don’t forget to click Fix Permissions from File Manager because files created through composer are owned by root user.
Rewrite Rules
Normally any framework handle their own routing, similarly CakePHP also handles their own routing. But we need to adjust rewrite rules because default rules given on CakePHP site will not work with OpenLiteSpeed.
# Uncomment the following to prevent the httpoxy vulnerability
# See: https://httpoxy.org/
#<IfModule mod_headers.c>
#    RequestHeader unset Proxy
#</IfModule>

<IfModule mod_rewrite.c>
    RewriteEngine on
    RewriteRule    ^/(\.well-known/.*)$ $1 [L]
    RewriteRule    ^/$    webroot/    [L]
    RewriteCond %{ORG_REQ_URI} !/.filemanager
    RewriteRule   /(.*) webroot/$1
    RewriteCond %{REQUEST_FILENAME} !-f
    RewriteRule . /webroot/index.php [L]
</IfModule>
Use rewrite rules guide to setup rewrite rules on CyberPanel. You have successfully setup a CakePHP project on CyberPanel, incase you already have a ready-made application you might need to skip few steps and just upload your site and update rewrite rules and you should be ready to go.
LiteSpeed Web server Specific Cache Development
This is an optional step to boost the performance of your CakePHP application in case you are developing your application from scratch, however, if you are using a premade application by someone else you can ask them to integrate caching in your application. CakePHP also follows MVC pattern just like any other web application framework, I am not a CakePHP expert, but reading their documentation I’ve setup a very simple page to demonstrate how you can leverage OpenLiteSpeed cache module by making your website cache friendly, if you follow this pattern from start it will be easier later. Any paths refenreced below is relative to the document root. Navigate to: src/Controller/ Create a controller file here named: LitespeedController.php It should contain this content:
<?php

namespace App\Controller;

use App\Controller\AppController;

class LitespeedController extends AppController
{
    public function index()
    {
       $response = $this->response->withHeader('X-LiteSpeed-Cache-Control','public, max-age=120');
       return $response;
    }

}
This is literally the basic example of how you can use LSCache related X-LiteSpeed-Cache-Control header to control cache, in this case, we told LSCache to cache this page for 120 seconds.
curl http://dev.cyberpanel.net/litespeed head
HTTP/1.1 200 OK
X-Powered-By: PHP/7.2.2
Content-Type: text/html; charset=UTF-8
X-Litespeed-Cache-Control: public, max-age=120
X-Litespeed-Cache: hit
Date: Tue, 24 Apr 2018 10:35:09 GMT
Server: LiteSpeed
Connection: Keep-Alive
This is a very dumb way of caching a page, but for a demonstration, it fulfills the purpose. If you visit for the first time OpenLiteSpeed will get this page from backend and next time OpenLiteSpeed will serve this page from cache, and you will see an additional header as mentioned above. An important additional header here is: X-Litespeed-Cache: hit This was a really the simplest example of enabling cache, there are countless possibilities you can read more details on how you can make your application cache friendly using cache developer guide. It can be a tiring task at first, but it will pay off later. Once the page is served via cache you can verify by making changes in your view file, any changes made will not reflect until 2 minutes are passed. Do note that OpenLiteSpeed does not support ESI, however, LiteSpeed Enterprise does.
Cache invalidation and tag-based caching
In our example we’ve not performed any proper cache invalidation or tag based caching, which is really important when you build cache friendly application, so make sure you use tag-based caching and tag your web pages accurately so you can invalidate cached pages later. To tag a page you can use X-LiteSpeed-Tag, a simple example can be:
<?php

namespace App\Controller;

use App\Controller\AppController;

class LitespeedController extends AppController
{
    public function index()
    {
       $response = $this->response->withHeader('X-LiteSpeed-Cache-Control','public, max-age=120')
          ->withHeader('X-LiteSpeed-Tag', 'page1, page2');;
       return $response;
    }

}
Now our page at /litespeed is tagged with two parameters (page1, page2). If something changes on backend related to either of these tags you can tell LSCache to purge any page containing these tags using another response variable: X-LiteSpeed-Purge, more details here.


