Mautic is one of the most powerful opensource email automation software. Many small to medium businesses around the world use some sort of email automation to increase their sales and stay ahead by using email stats such as open rate, clicks from the emails and how many people actually converted through your campaigns.
And guess what? Mautic do exactly that and it is completely free if you know how to set it up.
So if you are running an e-commerce store then email marketing helps you to nurture your potential clients through regular email communication (although you should avoid sending too many emails)
Mautic + WooCommerce ?
During WooCommerce installation they suggest you to install MailChimp. MailChimp is pretty much the paid alternative of Mautic. Initially for new stores you won’t care if you use MailChimp or Mautic but as your store and contacts grow, your costs will grow exponentially with MailChimp.
Although if you are a newbie then better stick to MailChimp as it is easy to integrate with WooCommerce.
In this article we will learn how to integrate Mautic into your WooCommerce store so that you can send marketing emails to your clients. You can segment your customer based on the custom fields and then have them go through different campaigns according to your business needs.

Installing Mautic on CyberPanel
Before we move forward with the tutorial you need to install Mautic, we’ve a detailed guide on how to install and configure Mautic using CyberPanel:
How To Install And Setup Mautic On CyberPanel
Generate API Credentials
After installing Mautic you need to create and obtain API credentials from Mautic, steps are as follows:
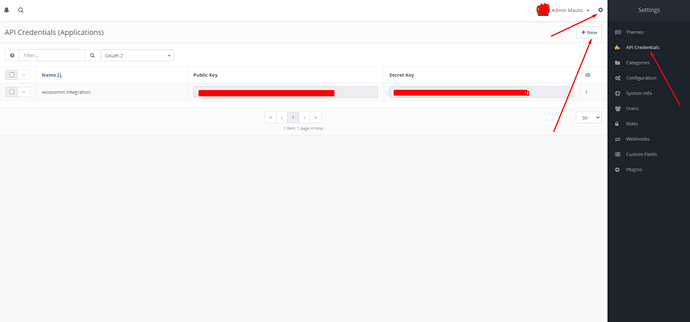
Goto to your Mautic Dashboard then click setting icons from top right corner followed by clicking on API Credentials from the menu. You will see a new page where you can create new API keys using the New button.
Authentication Protocol: OAuth 2
Name: Anything that you can remember later.
Redirect URL: yourdomain.com is available for purchase - Sedo.com
Once created you will be presented with client id and secret id, save them in a safe place as we will need them while we configure the WordPress Plugin.
Installing and setting up WooCommerce Store
You also need a WooCommerce Store up and running, for that you can also read our previous guide:
How to deploy and setup WooCommerce store in 10 minutes?
Once Mautic and WooCommerce are installed and ready, you can install and configure Mautic for WooCommerce plugin for complete email automation.
How to set up Mautic for WooCommerce
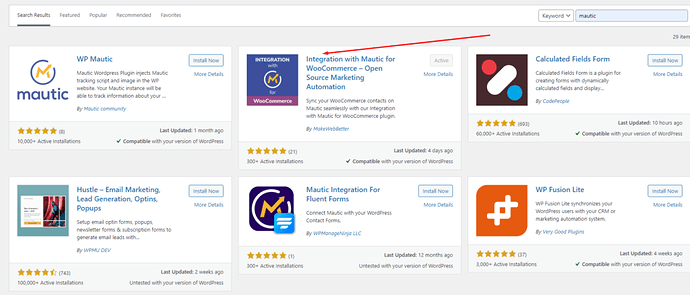
First, you need to download and install a WordPress plugin, search mautic on WordPress plugin window and install the plugin as pointed by the image below:
Once the plugin is installed, we need to connect plugin with our Mautic Installation so that contacts can be synced to Mautic.
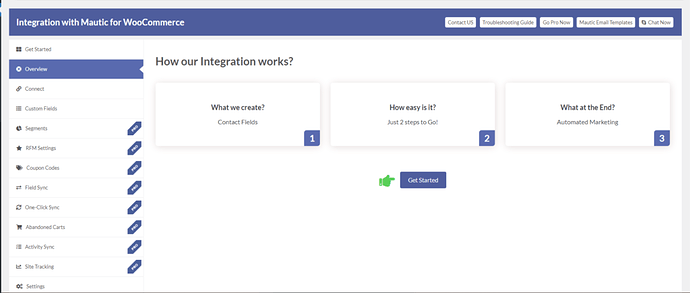
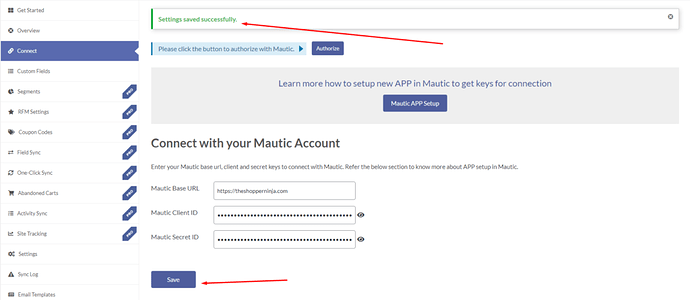
Click Get Started and you will land on a page that looks like:
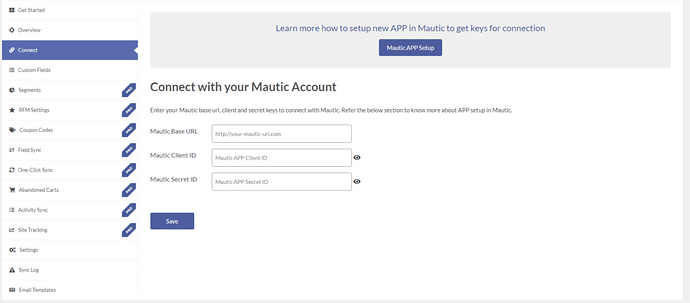
Mautic Base URL: This is the URL where you have installed Mautic.
Mautic Client ID: This will be client id, which you got above while generating API credentials in Mautic.
Mautic Secret ID: This will be secret id, which you got above while generating API credentials in Mautic.
Finally after adding all the details click Save, and the plugin is now ready to sync your contacts to Mautic. You can also view sync logs to see if plugin is able to sync your contacts to Mautic.
Go ahead and create a test order in your WooCommerce store and see if your contact is syned to Mautic. Once your contact is successfully synced to Mautic, then you have unlimited possibilities in your hand as to how you design your email campaigns.
Create Segments Based on these contacts fields
In the free version of this plugin you can only add contacts to segments based on the contact fields you created above. Learn more as to how you can add contacts to different segments using filters.
Once you are done creating segments you can then automatically send emails to those contacts using Mautic Campaigns.
This way you will have complete email automation at your hand.
