This article will help you install WordPress with the LSCache plugin on OpenLiteSpeed using LSPHP. We are also going to see how we can use free Lets Encrypt SSL to secure your WordPress site.
This article guides you through installing and configuring OpenLiteSpeed web server, MariaDB as a database management system, LiteSpeed PHP, LetsEncrypt SSL to secure your website and Pure-FTPD (File Transfer Protocols Daemon) in case you want to use FTP to transfer WordPress files from your computer to server. The result would be to create a WordPress site on a domain (faizan.cyberpanel.net with the issuance of SSL Certificate) using OpenLiteSpeed as a web server.
Prerequisites
- Root user account, or non-root user account with Sudo privileges on your server.
- Centos 7.x installed on VPS/Server.
Step 1: Set up OpenLiteSpeed Web Server, MariaDB and PHP on Centos 7
Step 1.1: Enable LiteSpeed Repository
A repository is a storage location where software packages are retrieved and installed on a server. We can install OpenLiteSpeed without compiling it by directly adding the LiteSpeed repository. Use the command below to enable the repository:
sudo rpm -ivh http://rpms.litespeedtech.com/centos/litespeed-repo-1.1-1.el7.noarch.rpm
Step 1.2: Installation of Components
Step 1.2.1
Now that we can access LiteSpeed repositories, we can set up the server along with the MariaDB database management system by using the following command:
sudo yum install OpenLiteSpeed mariadb-server
Step 1.2.2
Different versions of PHP are available in LiteSpeed repositories. We will install PHP version 5.6 along with the PHP extension needed to connect with the MariaDB database management system.
sudo yum install lsphp56 lsphp56-mysql
Step 1.2.3
LSPHP denotes LiteSpeed PHP. You can also search for various available extensions. Replace 56 with the corresponding PHP version to search for extensions of other PHP versions:
yum search lsphp56
Step 1.2.4
You can also install all the extensions for LSPHP 5.6 using the command below:
sudo yum install lsphp56-*
Step 1.3: Setting up the Default Admin Password
To execute and change the default admin password for OpenLiteSpeed’s WebAdmin Console, use the following command and set it to 123456:
sudo /usr/local/lsws/admin/misc/admpass.sh
It will ask for a username but by default, the admin username is used. You can press Enter to accept, and use the password 123456 on a temporary basis. Later, you can change your temporary password to a strong password for protection.
Step 1.4: Adding a New PHP Link
By default, OpenLiteSpeed will use the PHP at /usr/local/lsws/fcgi-bin/lsphp5 We will create a symlink to our installed PHP version so that OpenLiteSpeed can use the PHP 5.6 that we installed earlier because it contains the MySQL extension which is required by WordPress.
sudo ln -sf /usr/local/lsws/lsphp56/bin/lsphp /usr/local/lsws/fcgi-bin/lsphp5
Now, the PHP version 5.6 at /usr/local/lsws/lsphp56/bin/lsphp will be used by OpenLiteSpeed to process PHP files.
Step 1.5: MariaDB Configuration
Step 1.5.1
Start MariaDB by using following command:
sudo systemctl start mariadb
Step 1.5.2
Enable MariaDB service automatically, when we boot our system:
sudo systemctl enable mariadb
Step 1.5.3
Run the first time command to set up and configure MariaDB:
sudo mysql_secure_installation
First, it will ask for the root password for Maria DB, but since we haven’t set one, press the Enter key to proceed. Now, it will ask you to set the root password. Provide a secure and strong root password to log into MariaDB.
For the rest of the questions, you can press Enter to continue and you will successfully install MariaDB on your server along with OpenLiteSpeed and LSPHP.
Step 1.6: Confirmation
Now we will confirm the OpenLiteSpeed web page and Admin interface.
Step 1.6.1
You can check the status of your OpenLiteSpeed web server using the following command, which provides a LSWS PID:
sudo service LSWS status
Step 1.6.2
You can also browse to your server’s domain name or IP address on port 8088 to view the following OpenLiteSpeed default page:

Now you have successfully installed OpenLiteSpeed web server which is running on port 8088.
Step 1.6.3
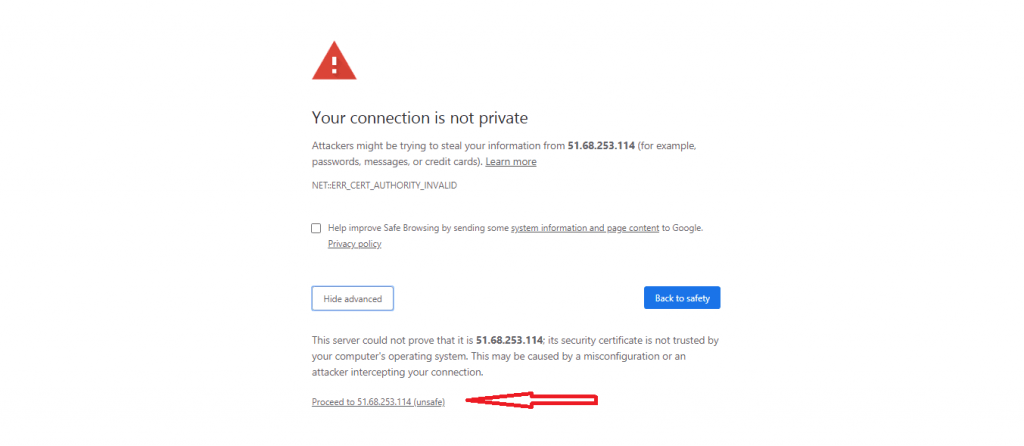
Log into the OpenLiteSpeed administrative interface by browsing to your server’s domain name or IP address on port 7080:
https://your-IP-Address:7080
You will see a browser warning for an invalid SSL certificate, but you can proceed by clicking the “Proceed” link as shown:
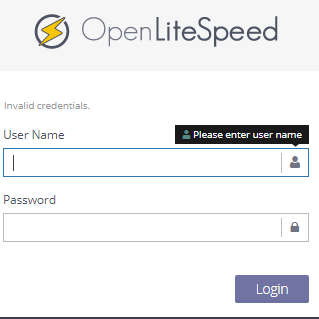
Step 1.6.4
After proceeding, it will take you to the OpenLiteSpeed administrative interface, where you will enter your username and default password.
Step 1.6.5
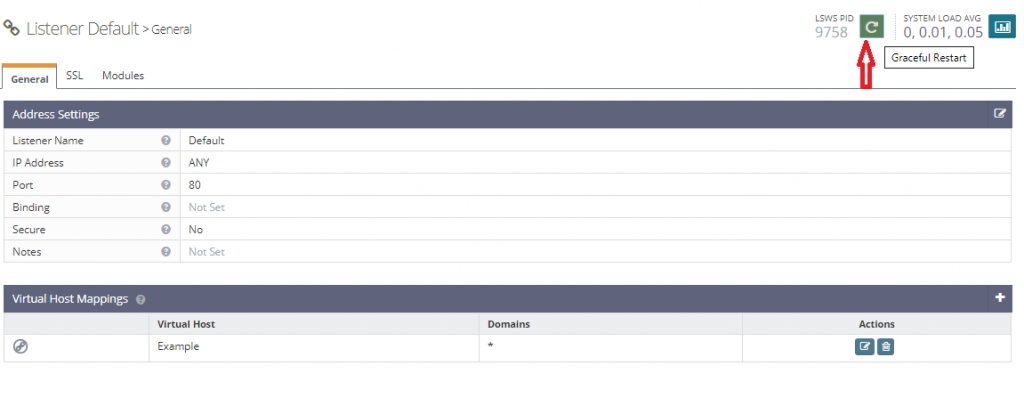
Now you are on your main server management dashboard.

Step 1.7: Change Port for the Default Page
Log into your the OpenLiteSpeed administrative interface. Go to Listeners > Listener List > View/Edit Button > from main menu bar of your dashboard, and change port 8088 to conventional port 80. Save the changes and restart the server.
Now we have installed OpenLiteSpeed web server, MariaDB and PHP version 5.6 on Centos 7. OpenLiteSpeed web server and its administrative interface provides useful features to run and manage your websites in a user-friendly environment.
Step 2: Set up WordPress with OpenLiteSpeed Web Server on Centos 7
WordPress is the most powerful website creation tool in the world. It is the prevalent content management system (CMS). WordPress owes its popularity to a user-friendly interfance for blog, website, and post management that doesn’t require a user to know any programming languages. WordPress websites are set up on top of a database back-end system that uses PHP scripts to execute the processing of dynamic content.
Let’s set up WordPress with OpenLiteSpeed on CentOS 7.
Step 2.1: Prerequisites
- Root user account/Non-root user account with Sudo privileges on your server.
- Installed and configured OpenLiteSpeed web server with PHP and MariaDB.
At this point, you must have successfully installed the above prerequisites to move ahead.
Step 2.2: Creating a Database and Database User on MariaDB for WordPress
To create a database and database user for WordPress, we need to log into MariaDB with the following command:
mysql -u root -p
It will ask for the administrative password for MariaDB that you entered during installation.
Once you are logged into MariaDB, you will need to create a database for WordPress. You may choose any name for your database, but we will use cyberpanel for a simple example.
CREATE DATABASE cyberpanel;
Now we will create a database user and grant it access to manage the database that has just been created. We will create a user by the name of cyberpaneluser but, again, you may name it whatever you like. Also, you can replace the password in the command section to keep it strong. We will be using password for simplicity.
GRANT ALL ON cyberpanel.* TO cyberpaneluser@localhost IDENTIFIED BY 'password';
Use the flush command to make your changes available to the current MariaDB process.
FLUSH PRIVILEGES;
Now, exit out of MariaDB to your regular shell.
exit
Step 2.3: Installation of Necessary PHP Extensions for WordPress
Earlier we installed PHP 5.6 from LiteSpeed repositories. WordPress requires some additional extensions that we will install now using the command below:
sudo yum install lsphp56-gd lsphp56-process lsphp56-mbstring
Now, these extensions will automatically be available to OpenLiteSpeed web server to run WordPress.
Step 2.4: Configuration of Virtual Host for WordPress
Step 2.4.1
For the configuration of a Virtual Host, navigate to OpenLiteSpeed’s administrative interface by browsing to your server’s domain name or IP address on port 7080 i.e. https://your-IP-Address:7080
Step 2.4.2
Enter your username and default password to log in, then go to Virtual Hosts from the main dashboard menu bar on the left and follow the steps below:

Step 2.4.3
Press the add button on the top right corner. The following window will be opened.
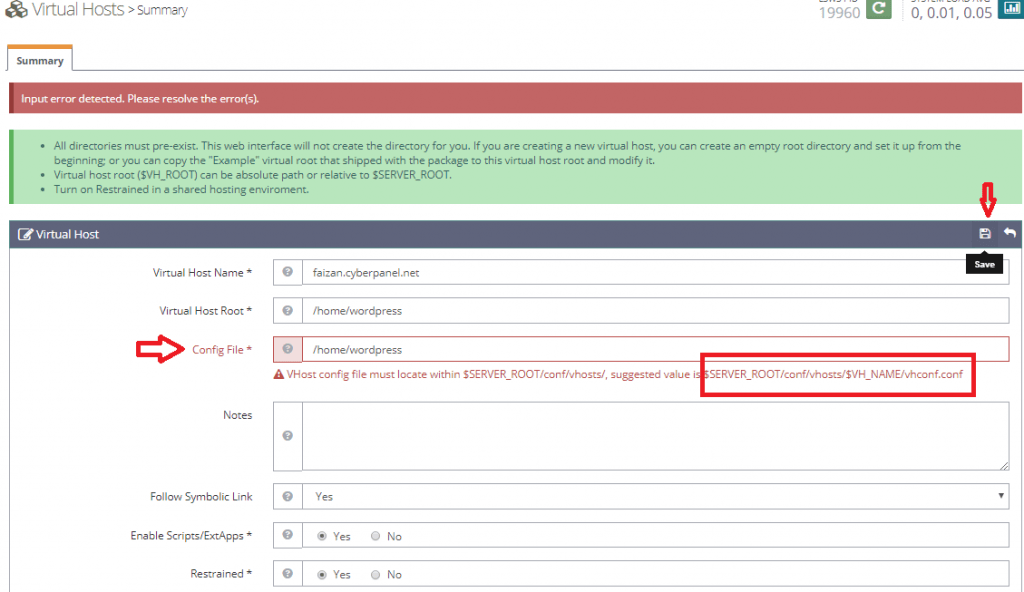
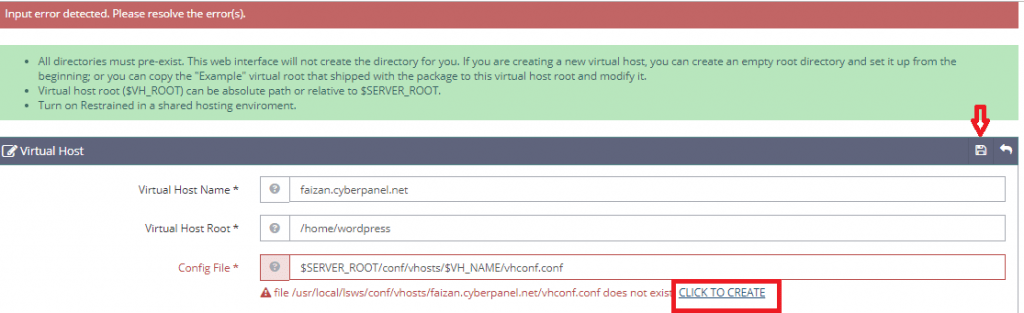
- Virtual Host Name is the domain name on which WordPress will be running. (Example:
faizan.cyberpanel.net) - Virtual Host Root is the path for all WordPress files to reside. (Example:
/home/wordpress) - Config File is the path where your configuration file will be placed for this virtual host. When you click Click to Create, a system-generated config file will be placed in the specified file location. (Example:
$SERVER_ROOT/conf/vhosts/$VH_NAME/vhconf.conf) - Say
Yesto Enable Scripts/External Apps. - Say
Yesto Enable Restrained. - Press Save and restart your server.
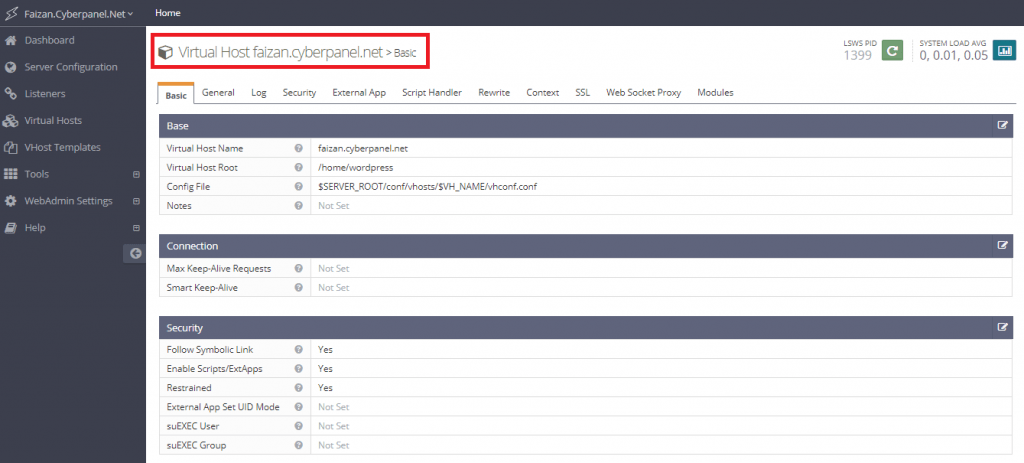
Now a Virtual Host has been created and is called “faizan.cyberpanel.net”:
Step 2.4.4
Navigate to Virtual Hosts > faizan.cyberpanel.net > General and press the edit/view button to make the following changes:

- Document Root can be an absolute path or relative to
$SERV_ROOTor$VH_ROOT. This path will be similar to the path of Virtual Host Root, i.e./home/wordpress. - Domain Name is
faizan.cyberpanel.net, and is the domain where WordPress will be running. - Domain Aliases is a list of alternate domain names that can be used to refer to this domain, i.e.
www.faizan.cyberpanel.net - Save your changes.
Step 2.4.5
Navigate to ** Virtual Hosts > faizan.cyberpanel.net > General > Index Files** and press the edit/view button. In the Index files field, add index.php before index.html to allow PHP index files to take precedence. Now, save changes and restart your server.

Step 2.4.6
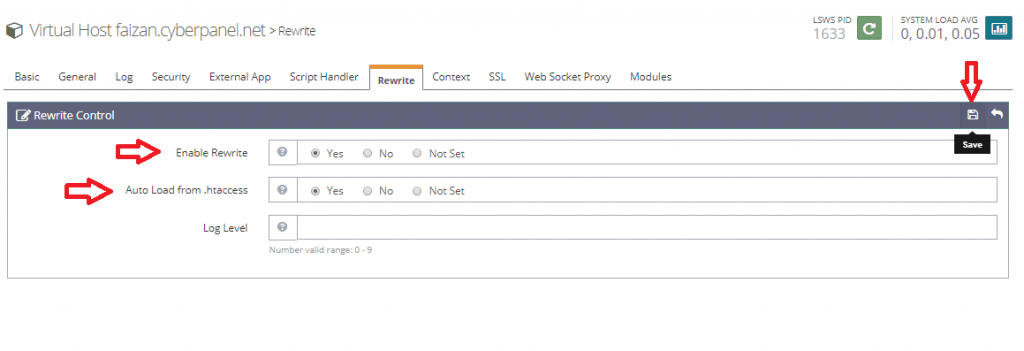
Navigate to Virtual Hosts > faizan.cyberpanel.net > Rewrite Rules, press the edit/view button, and make the following changes:
- Set Enable Rewrite to
YES. - Set Auto Load from .htaccess to
YES. - Save changes and restart your server.
Step 2.4.7
Navigate to Virtual Hosts > faizan.cyberpanel.net > Script Handler, press the edit/view button, and make the following changes:
- Set Suffixes to
lsphp. - For Handler Type, choose
Litespeed SAPIfrom the drop-down list. - For Handler Name, choose
[server level] lsphp. - Save changes and restart your server.

Step 2.4.8
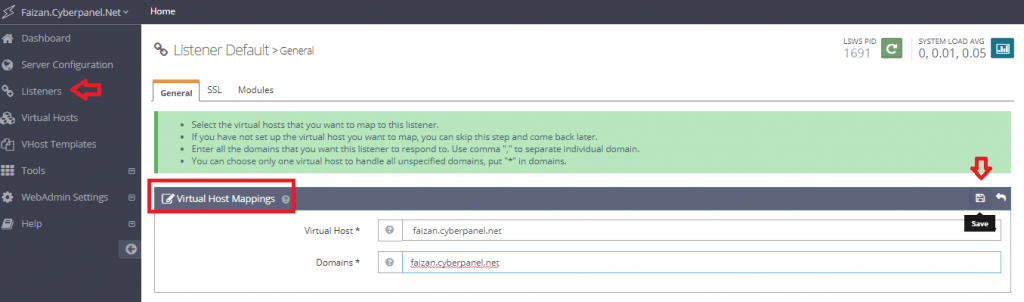
From the OpenLiteSpeed administrative main dashboard, navigate to: Listeners > Listener List > Virtual Host Mappings, press the edit/view button, and make the following changes:
- Set Virtual Host to
faizan.cyberpanel.net. - Set Domains to
faizan.cyberpanel.net - Save changes and restart your server
At this point, we have completed the necessary virtual host tasks required to run WordPress on faizan.cyberpanel.net. Now, we will install and configure WordPress in the /home/wordpress directory on CentOS 7.
Step 2.5: Install and Configure WordPress
Step 2.5.1
Now we are ready to download and install WordPress to the /home/wordpress directory that we set up on the Virtual Host Root and Document Root.
cd /home
wget https://wordpress.org/latest.tar.gz
Step 2.5.2
Extract WordPress:
tar xzvf latest.tar.gz
Now, WordPress has been installed in /home/wordpress.
Step 2.5.3
Set permissions on the WordPress directory so that the user which runs the web server may make changes through the WordPress interface.
chown -R nobody:nobody /home/wordpress/
Now we have successfully downloaded and extracted WordPress in the /home/wordpress directory.
Step 2.6: Complete Installation through the WordPress Interface
Step 2.6.1
Now, with the files downloaded to /home/wordpress, we can access WordPress by going to the faizan.cyberpanel.net/index.php domain that we set up for running WordPress in Virtual Hosts.

Step 2.6.2
Press Continue to proceed; the next page will ask you to enter the following things for validation:
- Database Name, i.e.
cyberpanel. - Username, i.e.
cyberpaneluser. - Password, i.e.
password.
Step 2.6.3
After adding the above information, enter Site Title, Username, Password, and Your Email for authentication.

Press the Install WordPress button.
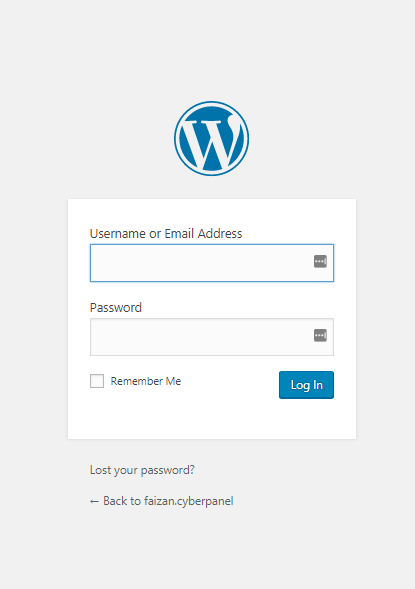
Step 2.6.4
Enter your username and password to log into the main dashboard of your WordPress website:
Step 3: Set up the LSCache Plugin
The LSCache plugin for WordPress works by generating static HTML pages of your WordPress website and saving them on your server. The main benefit of this feature is that when a user tries to access a website, LSCache provides a lighter HTML page, instead of running the heavy PHP scripts, and gathering data from the beginning. LSCache is installed on servers to improve the load time of a website through this process.
Prerequisites
- Openlitespeed Web Server Installed
- WordPress Installed
- Virtual Host set up
- Listener set up
Step 3.1: LSCache Configuration
The LSCache server module installed and enabled itself when you first set up OpenLiteSpeed. You need to set the LSCache parameters to the following by going to Openlitespeed’s Administrative Interface > Main Dashboard > Server Configuration > Modules > Server Modules Definition > View/Edit Button > Module Parameters.
checkPrivateCache   1
checkPublicCache    1
maxCacheObjSize     10000000
maxStaleAge         200
qsCache             1
reqCookieCache      1
respCookieCache     1
ignoreReqCacheCtrl  1
ignoreRespCacheCtrl 0

enableCache         0
expireInSeconds     3600
enablePrivateCache  0
privateExpireInSeconds 3600
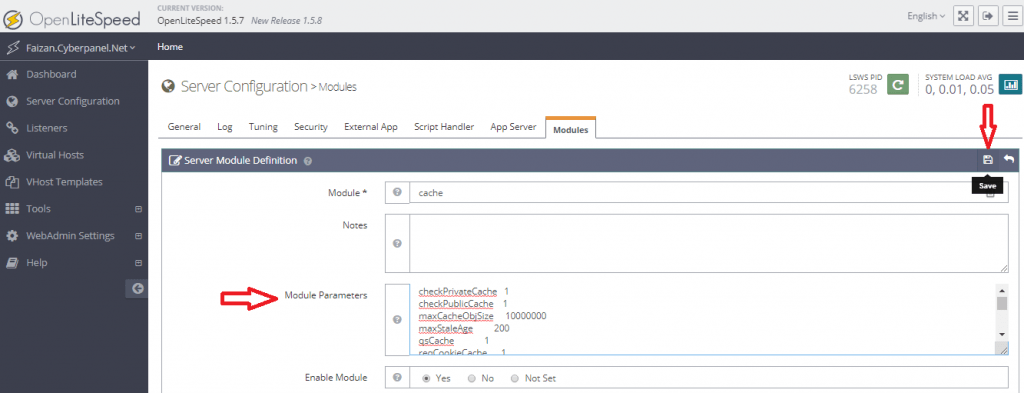
Save changes and restart your server.
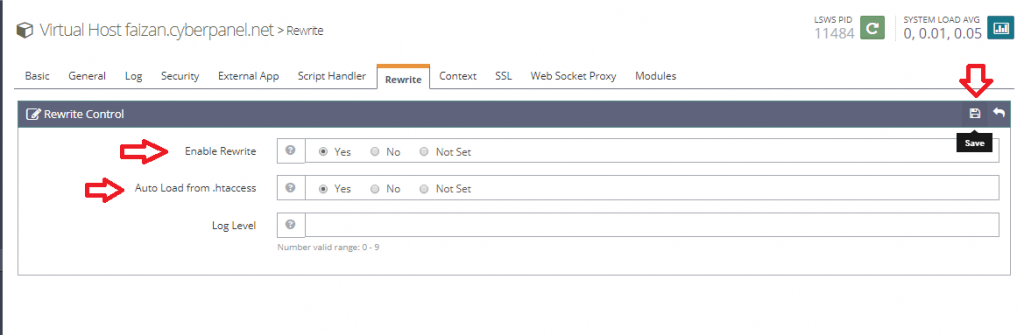
Step 3.2: Set LSCache Rewrite Configuration for Virtual Hosts
Now, go to Virtual Hosts > faizan.cyberpanel.net > Rewrite Rules, press the edit/view button, and make the following changes:
- Set Enable Rewrite to
YES. - Set Auto Load from .htaccess to
YES. - Save changes and restart your server.
Step 3.3: Activate LSCache WordPress Plugin
- Log into your WordPress Admin Dashboard (
your.domain.com/wp-admin). - Click on Plugins > Add New.
- Search for
LiteSpeed Cache. - Click the Install button under the LSCache plugin name.
- Now click on the Activate Plugin link.
Step 3.4: Verify LSCache Activation
- Go to your website’s homepage.
- Right-click and select Inspect.
- Refresh your page.
-
After the page loads, click on the Inspector’s Network tab.
- Locate and click the resource that contains your URL.
- Click the Headers sub-tab.
- Scroll down to the response header section where you should see the following result:
X-LiteSpeed-Cache: hit
This means the LSCache plugin for WordPress is successfully activated and is caching your site.
Step 4: Set up LetsEncrypt SSL on CentOS 7
SSL stand for Secure Socket Layer, and it is used to ensure privacy, authentication and data protection in Internet communication. It uses the HTTPS protocol and encryption to secure your website from threats and an insecure environment.
Step 4.1: Install Acme.sh
To install acme.sh, execute the command below:
wget -O - https://get.acme.sh | sh
You will see an output in which acme.sh is installed to /root/.acme.sh/ directory**.**
Step 4.2: Issue a LetsEncrypt Certificate
The following command is used to issue a LetsEncrypt certificate for a single domain, i.e. faizan.cyberpanel.net.
/root/.acme.sh/acme.sh --issue -d faizan.cyberpanel.net -w /home/wordpress
/root/.acme.sh/acme.shis the path where acme is installed.faizan.cyberpanel.netis the domain name that needs to be secured./home/wordpressis the document root for that domain. It needs to be supplied so that acme can do its verification.
Output

In the output, the certificate key and full chain certificate key are outlined in red. Now you will need to enter these two keys in the Virtual Hosts area.
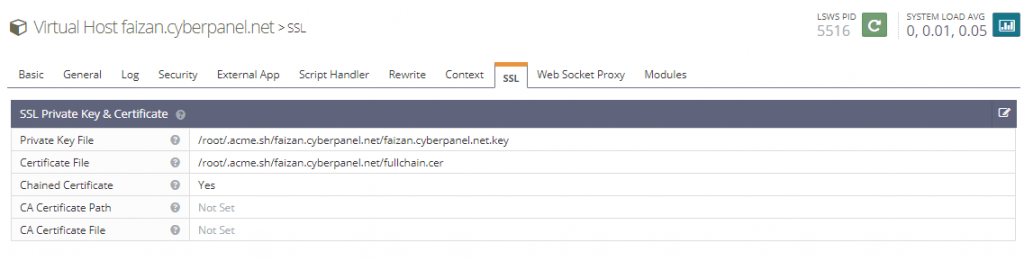
Step 4.2.1
Navigate to Virtual Hosts > faizan.cyberpanel.net > SSL > SSL Private Key and Certificate, press the edit/view button, and make the following changes:
- Add the output certificate key to Private Key File.
- Add the output full certificate key to Certificate File.
- Set Chained Certificate to
YES. - Save changes and restart your server.
Step 4.2.2
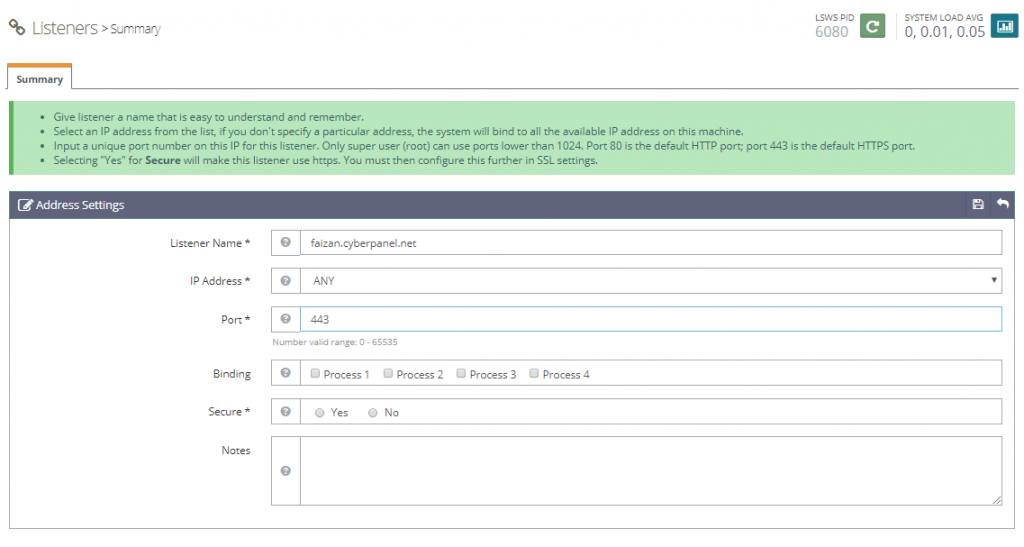
Go to Listeners > Add Listener, and make the following changes:
- Set Listener Name to your domain name, i.e.
faizan.cyberpanel.net. - Set IP Address to
ANY. - Set Port to
443, which is the standard TCP port used for SSL. - Set Secure to
YES. - Save changes and restart your server.
Step 4.2.3
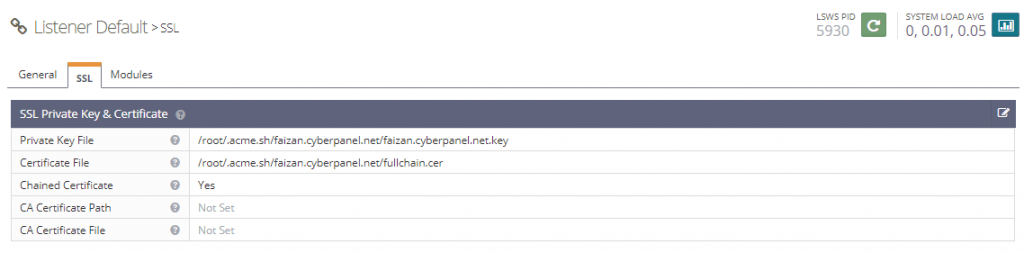
Go to Listeners > Listeners faizan.cyberpanel.net > Virtual Host Mappings > SSL > SSL Private Key and Certificate, press the edit/view button, and make the following changes:
- Add the output certificate key to Private Key File.
- Add the output full certificate key to Certificate File.
- Set Chained Certificate to
YES. - Save changes and restart your server.
Step 4.2.4
Go to your browser visit your index page, like so: https://faizan.cyberpanel.net/index.php
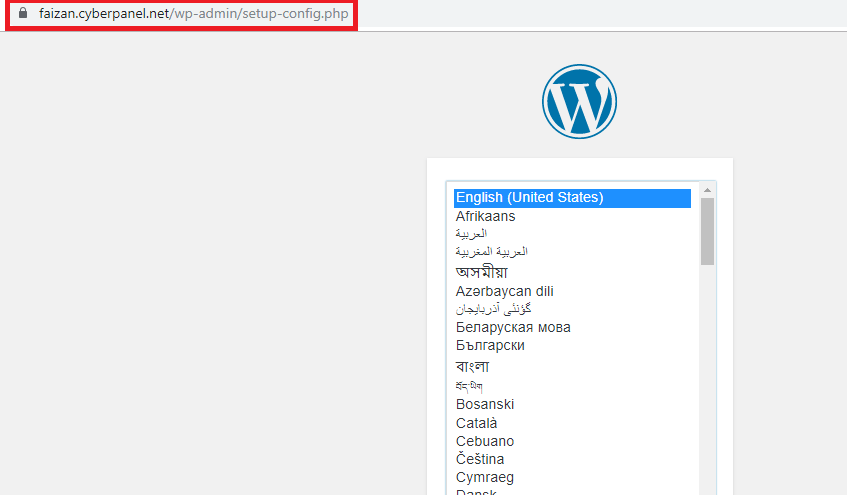
You have now successfully installed LetsEncrypt SSL on CentOS 7 for the domain faizan.cyberpanel.net. You can follow the steps mentioned above to do the same for your own website in an easy way.