In this article, we are going to tell you how to easily set up Mautic on CyberPanel as then use the CyberPanel email server for a 10/10 spam-free score and configure that SMTP on Mautic.
You have to follow these steps in order to set up Mautic on Cyberpanel without any error.
Let’s know something about Mautic, Mautic provides free and open-source marketing automation available to everyone.
Let’s continue without any further ado.
Install CyberPanel:
First of all, you need to install Cyberpanel on your server. If you already have a CyberPanel server you can skip to next step otherwise you can follow this tutorial to install fresh CyberPanel on the server. Click here and follow the process to do so.
Login to CyberPanel:
Once CyberPanel is installed, you have to log in to CyberPanel using your credentials. Visit URL
https//::8090

Create a new Website:
Now in this step, you need to create a website for Muatic installation. To add a new website on your CyberPanel go to the Websites-> Create Website

On this page, you need to add the required information like Website URL, packages, owner, PHP Version, SSL, etc. Make sure you select SSL, DKIM support, and Mail Domain as you will need all of them for a spam-free SMTP server.
Keep in mind that you need to select PHP 7.3 or lower. PHP 7.4 or 8.0 aren’t supported by mautic yet.

Once you added all the information click on the create button and the site will be created for you.
Install Mautic
Next step is to install the mautic on the server and you can do this by following these steps.
To install muatic on your website, go to the Websites → List Websites

On this page, you can see the website you added, in front of your website you can see the Manage Button. Click this button.

On the “website manager” page, go to the APPLICATION INSTALLER section and here you will see the Mautic logo and name, click on that.

Once you click on this option you can see the screen for the Installation of Mautic. Add the required information.

When you click on the install button, the installation process will start and you can see this screen.

Once the installation process for muatic is complete, visit your website and you will see this screen.

Enter the credentials that you created during mautic installation. When you are logged in to the muatic, you can see this dashboard.

Connect SMTP with Mautic:
First of all, you need to connect Mautic to your SMTP server. to do so you have to follow some steps.
Click on the Settings button on the right top of the screen.

Here you can see the configuration option now.

Click on this configuration button and navigate to the next screen to setup SMTP settings.
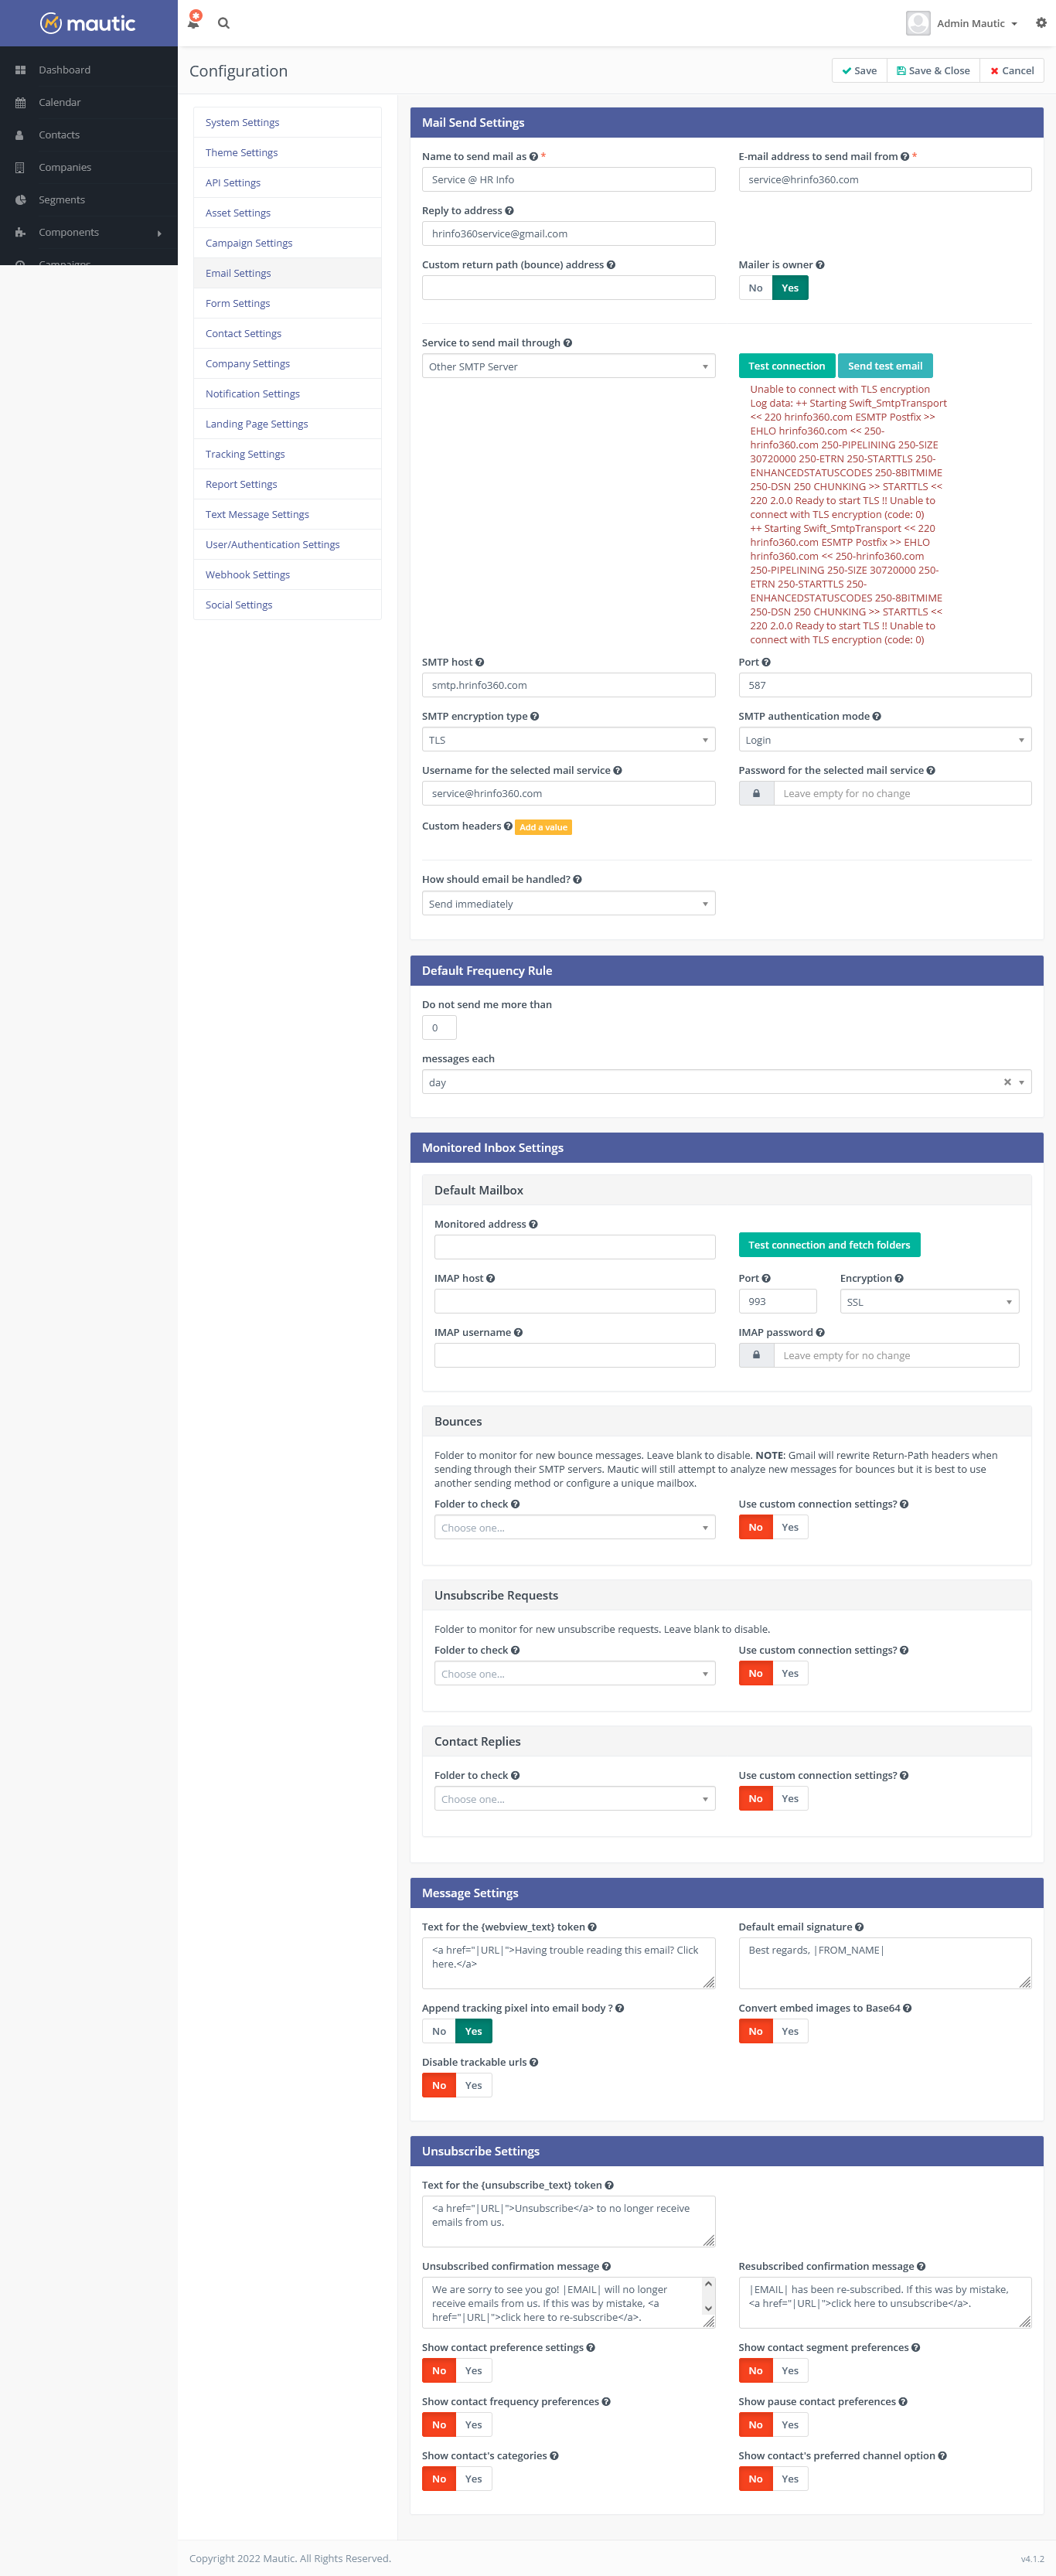
On this page, you have to go to the Email Settings option to setup SMTP configurations.

Add your mail server address like mail.cyberpanel.net
Add port: 587
SMTP encryption type: TLS
SMTP authentication mode: Login
Username for the selected mail service: Your email/SMTP username
Password for the selected mail service: Your email/SMTP password
Test Your Connection:
Once you complete the process of setting up email configurations, press the Test button, and if you got a success message your setup is alright.

Add Email Lists to Mautic:
To set up an email list, you need to set up a segment first, in order to do so go to the segment option in the left menu.

Here you will find an option to create a new segment in the right corner.

Here on the next screen, you need to provide some information to create a segment. Like list name Alias and description. Toggle the “Public Segment” and “Published” to “yes”.

Once you click the save button, you can see the list below.
Now, it’s time to import some emails to this list. We have to go to the Contacts to import some email lists. Go to this small arrow on the side of Contacts page.

Here on this button, you can see an import button, click this one to import your email list. Mautic accepts CSV files.

Select the file you want to import and click on the import button.

Once the import is done and you can see you have to add some details about the imported list
Owner name
Tags
List
You also have to match the data in file to some of the fields in Mautic. Click the import in browser option on the top of the page.

You can see this screen after it’s successfully done.

Now if you go back to the segments option and you can see the contacts in the segment list.

How to create a bulk campaign:
To create a bulk campaign as your email list is ready now, you need to go to the email option inside the channels section of the left menu.

Click the New button and then select “New Segment Email”

After selecting the type, it is time to select any template for your message. You can choose one of them or pick a blank one for your own design.

On the right side, you have to provide all details.

On top of this form, you can also see their builder page where you can design and edit templates according to your choice. After doing all these save your email template and get ready to send mail.
Now you can go to the email button again and see the email you just added.
On the left, you can see an arrow button and on the right side, you can see the status for email. By pressing the arrow button, you can click and send the mail from here.

That’s it. You have sent a bulk email.
How to schedule your campaign:
To schedule your mail campaign you need to create an email like the one above with a minor modification.
While creating the email, you have to select a later date and time in “Publish at (date/time)”

Meanwhile, you have to take care of one thing and that is the time zone. For this, you need to go to the
Settings-> Configurations-> general settings-> Time Zone

This is very important that you need to synchronize your schedule with your email and time zone.
Set a Cron Job:
Now the last thing that remains in the process and is a cron job that will execute and send mail. This is the last and the most important thing for scheduled mail/campaign.
So mail server can know and send mail accordingly.
To do so you just need to login to your CyberPanel go to
Website → List Websites → Manage
Then go down to the cron job option.

add this cron job here.
*/10 * * * * root /usr/bin/php /var/www/html/mautic/app/console mautic:broadcasts:send
You are all set.