CyberPanel and cPanel are both hosting control panels, and they help you manage your websites. With one command you get a fully functional LAMP stack that is ready to serve your web applications. Let see how CyberPanel is a feasible cPanel alternative.
If you are new to development or managing sites then you will sooner or later discover that some variation of the LAMP stack (Linux, Apache, MySQL, and PHP) is mandatory to run your sites. Here Apache can be replaced with other web servers such as OpenLiteSpeed, and PHP can be replaced with other programming languages like Python. Control panels like cPanel and CyberPanel offer many other features on top of the LAMP stack, and these features can help you in many ways.
Basic Feature Comparison
cPanel is almost 20 years old, and 20 years ago everything was very different. Hardware and bandwidth were expensive, so cPanel was designed to be used by shared hosting companies. Usually, in a shared hosting environment, a single server is hosting hundreds or even thousands of sites, which allows the company to get maximum profit out of existing hardware. Everything was expensive back then.
Considering these facts, cPanel is bloated with umpteen number of features, many of which are not required by a normal end-user. Additionally, all of these features make cPanel expensive to buy and a high consumer of server resources.
Fast-forward 20 years, and these days hardware and bandwidth are not as expensive as they were in the past. Anyone can get a virtual private server for $5/month, with roughly 1GB of RAM and 20GB disk space. If configured right, a $5 VPS can host 10-20 sites easily or even 100 static sites. The most basic cPanel package is $15. Spending $5 + $15 does not make sense if you only want to host a simple WordPress site.
CyberPanel to the rescue! CyberPanel is a great cPanel alternative. It offers all of the features needed to host and run a site including Web, DNS, FTP, and Email server. On top of that CyberPanel also offers two variants: Free and Paid.
CyberPanel Free vs Paid Variant
CyberPanel’s free version is 100% identical to CyberPanel Enterprise, the paid version. However, the free version comes with the OpenLiteSpeed web server, whereas the paid version comes with LiteSpeed Enterprise and our premium support.
You can learn the difference between OpenLiteSpeed and LiteSpeed Enterprise Web Server here. The most relevant differences are:
- LiteSpeed Enterprise has full .htaccess support. OpenLiteSpeed supports limited .htaccess directives)
- LiteSpeed Enterprise features an ESI engine. OpenLiteSpeed does not support ESI at all.
Note: On our pricing page, the listed plans include the cost of the corresponding LiteSpeed Web Server license. This means you do not need to buy a web server license separately. You get huge saving plus high performance. To see all of the plans in detail, you can visit the store. Or if you want to try the fully function free version of CyberPanel, just run this command on your terminal:
sh <(curl https://cyberpanel.net/install.sh || wget -O - https://cyberpanel.net/install.sh)
Within a few minutes, your server is ready to deploy super fast WordPress or other web apps. If you are still not convinced then learn why people are moving their WordPress setups to CyberPanel.
Use Case: cPanel vs CyberPanel
Let’s walk through a website administrator’s daily routine tasks. Since WordPress is the most-used CMS, we will use that as an example. We’ll create a site, install WordPress, set up SSL, back up the site, use the staging features on CyberPanel, and finally set up email.
Step 1: Buy Server and Install Control Panel
Some hosting companies will give you pre-installed servers, if you chose a specific control panel. On the other hand, you can also self-install cPanel or CyberPanel.
To install cPanel you can run the following command on your server terminal:
cd /home && curl -o latest -L https://securedownloads.cpanel.net/latest && sh latest
After command line installation is complete, visit https://<IP Address>:2087. During this first visit, you will need to set up your basic configuration. This can be hard for new or inexperienced users.
Installing CyberPanel is comparatively easy, as you don’t need to do any configuration once the installation is completed. To install, run the following command:
sh <(curl https://cyberpanel.net/install.sh || wget -O - https://cyberpanel.net/install.sh)
After successful installation, you can immediately visit the CyberPanel interface at https://<IP Address>:8090, with no additional configuration required.
Step 2: Create a Website
cPanel via WHM
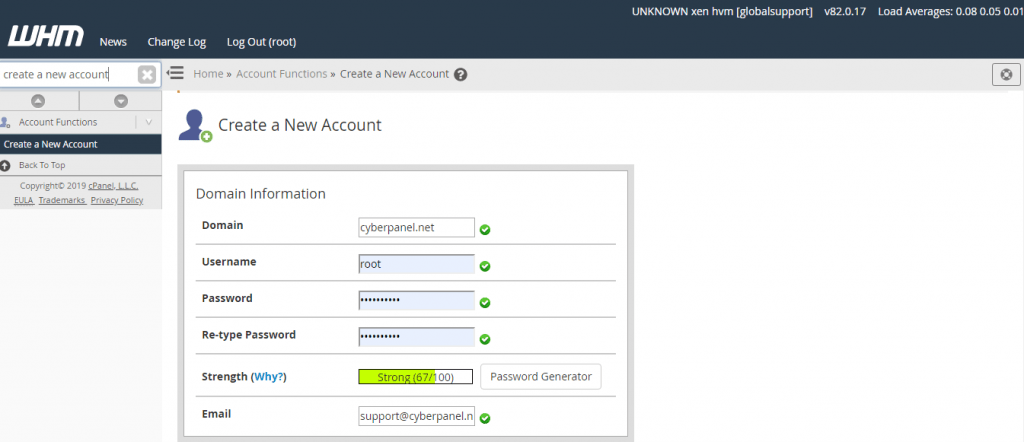
To create a website via cPanel + WHM, you would follow these steps:
- Log into WHM with your username and password, or enter your URL (
example.com/WHMorexample.com:2087) - Go to Create a New Account by searching on left top search bar
- Enter your site’s Domain
- Enter your Username
- Enter your Password
- Provide an Email Address
- Choose a package. The default option is for unlimited resources, or you can enter resources (disk space, bandwidth, ftp accounts etc.) manually according to your requirements.
- Select a default language for your website.
- Update Mail Routing Service, in which you can choose to automatically detect the configuration
- Press the Click to Create button, and within 3-to-5 seconds, your account will be created in WHM. Then, you will see a dialog box to enter cPanel via a list of websites.
This process is not user-friendly. Beginners don’t need many of the features, nor do they necessarily know how to determine their requirements based on projected usage. Beginners need more time to understand the complexity of the software.
CyberPanel
Creating a website on CyberPanel is much easier than with cPanel. CyberPanel is designed for end-users to create their website and manage it. CyberPanel’s GUI (Graphical User Interface) is simple and user-friendly as compared to cPanel.

Follow the steps below to create a website on CyberPanel:
- Log into CyberPanel with your username and password
- Go to Websites > Create Website from left menu bar
- Select Package (Choose the default or create your own package according to your requirements.)
-
Select Owner (Normally
adminis used, or you can give management access to any of your users.) - Enter Domain Name (
example.com) - Enter Email Address
- Select PHP (Options available range from PHP 5.6 to 7.3)
-
Additional features like
SSL,DKIM, andDNS Verificationare available with one click, and they are absolutely free. - Click the Create Website button and within 10 seconds, you will have your new website.
Note: If you want SSL to be successfully issued make sure that your site’s DNS is already pointed to the server IP.
Step 3: Manage Your Site
The cPanel interface is very complex, compared to CyberPanel. While cPanel has existed for more than 20 years, CyberPanel is designed for end-users and includes all basic and advanced features with a user-friendly GUI. It can be difficult for an end-user to understand WHM and locate the required features (as they are innumerable) but CyberPanel displays all icons in the main dashboard.
cPanel
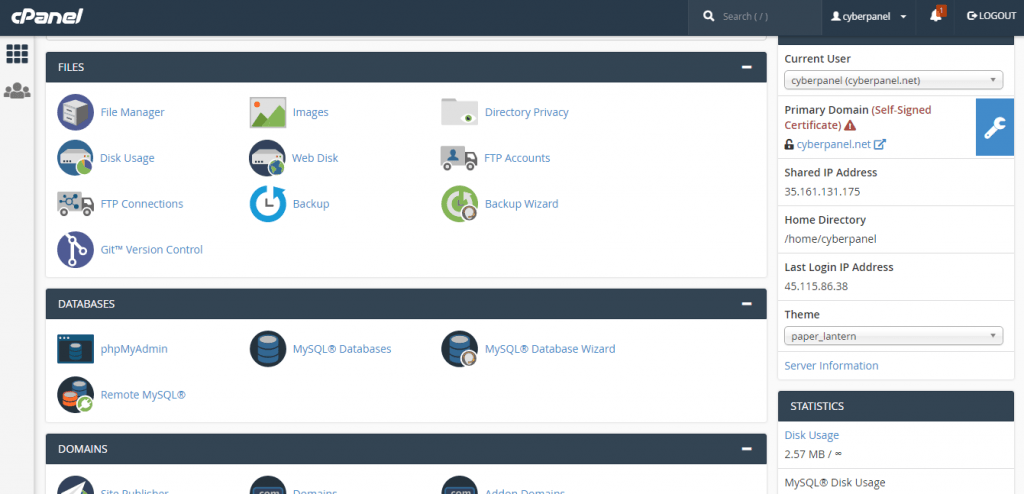
The above image shows the cPanel domain management interface. The dashboard offers major and advanced features in the following categories: Files, Databases, Domains, Email, Metrics, Security, Software, Advanced, Preferences and Applications. These categories narrow down major tasks that are performed by either the system administrator or the end-user. Most of the features, though, are not relevant to the end-user.
CyberPanel
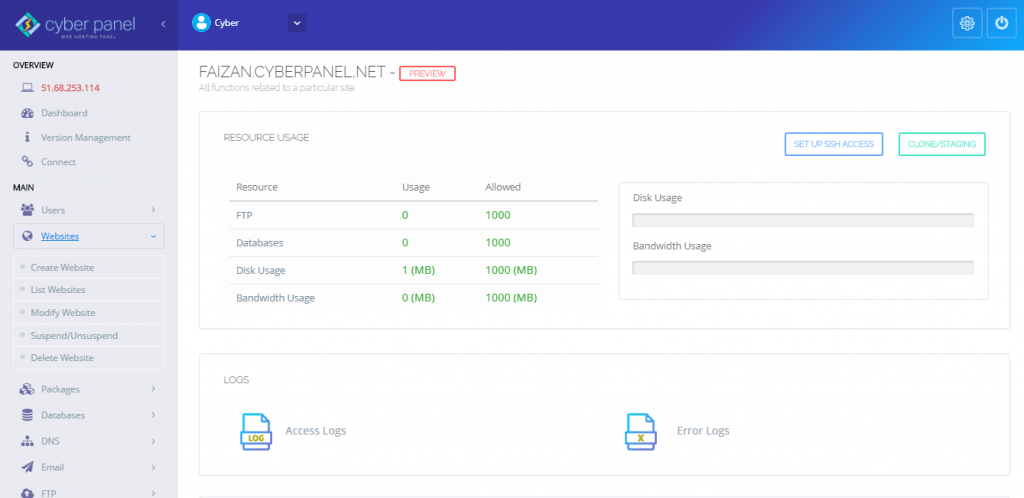
The above image shows the CyberPanel interface, which helps end-users to manage their websites in a friendly way. To manage your site, navigate to Websites > List Websites > Manage. If you scroll down, you will find relevant features that are easily understandable for end-users. You can view access logs, control child domains, edit configuration files, visit the file manager, use email marketing, or install applications with our one-click application installer for WordPress, Joomla and PrestaShop.
Step 4: Set up a WordPress Site
cPanel
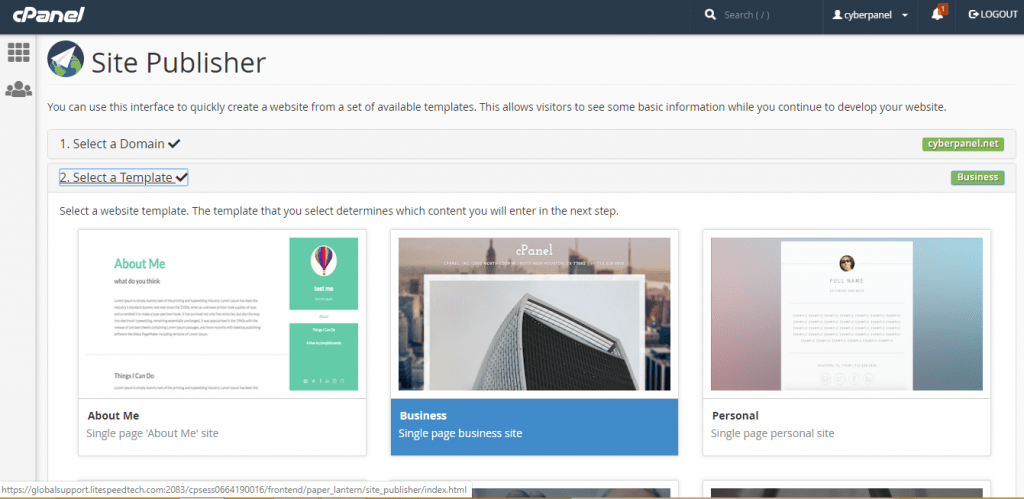
When you log into the cPanel dashboard, you will need to go to Domains > Site Publisher where you will follow three steps to set up your website on WordPress: Select your domain, choose a template, and publish your website. The cPanel dashboard carries all of these features under one umbrella, which can be confusing to end-users who just want the basic tools to run their websites.
CyberPanel

The installation of WordPress on CyberPanel is very easy as compared to cPanel. Navigate to Websites > List Websites > Manage, where you will find our auto-installer for WordPress with LS Cache Plugin. The LS Cache Plugin feature reduces website load time when compared to other cache plugins because it is built right into the server. It uses disk space to save and serve cache copies. Click WordPress, and it will take you to the above window where you will enter your desired information. The website will be ready to use in 10 seconds.
Step 5: Back up the System
The Backup feature helps to secure/restore your data. In an era of cyberattacks, hackers find loopholes to attack recognized websites. Backup allows you to save your data as per your requirements on a daily and weekly basis. In the case of computer viruses, system files get affected easily and need to be removed from system, otherwise, chances of cyberattacks get increased. It’s smart to have a backup of important files.
cPanel

cPanel’s backup system offers two types of backup: Full and Partial. A full backup creates an archive of all the files and the configuration of a website. Partial backup allows you to download archive files of the home directory, MySQL databases and email forwarders and filters separately. cPanel is useful for a system administrator to manage their content as an advanced tool, but it is very complex for end-users to understand the backup process. On the other hand, CyberPanel provides a user-friendly backup system with self-explanatory GUI.
CyberPanel
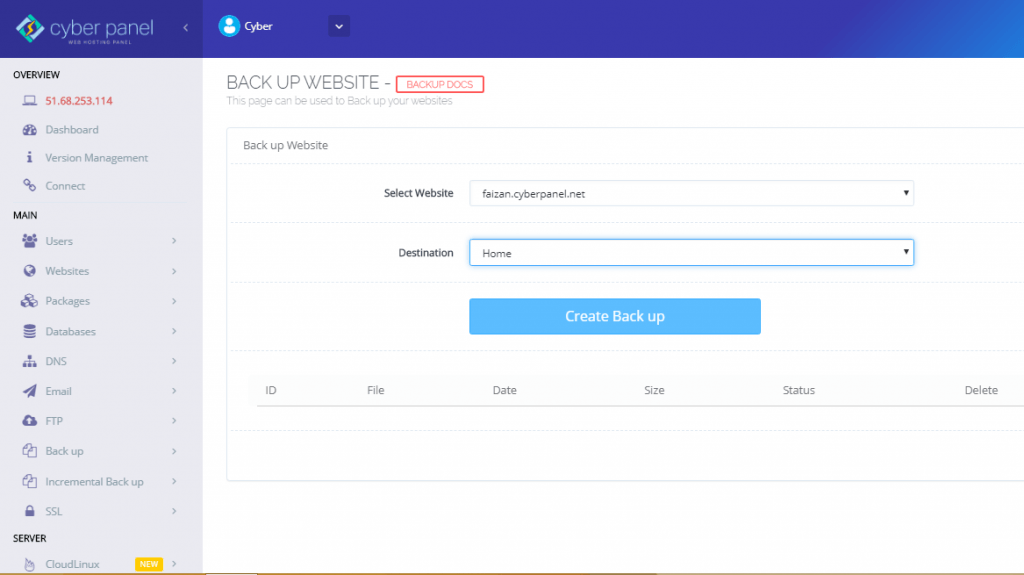
CyberPanel allows you to restore your data in one click. There are two types of backups that CyberPanel provides to their end-users. After logging into your CyberPanel account, navigate to Backup > Create Backup and it will generate a backup of your website in one go.
Backup file location: /home//backup

To restore your website’s data, navigate to Backup > Restore Backup where you can select your website’s backup file. Your website will be restored in one click.
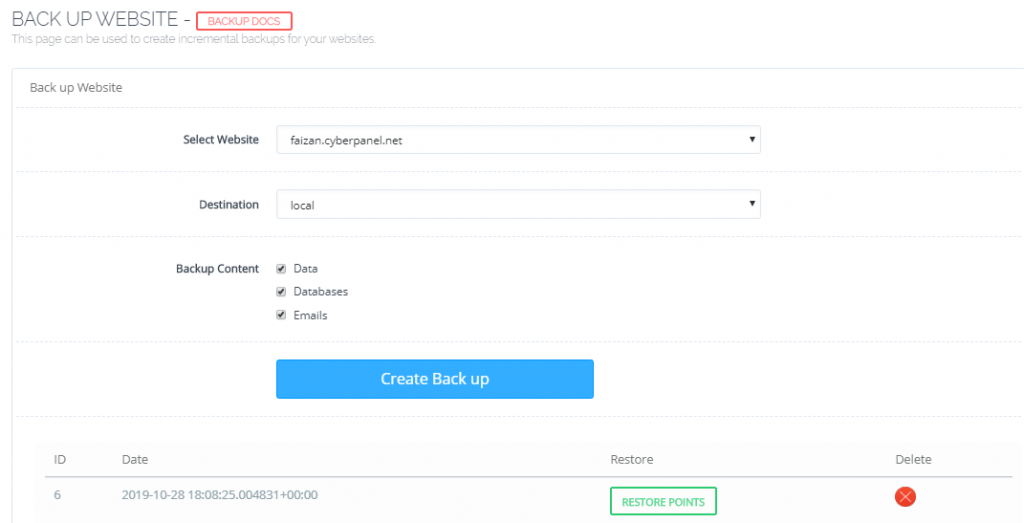
Recently, CyberPanel introduced an incremental backup system, which allows you to create a backup of your website’s data, databases and emails separately. The purpose of the incremental backup is to reduce repetition of backed up content. It gives you free space at the server level to increase efficiency and reduced bandwidth cost, in case incremental backups are stored remotely.
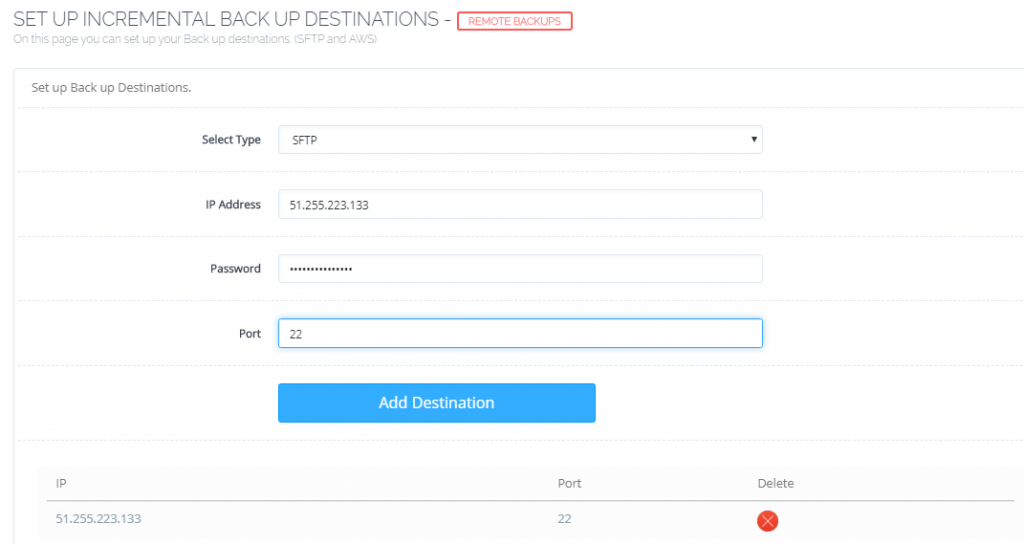
Incremental backup destinations include: Local (default destination), SFTP (Server IP Address required) and S3 (AWS S3 key required).
Step 6: Stage Your WordPress Site
Digital businesses use staging to test their websites outside of the production environment whenever they need to make changes to their websites. Website changes involve risk. A staging feature helps developers to make changes in a secure environment where your live website will not be impacted. After careful testing, the QA team allows the changes to go live to the website.
cPanel
This feature is not available in cPanel.
CyberPanel
CyberPanel’s WordPress Staging Feature allows you to test your websites in a secure environment and then pushes it live when you are fully satisfied with the changes. The staging feature reduces the chances of insecurity, loss of data, bugs, and general failures by keeping the testing phase-out of production. This feature has increased the overall efficiency of end-users’ websites.
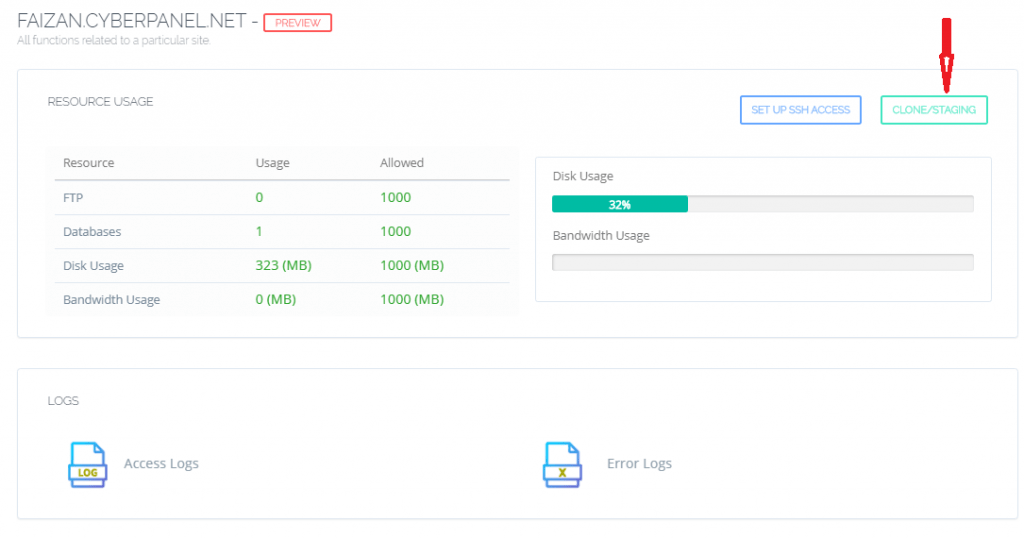
The first step in staging is to clone the website. Navigate to Main Dashboard > Websites > List Websites > Manage >Clone/Staging.
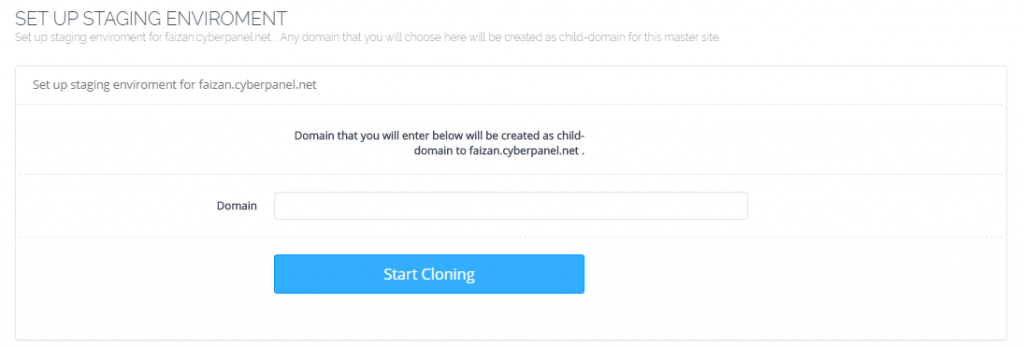
When you click on the Clone/Staging dialog box, enter your domain name, and the clone will be created as child domain, pending DNS validation. Once complete, you can start testing.
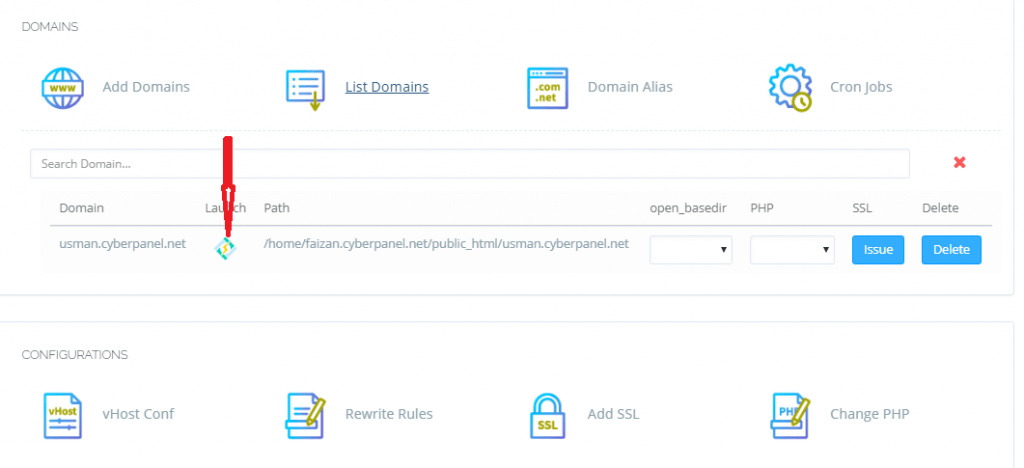
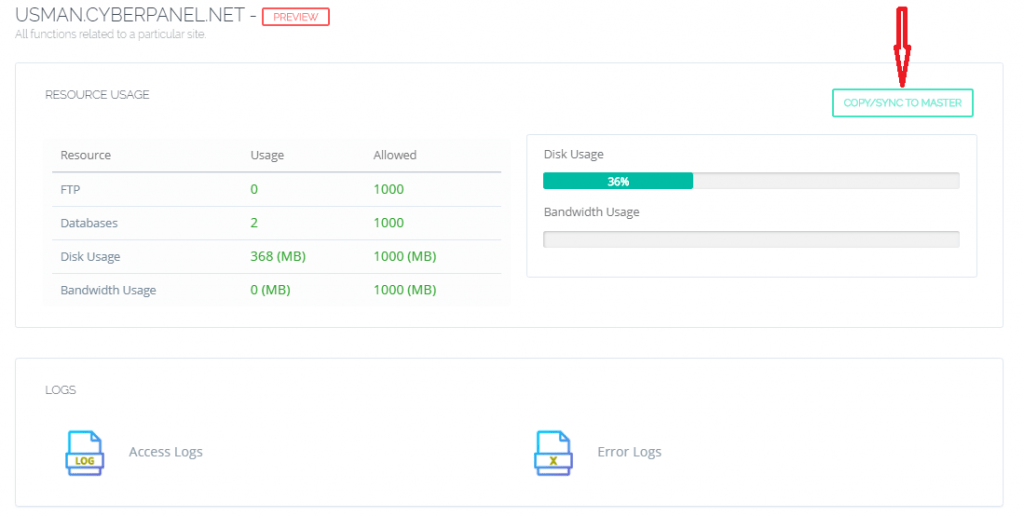
Second, when testing is complete, you can copy the child domain’s content back to the master domain. Navigate to Main Dashboard > Websites > List Websites > Manage > List Domain > Manage/Launch > Copy/Sync to Master.
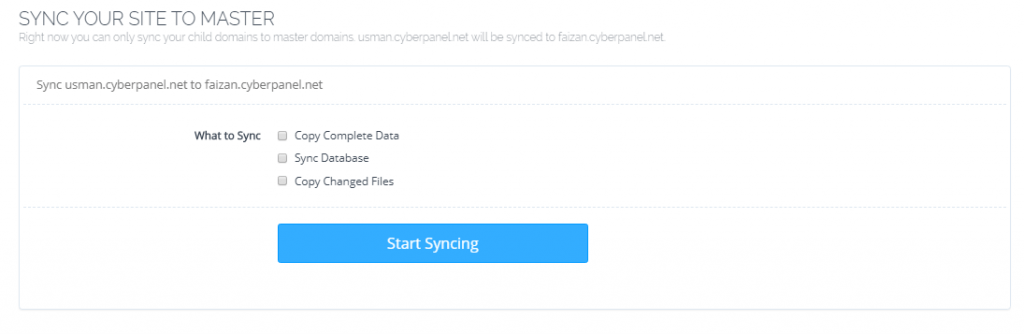
You have the option of syncing your website by copying complete data, database, or changed files.
Step 7: Manage Email
cPanel
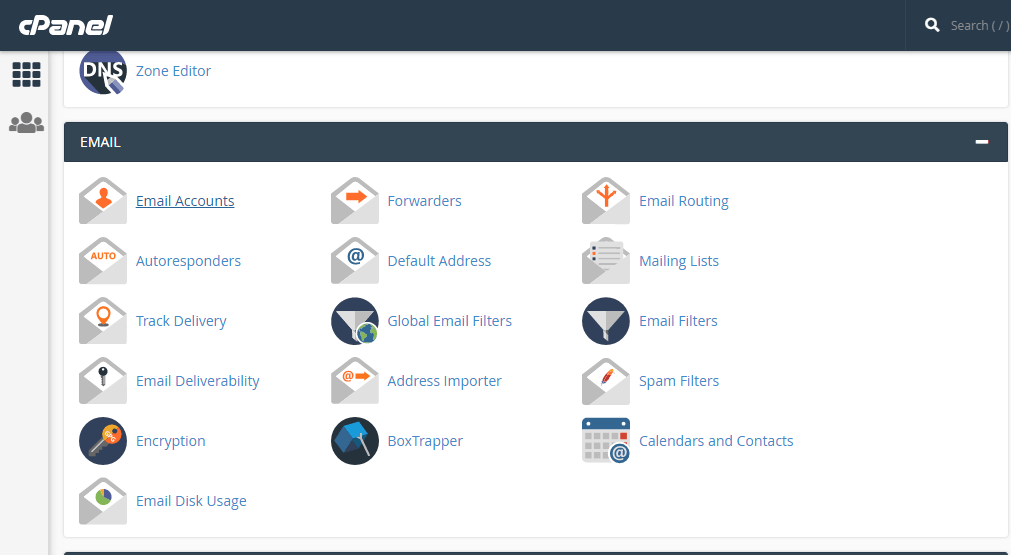
The cPanel Email system offers advanced features to handle hosting accounts. To create an email account in cPanel you need to log into cPanel > Main Dashboard > Email Accounts.
CyberPanel
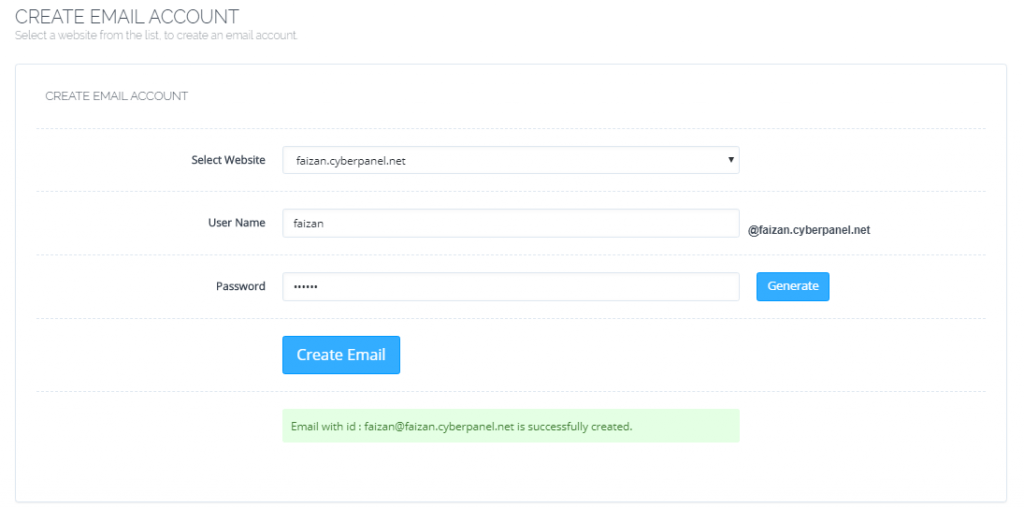
CyberPanel’s Email system offers some basic features that are very useful for end-users to communicate officially. To create your email account, navigate to Dashboard > Email > Create Email.
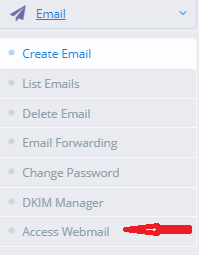
After the creation of an email account, you can access the Webmail Portal to send or receive messages. Apart from that, CyberPanel also helps in setting up DKIM, and SPF records along with SSL for email. You can get more deep information in our previous article:
Achieve 10/10 Email score with CyberPanel!
Conclusion
As you can see, anything that you can do with cPanel can be easily achieved in CyberPanel as well. Plus CyberPanel involves little-to-no cost. That is why CyberPanel is a good candidate for the cPanel alternative. From website creation to WordPress installation, everything is super easy and with Incremental Backup, you can sleep in peace.