CyberPanel is currently on version v2.0.3. This is the stable version of CyberPanel. CyberPanel v2.0.3 and above supports automated backups to AWS S3. S3 backups are configured through a cloud platform. Register your self on the cloud platform if you haven’t already, once registered you need to connect your server from here (subscription plan is required to connect servers, you can read more here).
How to Setup AWS S3 Backups on CyberPanel Cloud?
- Sign in to the AWS platform
- Sign to CyberPanel CLoud
- Manage Server
- Create Remote Backup
- Setup user in AWS IAM Console
- Configure AWS Account on Cloud Platform
- Create Backup
- Run Backup
- Backup Logs
Step 1: Sign in to the AWS platform
In order to setup S3 backups on CyberPanel Cloud. First of all need to login into your AWS Account click here to do so. If you don’t have an AWS account create one.
Step 2: Sign to CyberPanel Cloud
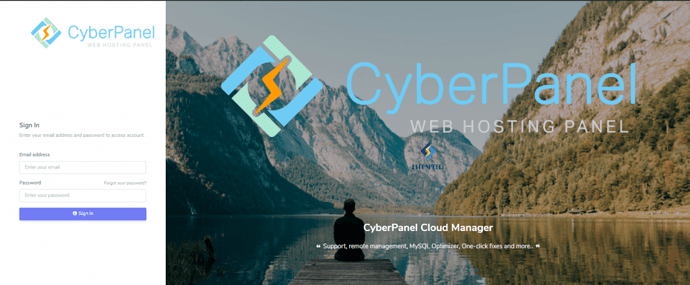
Its import to log in on CyberPanel Cloud to initiate the backup process. Visit here and use your account details to log in to your account.
CyberPanel Cloud has many more features that you can avail of according to the Plan. You can get
- 1-Click email Fix
- 1-Click FTP Fix
- 1-Click DNS Fix
- SSL Fix
- And many more
Step 3: Manage Server
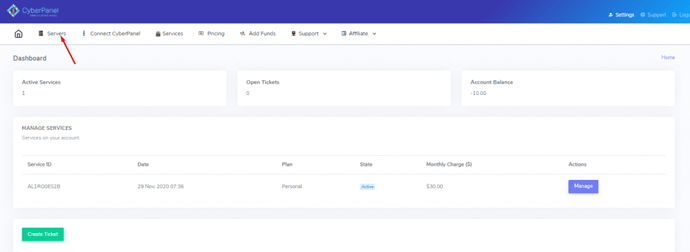
Once you logged in to your CyberPanel Cloud you can see the Servers option in the first place in your top menu.
Click on this Server Button you can see the servers you added to your CyberPanel Cloud account. On this page you can see three dots with every server you added by clicking these you can see three options.
- Manage
- Access CyberPanel
- Delete
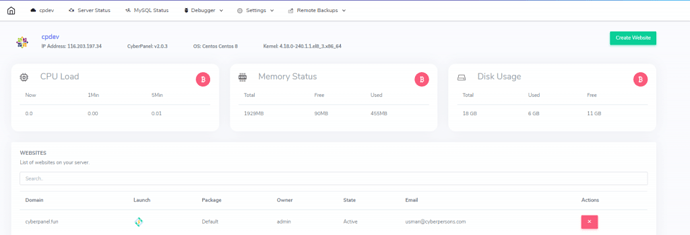
Click on the Manage button and here the actual process begins. Here I added the Manage dashboard view.
Step 4: Create Remote Backup (S3 Backups)
On the Manage Dashboard, you can see the Remote Backup option in the top menu. Once you go on this option you can see the S3 option.
Click on this S3 option and navigate to the screen to setup S3 backup.
Here you can see that you need some information to connect AWS account. on this page, you can see IAM Console lets follow the next steps and setup all these.
Step 5: Setup user in AWS IAM Console
Once you are done with all steps. Go to AWS IAM Console you can see the screen.
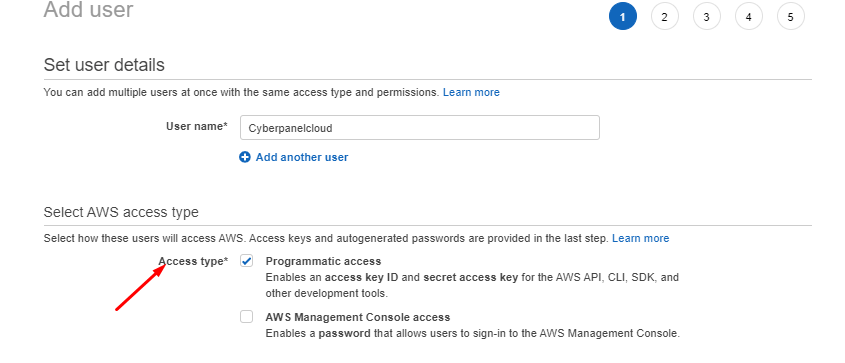
Now you need to create a new user, in order to do this click on the user and new user. it is recommended that you only give this user access to AWS API (S3 related operations).
Add the name of the new user to any username you want to add and select Programmatic access that Enables an access key ID and secret access key for the AWS API, CLI, SDK, and other development tools.
Make sure this user has correct permissions otherwise CyberPanel will fail to upload backups to your buckets.
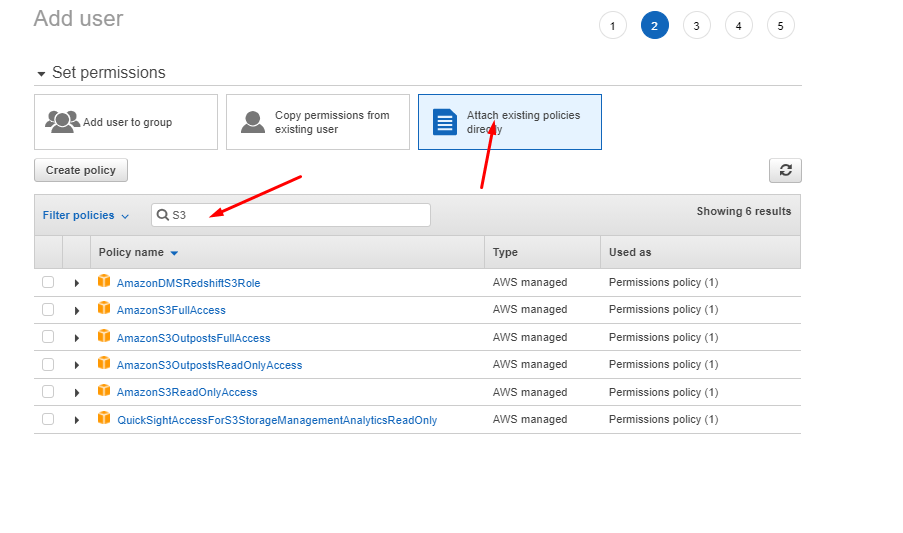
Select the Existing permissions and then search S3 in the search box and select all give below.
In the next step, you can see the tags that are optional if you want to add you can otherwise you can skip it.
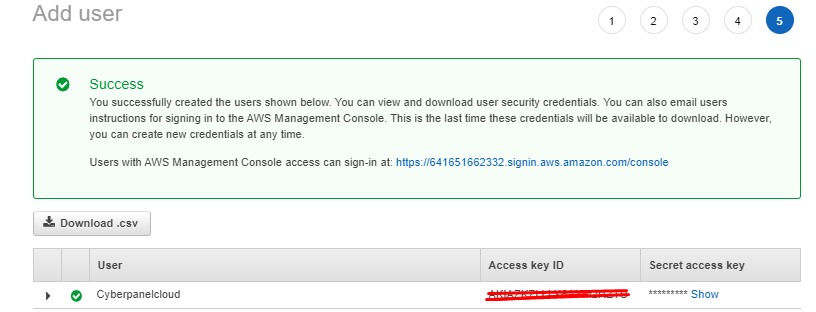
At last, you have to review all information and then you can see the process completed. At last, you can see your keys on the screen.
Also, create at least one bucket, buckets will be used to store backups. One account is configured note down its Access key ID and Secret Access Key.
Step 2: Configure AWS Account
To configure AWS Account on platform visit:
https://cloud.cyberpanel.net/s3//
Here you got all information by following the process stated above. You can get endpoints from here.
Here you can see that your server is connected you AWS.
Step 3: Create Backup Plan
It time to create a backup plan for your connected AWS account.
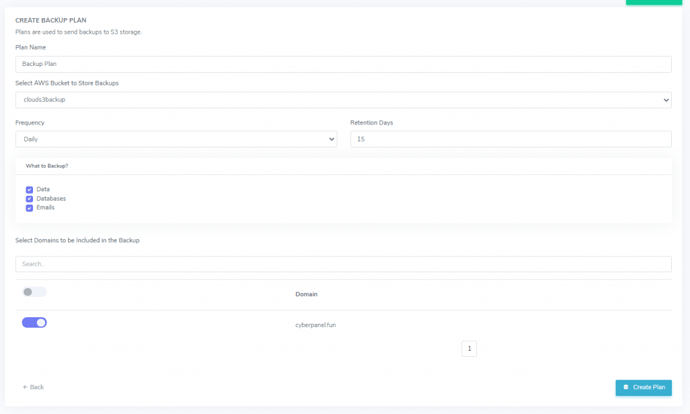
Backup plans are the starting point for your backups to S3. The backup plan defines the following things:
- Bucket: AWS Bucket to use for this backup plan.
- Frequency: How often this backup should run (Daily | Weekly)
- Retention Days: How many days a backup should be kept.
- Domain: Websites on your CyberPanel that should be included in this backup plan.
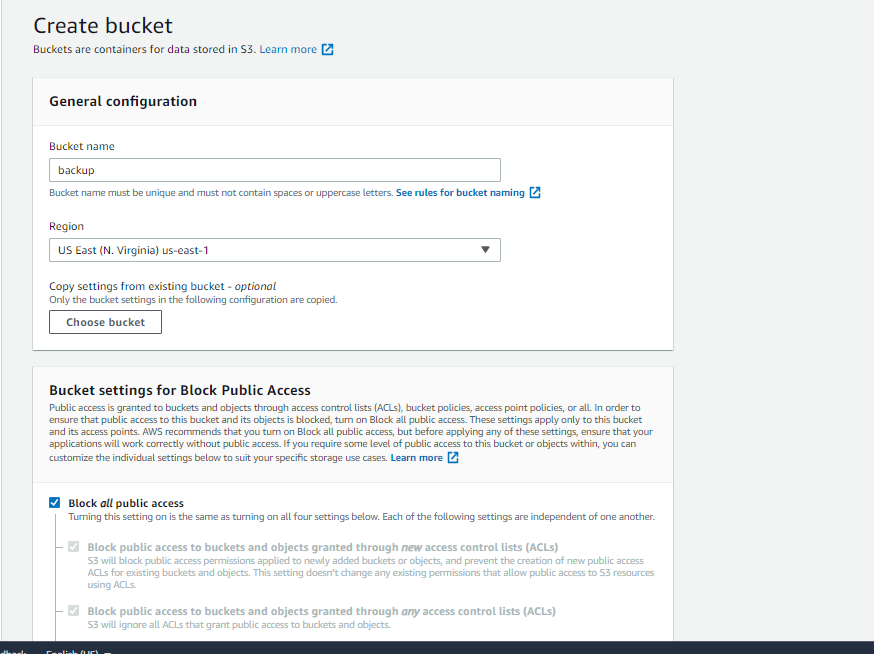
You need to create a bucket from your AWS account.
Click Here to create a bucket. You can see the create bucket button here.
On the next page please fill the required information and press the create bucket button.
To create a backup plan visit:
https://cloud.cyberpanel.net/s3//manage/createBackupPlan
Now its time to add all information to the page
Replace the server name with the name of your server in Cloud Platform. Configure your plan and click Create Plan. Now depending upon your backup frequency backups will be scheduled to send to S3 storage. You can also force run backup at any point in time.
Force Run Backups
Backups are usually scheduled to run daily or weekly, but you can force run them at any point in time. To force run a backup visit:
https://platform.cyberpanel.net/s3//manage/listBackupPlans
From there you can force backup to run at current point in time.
Backup Logs
The backup job runs in the background, for any backup plan you can view logs at:
https://platform.cyberpanel.net/s3//plans/
Replace Server and Plan name with Server and Backup plan name respectively.

