WooCommerce is an open-source e-commerce plugin for WordPress. It is designed for small to large-sized online merchants using WordPress. WooCommerce is used by a number of high-traffic websites. WooCommerce has attracted significant popularity because the base product, in addition to many extensions and plugins, is free and open-source.
There are 1,135 Woo-commerce themes on Theme Forest. The wordpress.org theme directory has 548 WooCommerce themes. WooCommerce has hundreds of extensions and over 1,000 plugins. In addition, there are thousands of paid add-ons for fixed prices. Many Premium Themes now offer capability with WooCommerce as well as plugins that make a theme framework compatible.
WooCommerce Bookings: Which allows users to sell blocks of time as appointments.
WooCommerce Memberships: This allows the user to restrict access to certain parts of their WordPress website, and sell access to these parts of the website.
Login/ Signup of CyberPanel Cloud:
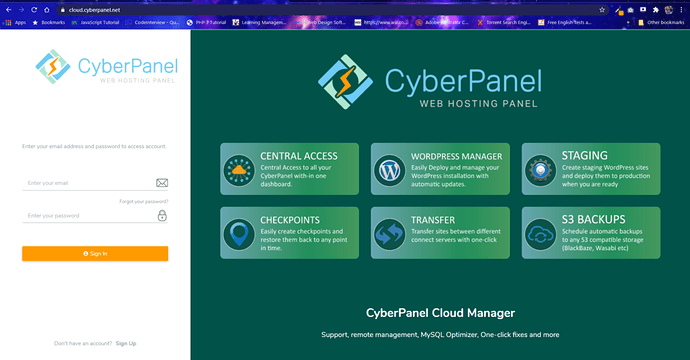
In the first step we have to log in on CyberPanel Cloud.
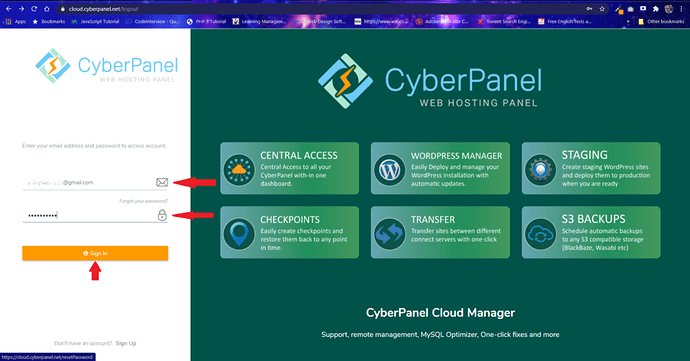
You have to put your email address in the email section and password in the password section then click on the sign-in button. As you can see in the below image
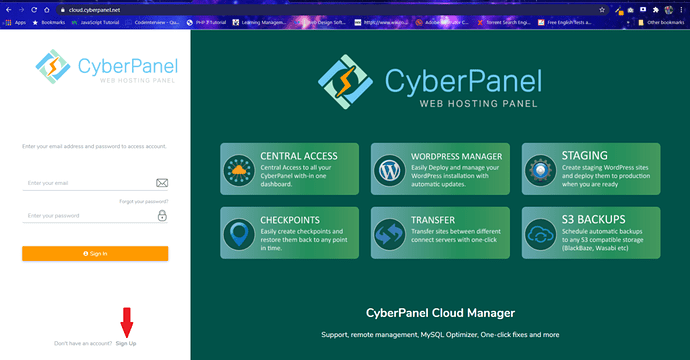
If you do not have an account on the CyberPanel Cloud then click on the signup button shown below;
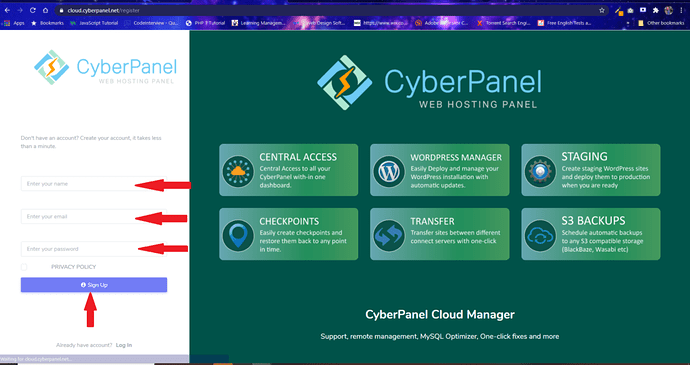
After clicking on the sign-up button, there you have to put your details i.e.
- Your Name
- Your Email Address
- Your Password
After providing all your details click on the sign-up button.
The dashboard of CyberPanel Cloud:
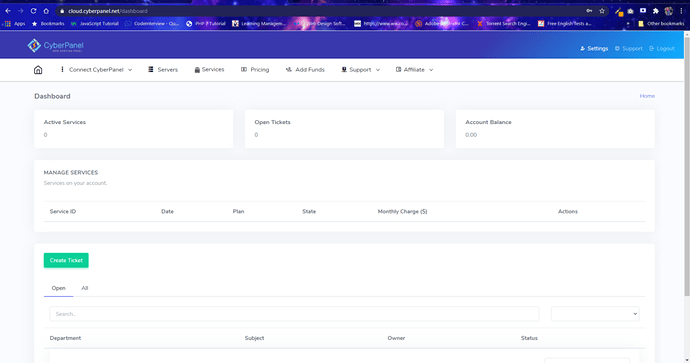
After successful login you will be directed to your dashboard where you see the multiple options, as you can see in the image below;
How to connect the server with the CyberPanel Cloud?
If you don’t know how to connect a server to the CyberPanel Cloud, you can see the video below which explains in detail as to how you can deploy a server via CyberPanel Cloud. If you already know, you can skip this step.
How to manage a server of the CyberPanel Cloud?
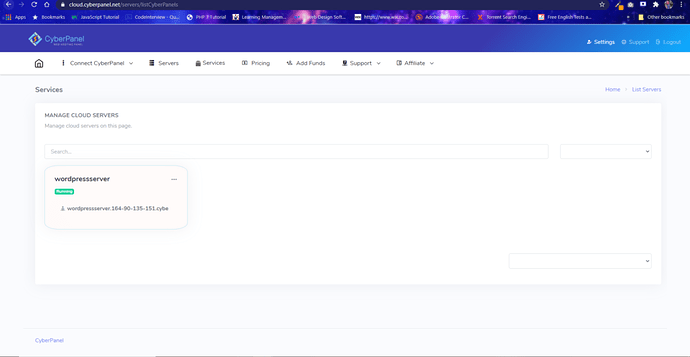
In the dashboard window you can see there is a section called servers, as you can see in the below image.
You have to click on it then you will be directed to the main screen of your server.
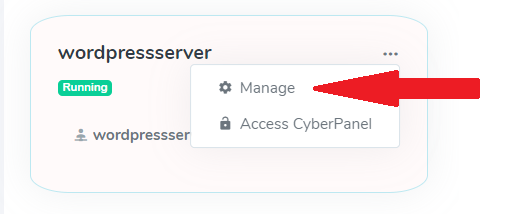
Here you can see your server, click on the more options button then click on the manage button.
How to deploy the WooCommerce site by the CyberPanel Cloud?
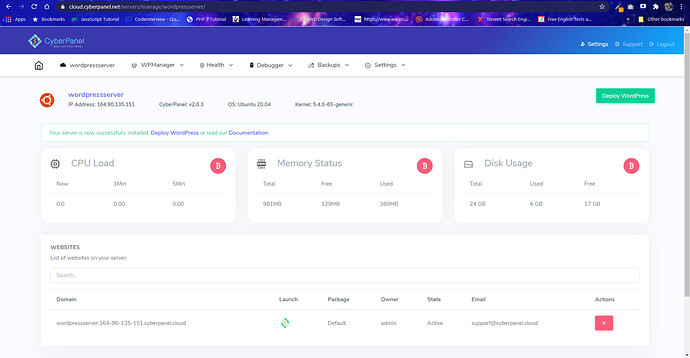
After clicking on manage, then you will be directed to a new window where you can easily deploy your Woo-commerce store with just one click,
In this “manage server” dashboard, you can see there are simple ways to deploy your woo-commerce by clicking on the deploy or deploy WordPress button. As you can see in the below image.
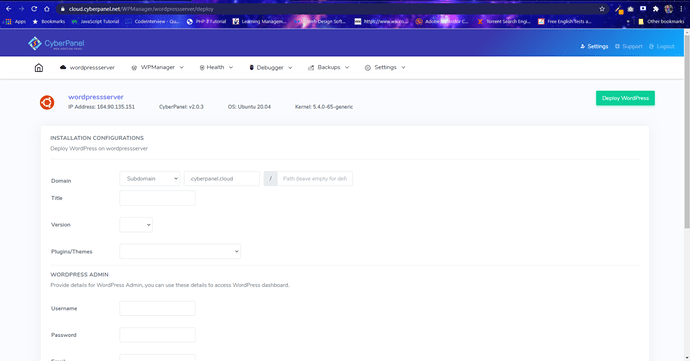
After clicking on the deploy button, you will be directed to a new window where you have to provide some details for your woo-commerce website. As you can see in the screenshots below;
On this page, you have to provide some details like
- Domain
- In the domain section you have 3 options like
- Subdomain/ Custom Domain
- Main Domain
- Path (leave as it is)
- In the domain section you have 3 options like
- Title
- In the title section, you have to put the name of your website

- Version
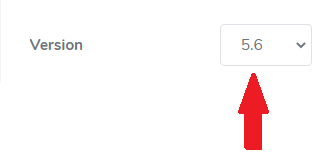
- In the version section, you have to select the latest version of your WordPress website
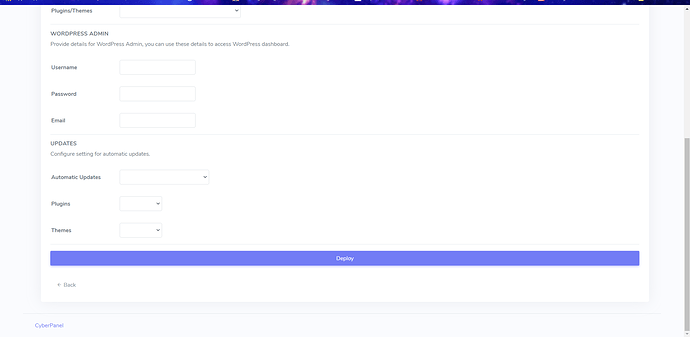
- Plugins/ Themes
- In the plugin/themes section, there’s a dropdown where you want to add your plugin and theme to your website,

-
- In this tutorial we are making a woo-commerce website so we go with WordPress + LS Cache + Woocommerce, as you can see in the screenshot below;

By selecting the (WordPress + LS Cache + Woocommerce) option, WordPress will automatically download the required plugins for Woocommerce like Woocommerce and wooadmin plugin, which are the latest and updated plugin nowadays, which really help you to make your WooCommerce website easily.
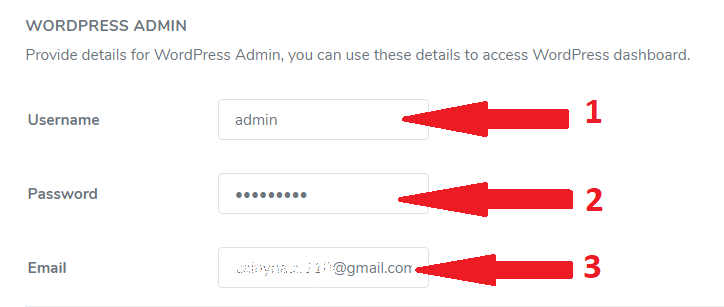
- WordPress Admin Details
- In the WordPress admin detail, you have to put your username, password, and email address for your WordPress website (which you want to use for your WordPress admin dashboard). As you can see in the image below;
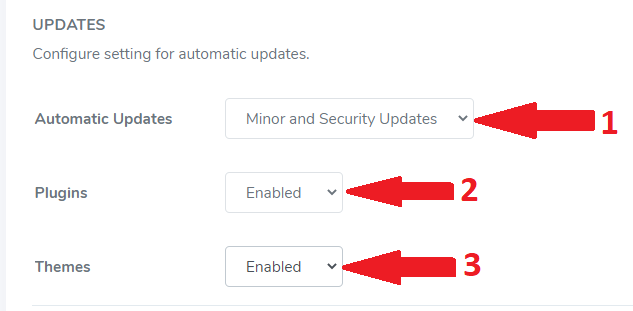
- Updates
- In the updates section, you can see there are multiple options like
- Automatic Updates
- Plugins
- Themes
- In the updates section, you can see there are multiple options like
For automatic updates there are 3 options;
- Disabled
- Minor and Security Updates
- All (Minor and Major)
Click any option you want to choose for your WordPress
For Plugin and Themes, you have 2 options
- Disable
- Enable
I suggest you go with the enabled option for both plugin and themes.
In the last step, you just have to click on the deploy button so your website will be successfully deployed.
After Clicking on the deploy button it will show you a progress bar which shows progress of your website deployment as you can see in the image below;
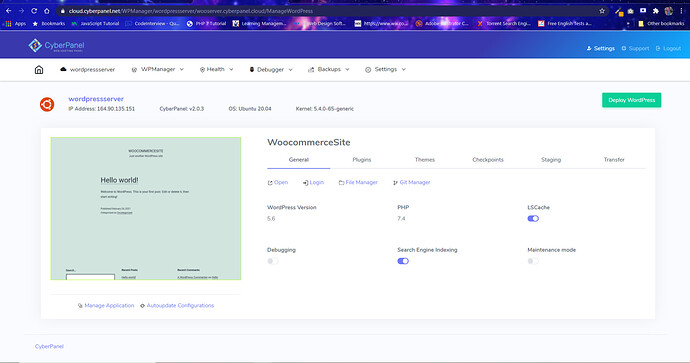
After successfully deployment, you will be directed to this new window, which is your wordpress management setting page
In this website setting window you can see there are multiple options but we have to see how our website is deployed and how its dashboard looks like;
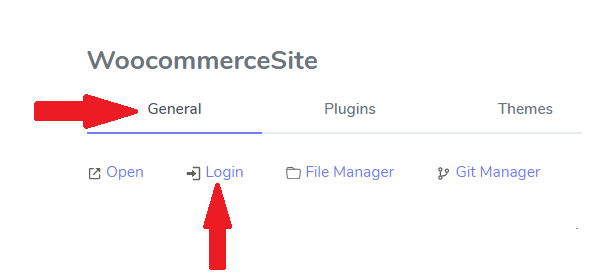
So, as you can see there is a general tab in your website setting window. In this section we have to click on the login option (to access your WordPress admin dashboard),
How to log in to WordPress Admin Dashboard?
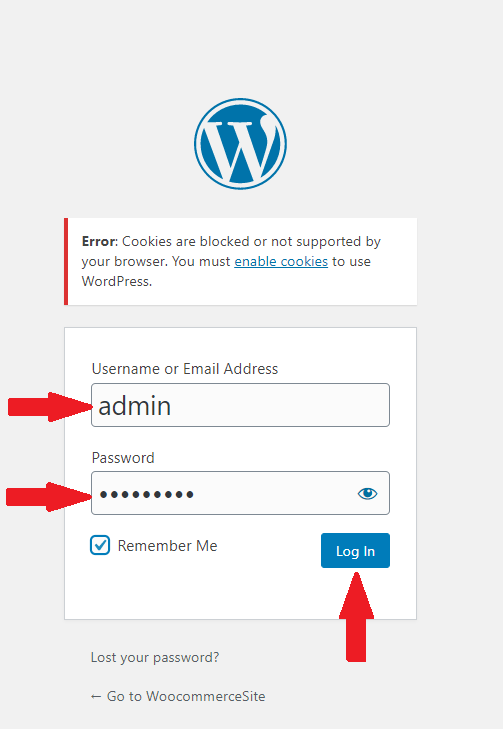
After Clicking on the login button it will direct you to the WordPress admin login page where you have to put the details of your admin as you set earlier in the WordPress Admin section above, after providing the details just click on login, as you can see in the image below;
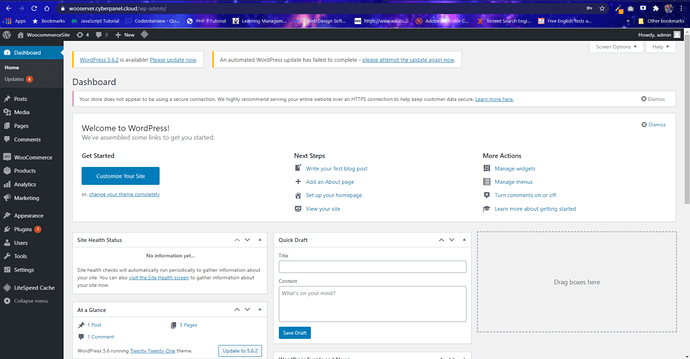
After successful login, you will see your WordPress admin dashboard
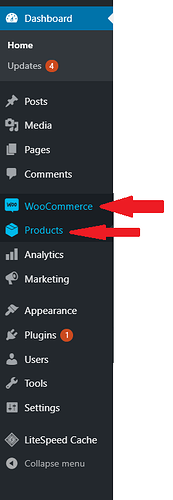
In the dashboard sidebar you can see there is WooCommerce which is successfully deployed in your website, as you can see in the below image;
How to Configure WooCommerce?
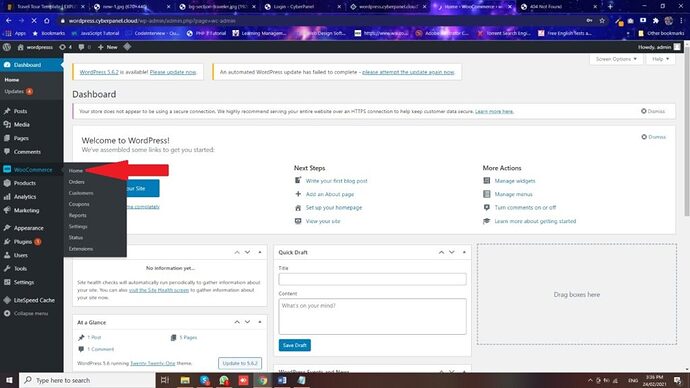
First, we have to click on the WooCommerce plugin which is situated on the left sidebar of your WordPress dashboard. As you can see in the below image.
At the first, we have to configure the WooCommerce plugin.
There are 5 steps which as;
- Store Details
- Industry
- Product Types
- Business Details
- Theme
1. Store Details
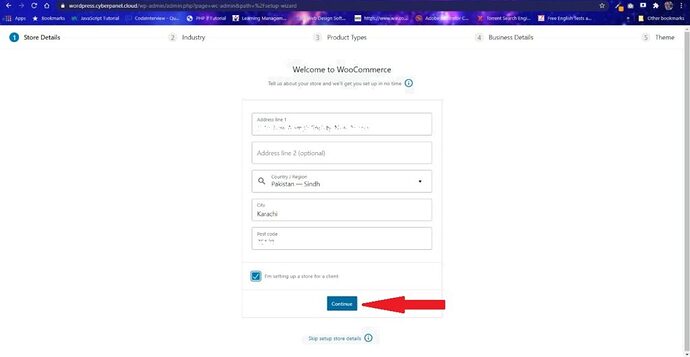
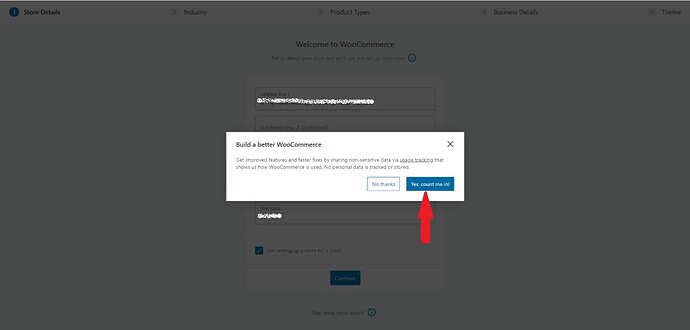
In this step, they ask for your store address, country, city, and postal code.
You have to put your store details on this step then click on the continue button (blue button), as you can see in the below image
After clicking on the continue button, you get this alert box on your screen which asks you to build a better WooCommerce for you, and this is safe for your store as I suggest you click on the yes, count me in button (blue button).
2. Industry
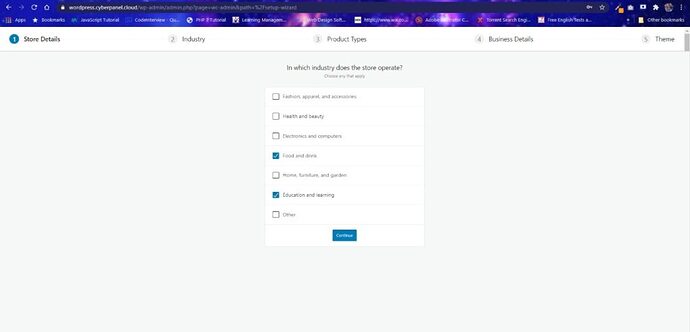
In this step, they ask for in which industry does the store operate like is your store is Fashion, apparel, and accessories, Health and beauty, Electronics and computers, Food and drink, Home, furniture, and garden, education and learning, and Other (if you click on other then you have to specify your industry in description box).
You have to select one or multiple options which is present in your store after selecting any of them then click on the continue button (blue button), as you can see in below image.
3. Product Types
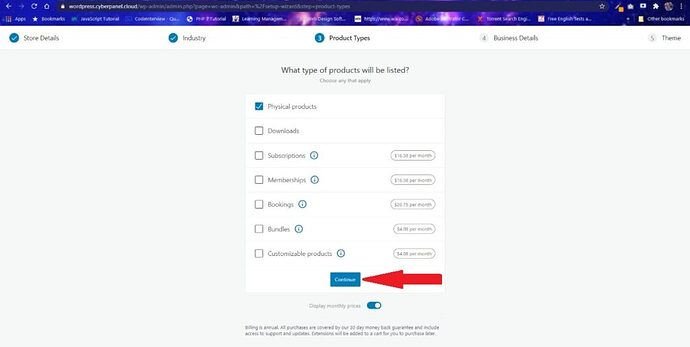
In this step, they ask what type of products will be listed on your WooCommerce store like is your product: Physical products, downloads, Subscriptions, Memberships, Bookings, Bundles, and Customizable products.
You have to select one or multiple options which is present in your store after selecting any of them then click on the continue button (blue button), as you can see in below image.
4.Business Details
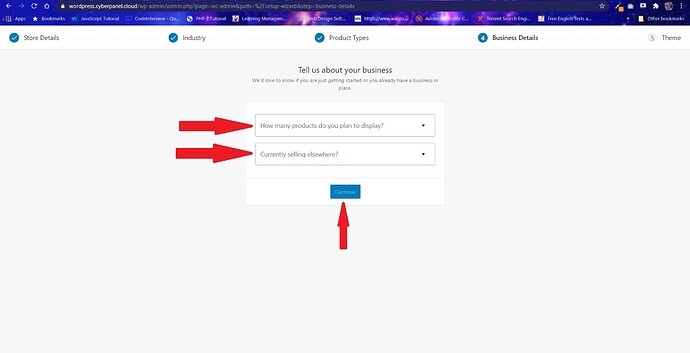
In this step, they ask about your business like How many products do you plan to display or that you are currently selling elsewhere?
You have to select what is related to your business or what you want for your business then click on the continue button (blue button), as you can see in below image.
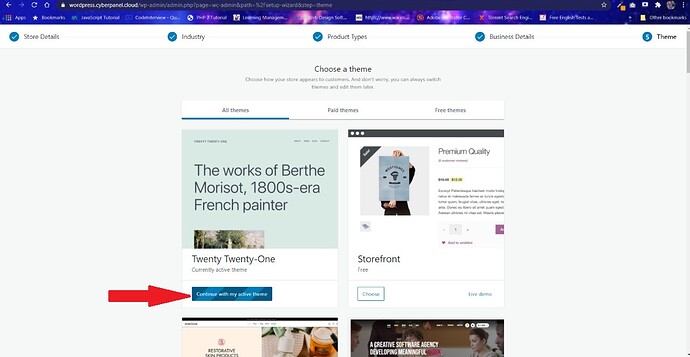
5.Theme
In this step, we have option to choose a theme for our store, in this window we have 3 tabs:
- All Themes
- Paid Themes
- Free Themes
If you can buy the theme for your store here you can easily buy on paid themes tab. Otherwise, there are also a tab for free themes where you can easily choose the free theme for your store.
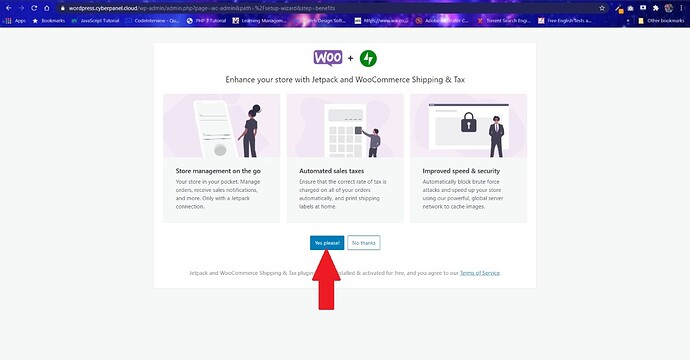
After you configure your woo-commerce store it will ask you to enhance your store with Jetpack and WooCommerce Shipping & Tax, it’s your choice to enhance your store with a jetpack or you don’t want to enhance with a jetpack. I suggest you to go with the “yes, please” button (blue button), as you can see in below image.
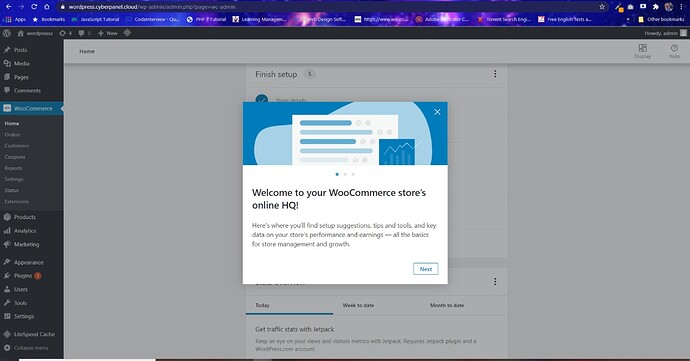
When you successfully finish setup of your WooCommerce plugin this window will appear on your screen, as you can see in the image below
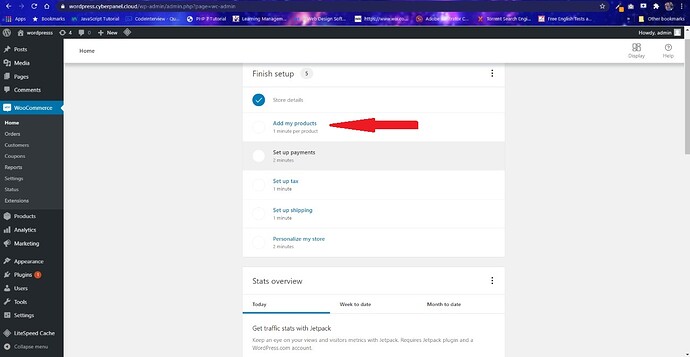
How to Add Product to your Woocommerce Store?
There’s an option to add my product, as you can see in the image below;
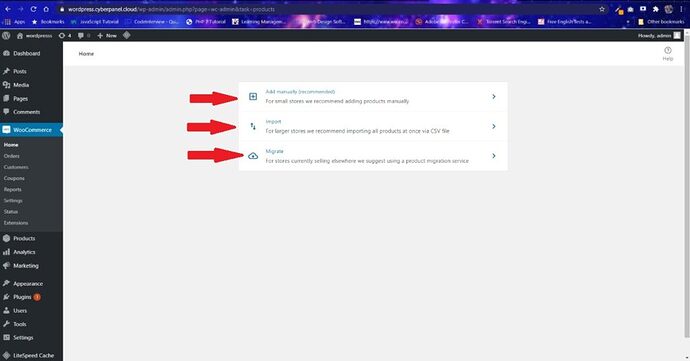
After clicking on the add my product option, you will be directed to this new window, there are 3 options
- Add manually (recommended)
- Import (if you have a file of your product)
- Migrate (if you want to migrate your products from another store)
How to Add Product Details?
Here we go with Add Manually option because we want to add a new product.
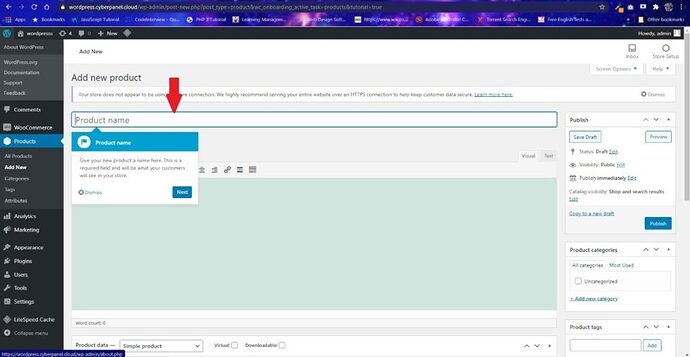
After clicking on add manually option you will be directed to a new window
There are many sections on this window, on the first section, we have an input box where you can type your product name, as you can see in the below image
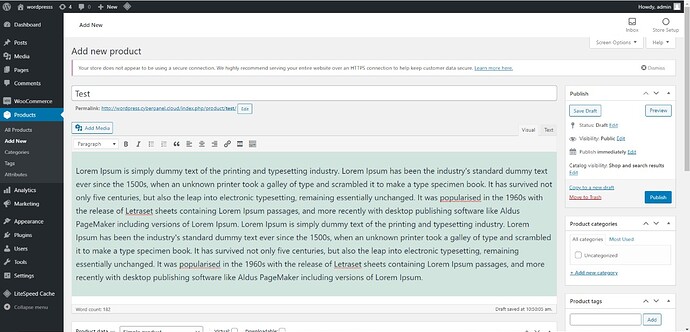
In the second section, you can also descriptions of your product, as you can see in the below image
.How to Add Price of Product?
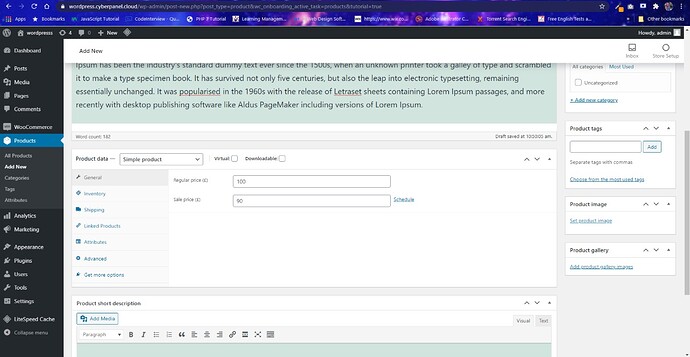
In the third section (product data), here you have to add your product details, we have 7 tabs on the sidebar of this section: general, inventory, shipping, linked products, attributes, advance, and get more options.
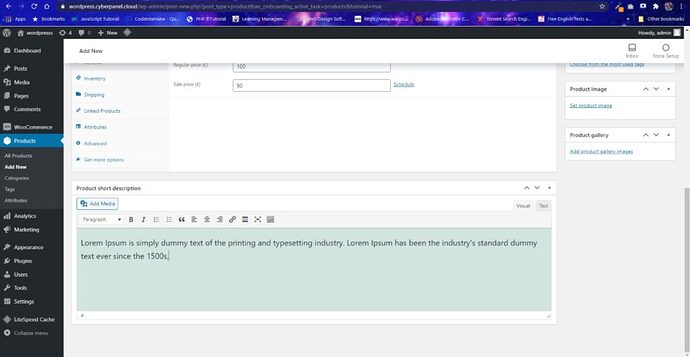
In these tabs, we can add variants, shipping details, product attributes, and many more. In the general tab, we can add regular price and sale price as you can in the below image.
In the fourth section (product short description), we can add a short description of your product as you can in the below image
How to Add product Image?
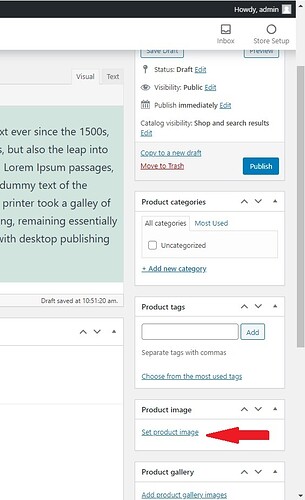
On the right sidebar of this window, you find the product image option, as you can see in the below image
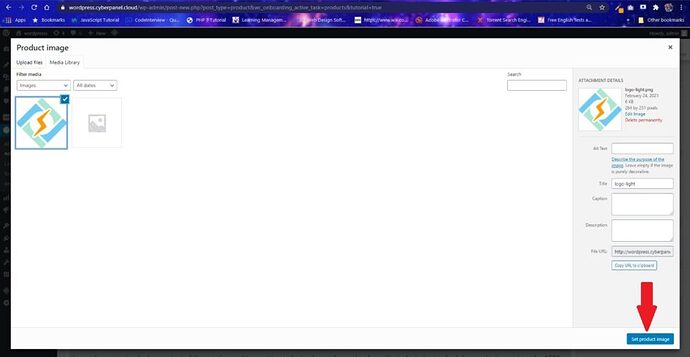
by clicking on the set product image, a new window will be opened on your screen where you can easily drag and drop any image from your system. After selecting an image for your product click on the set product image button (blue button) at the right bottom of your window. As you can see in the image below;
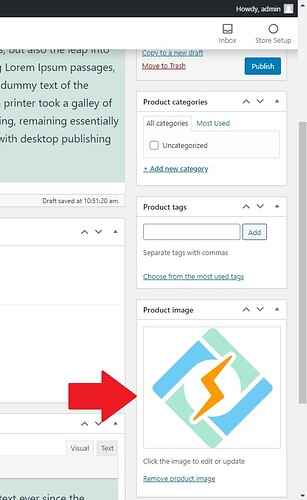
You can see the selected image of your product, as you can see in the below image;
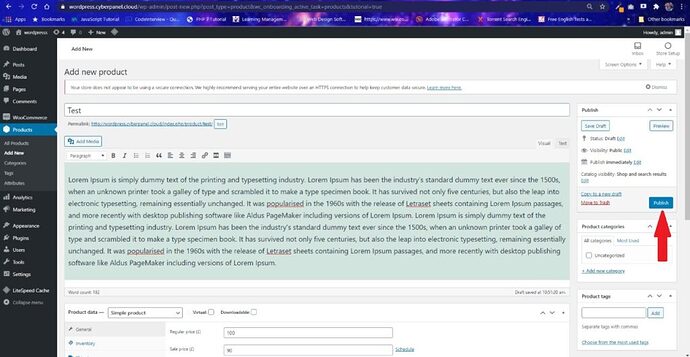
After putting all your product details, you have to publish by clicking on publish button (blue button), at the right sidebar of your window, as you can see in the below image.
How To Setup Payment Method?
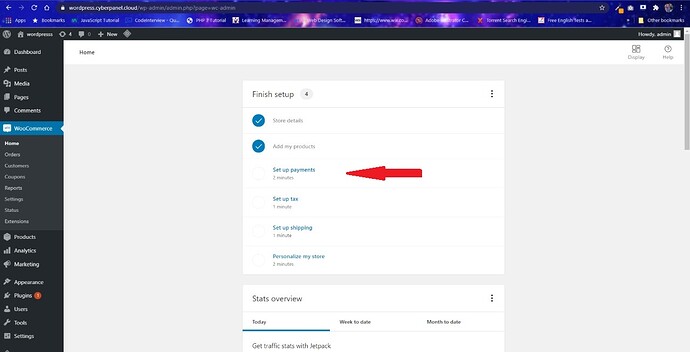
Now, go back to your Finish Setup window, and click on 3rd option which is Setup Payments for setting up your gateway for payment as you can see in the below image.
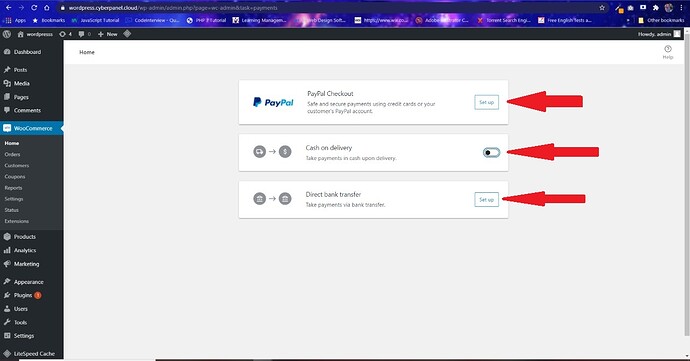
After clicking on setup payment you will get 3 option which are
- Paypal Checkout
- Cash on Delivery
- Direct Bank Transfer
You can select all options by setting up or you can select any as you like for your store. I’m going with Cash On Delivery (COD).
As you can see in the below image,
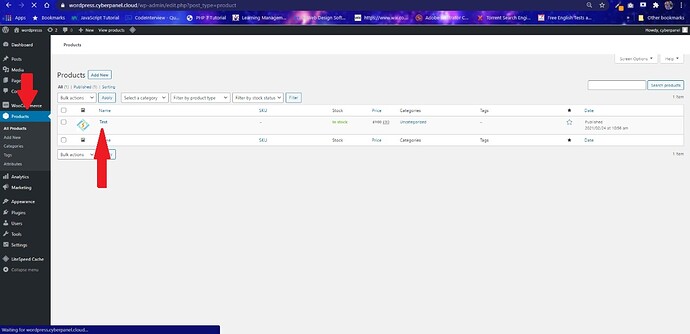
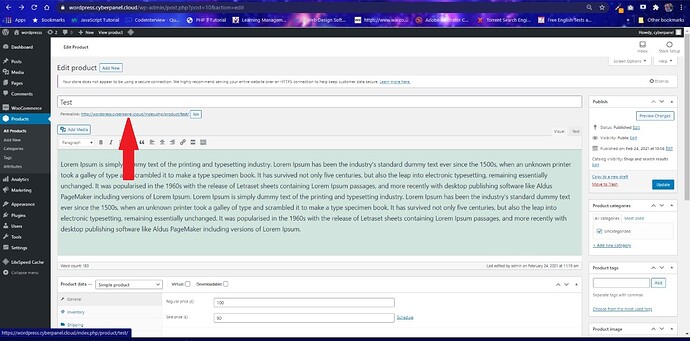
After setting up your payment method, go to the dashboard and click on Products which is situated on the left sidebar of the dashboard, after that click on the product you’ve created earlier. As you can see in the below image.
When you open your product, you can see there’s a permalink (blue link) below of title section, as you can see in the below image
How Customer can Add Product to Cart?
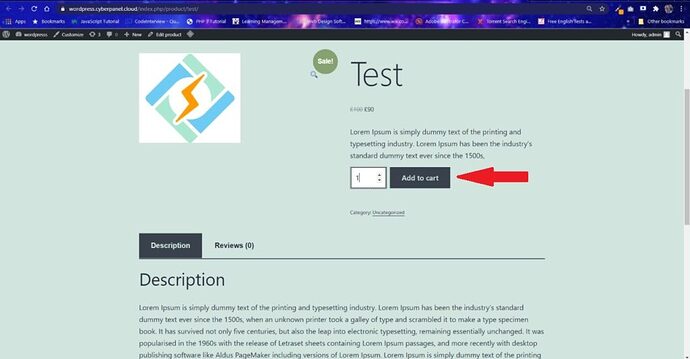
After Clicking on the permalink, you will be directed to you product page where customer can see all your product details like name, product picture, product short and long description, prices and also can select the quantity of product and customer can click on add to cart button (black button) for adding the product in the cart. As you can see in the below image
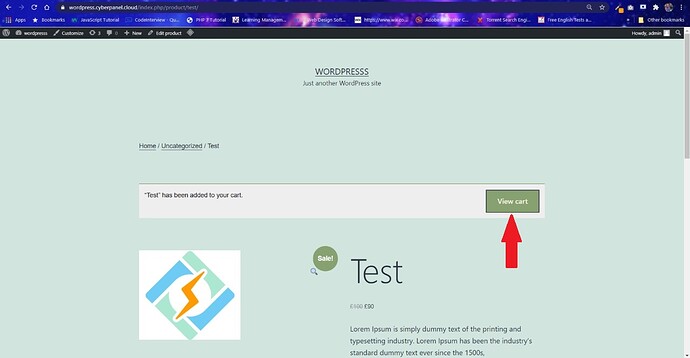
After Clicking on add to cart button (black button), once you added a product by clicking on add to cart button you will get a message at the top of the product where you can view your cart by clicking on the view cart button (green button). As you can see in the below image.
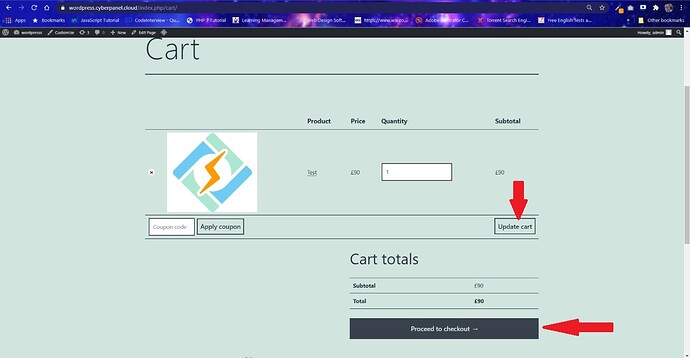
After clicking on the view cart button you will be directed to the cart page where you can see your added product and also can edit the quantity of existing product, in this page, there is an option to add a coupon (by default) if you want to remove coupon option then you also can disable this coupon option.
If you want to update your cart like add other products or remove products then you can click on the update button.
After finalizing your cart details then click on proceed to checkout button (black button) which is situated at the bottom of the cart page. As you can see in the below image.
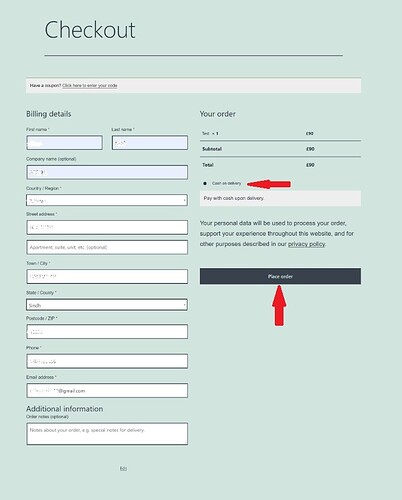
After clicking on proceed to checkout button (black button) then you will be directed to the checkout page where the customer has to put some details, this is a standard form that is generated by default, if you want to add or remove fields, then you can easily change by checkout setting in product options.
After providing all the required details, the customer can select any payment method that you provide them, I only set up the cash on delivery, first, the customer has to select the payment method then the customer can click on the place order button (black button). As you can see in the below image.
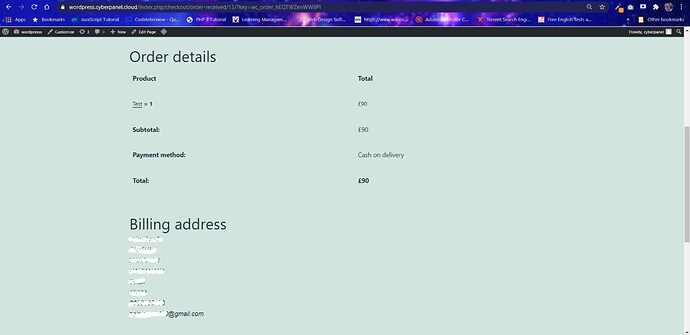
After clicking on the place order button customer will be directed to the order details page, where the customer can see details, what the customer ordered, the shipping details, contact details address, and etc, as you can see in the below image.

